This post may contain affiliate links. Please read my privacy policy.
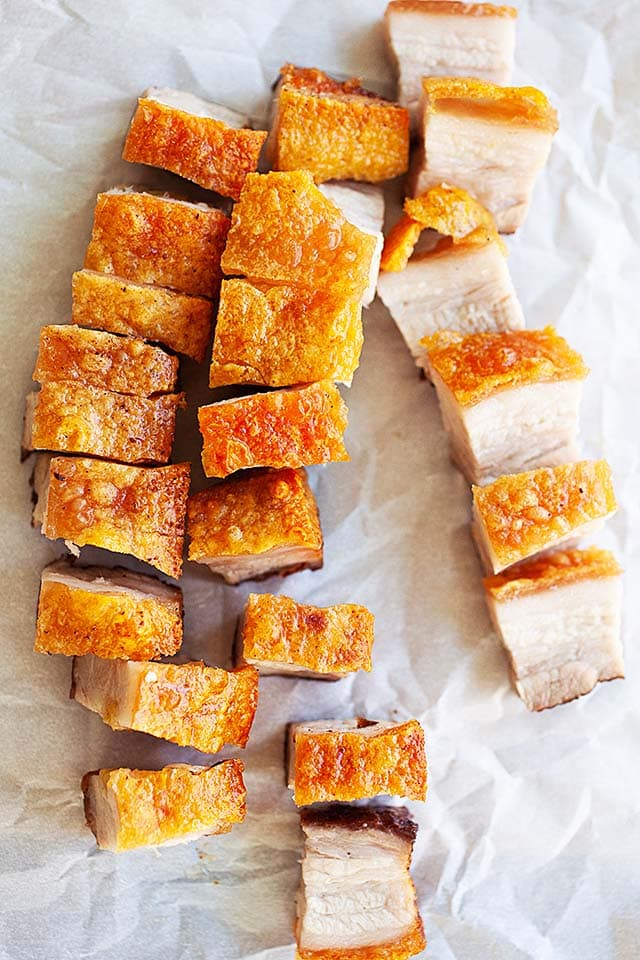
Chinese roast pork or siu yuk. Save yourself a trip to Chinatown and use this easy recipe for the best and crispiest Chinese roast pork belly at home.
Recipe Summary
- 🔪 Prep Time: 15 minutes
- 👨🍳 Cook Time: 1 hour 40 minutes
- ⏱️ Total Time: 2 hours 5 minutes
- 🍽️ Servings: 6 people
- 🏷️ Calories: ~446 calories
- 🍳 Cook Method: Roasted
- ✨ Flavor Profile: Crispy, crackling skin and tender meat seasoned with aromatic five spice and garlic
- 🧩 Difficulty: Medium (Managing the salt crust and oven temperature takes a bit of care to get that perfect crunch)
SUMMARIZE AND SAVE THIS CONTENT ON
Chinese Roast Pork Recipe
In my cookbook “Easy Chinese Recipes,” I have a Chinese roast pork belly recipe, or siu yuk.
When it comes to Chinese roast pork, one could never have enough of the crispy skinned roasted pork belly. It’s sinfully delicious!
This Chinese Roast Pork recipe is from my good friend Robert Danhi’s Facebook page. Robert and his wife made the roast pork following a recipe gathered from a church in Kuala Lumpur, Malaysia.
This is the PERFECT recipe for Chinese roast pork belly! It’s absolutely mouthwatering.
The recipe is easy, hassle-free and fail-proof. I guarantee you crispy, crunchy, absolutely aromatic and to-die-for pork crackling, melt-in-your-mouth pork belly.
Why You’ll Love This Recipe
This is the easiest and best recipe you’ll find online. There is no need to poke the pork skin, there is no no vinegar in the recipe.
There is also no need to par-boil the pork belly before roasting.
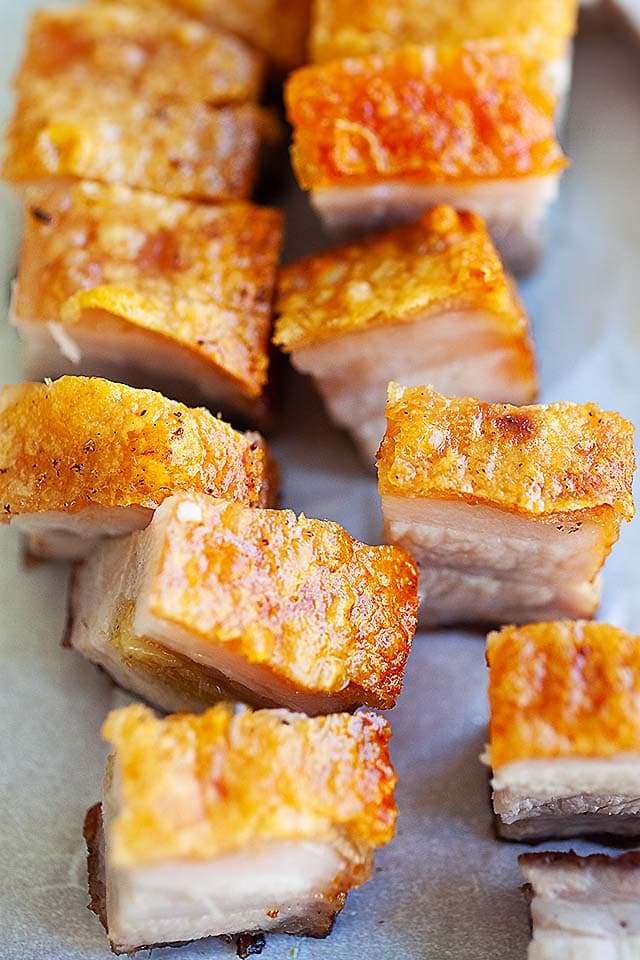
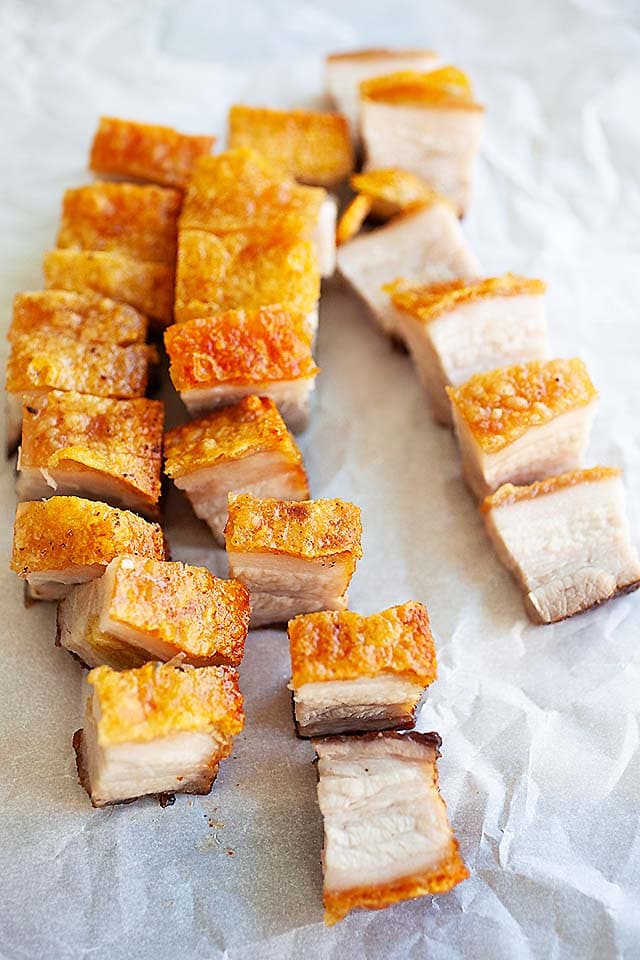
The end result is very crispy pork crackling. The pork belly is also juicy, tender, with the melt-in-your-mouth pork fat.
The taste is a bit salty and aromatic. The aroma comes from the garlic and five-spice powder.
Secrets To Perfect Crispy Pork Belly
- The Salt Crust Method: Since I don’t prick the skin, the salt crust does all the heavy lifting. I pack a thick, even layer of kosher salt over the skin to pull the moisture up to the surface. Once that salt hardens into a shell and I peel it off, the skin underneath is perfectly primed to puff up and blister.
- The Steam Bath Trick: I always place a pan of water on the rack below the pork. This creates a humid environment that keeps the meat side incredibly tender and juicy while the skin side roasts. It prevents the pork from drying out during that long first hour in the oven.
- The Garlic Pocket: I make sure to tuck the garlic cloves deep into the horizontal slits. If they are poking out, the heat will push them right out of the meat as it shrinks. Hiding them deep inside ensures the garlic flavor infuses into the center of the pork belly without burning.
- The High Heat Blast: The real magic happens when I crank the heat up to 465°F after removing the salt. This massive temperature jump is what turns that dried out skin into a bubbly, crunchy masterpiece. I just keep a close eye on it during those last 40 minutes to make sure it browns evenly.
Ingredients
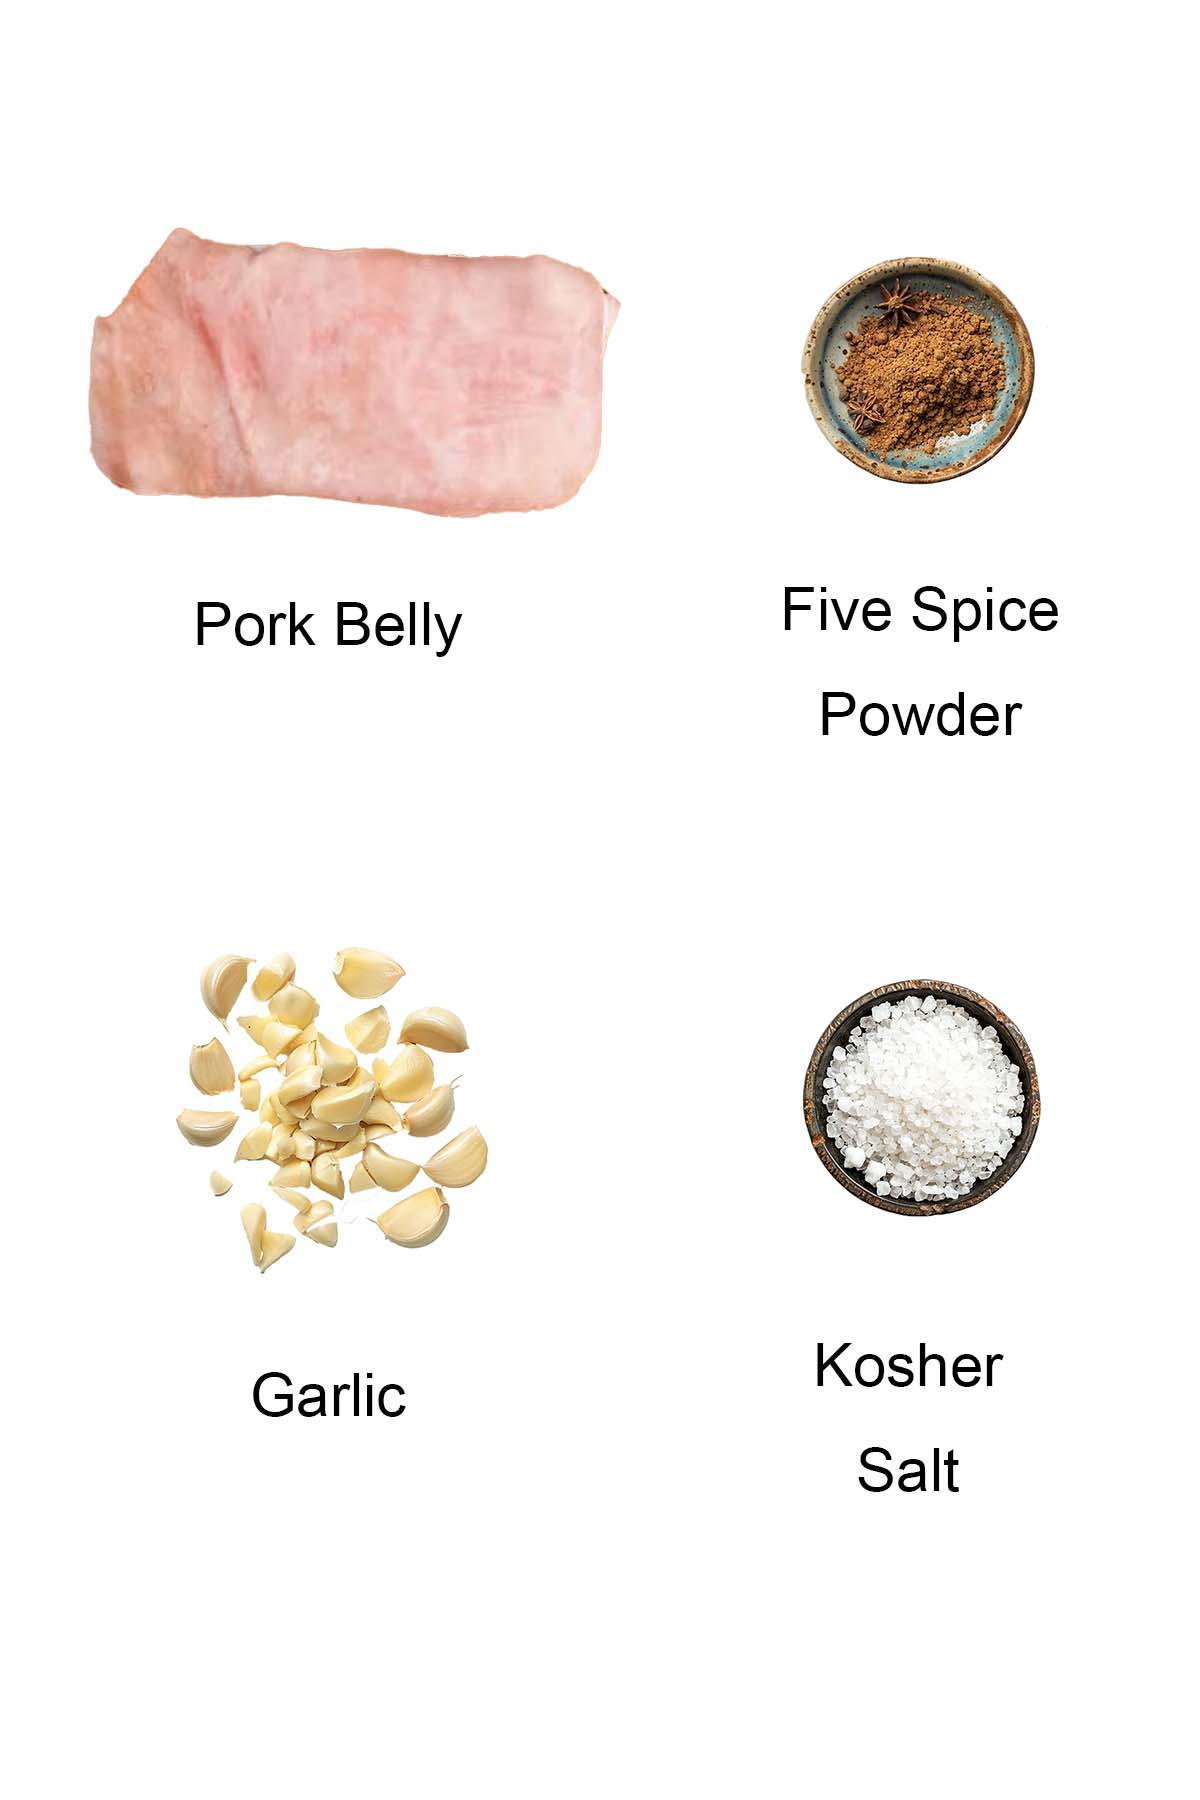
- Pork belly
- Five spice powder
- Garlic
- Kosher salt
See the recipe card for full information on ingredients.
How To Make Chinese Roast Pork (Siu Yuk)
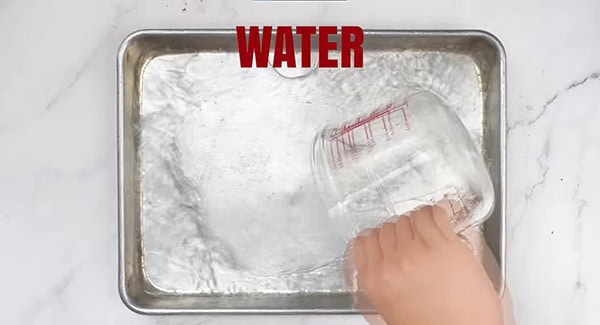
Preheat your oven to 350°F. I like to put a pan filled with water on the bottom third rack and place the roasting rack right above it. This creates a steam bath that keeps the meat side tender while the skin roasts.
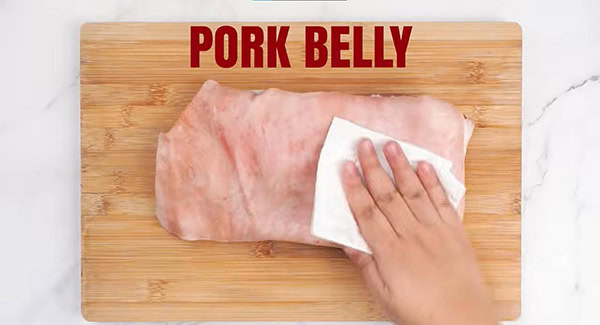
Give your pork belly a quick wash and use paper towels to get it bone dry. This is a huge step because any leftover moisture will stop the skin from getting that perfect crackle.

Make some horizontal slits on the sides of the belly. Rub the meat side with your five spice powder, making sure to keep the spices away from the top skin.
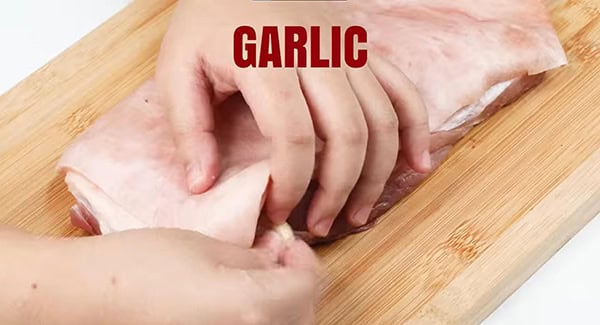
Push your garlic cloves deep into those slits. You want them tucked way in there so the meat doesn’t push them out as it shrinks during roasting.
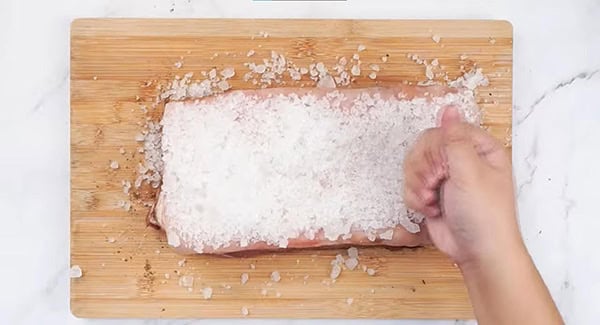
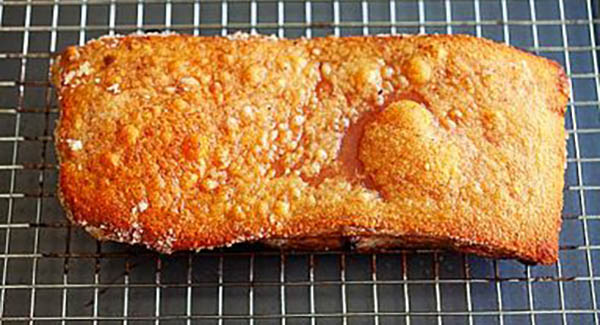
Layer the top of the pork belly with an even coat of kosher salt. This is what pulls the moisture out of the skin.
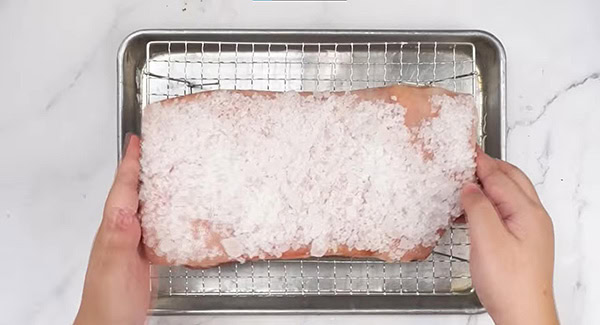
Place your pork on a wire rack. It should look like it has a solid white cap on top before you slide it in.
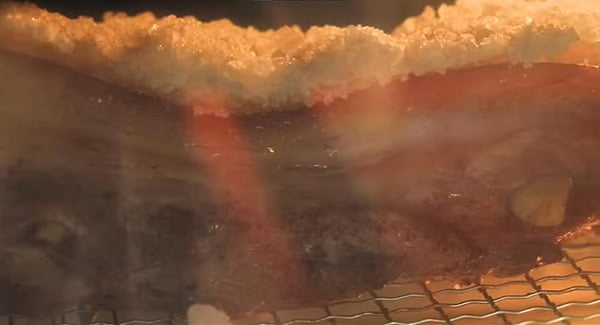
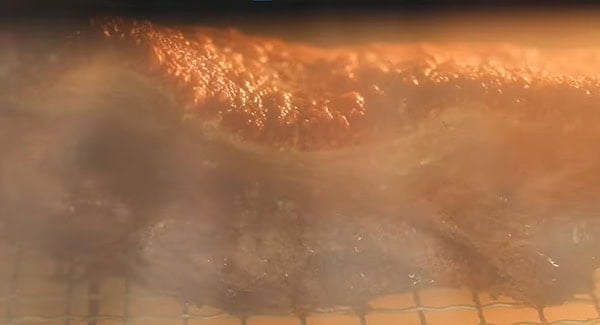
Put the pork in the top third of the oven and roast for 1 hour. You will see the oil dripping down into the water pan while the salt starts to harden.
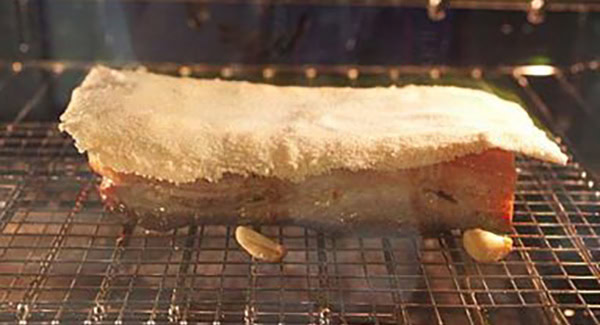
Bake until that salt layer forms a hard shell. If the water in the pan below looks low, just add a bit more so the meat stays juicy.
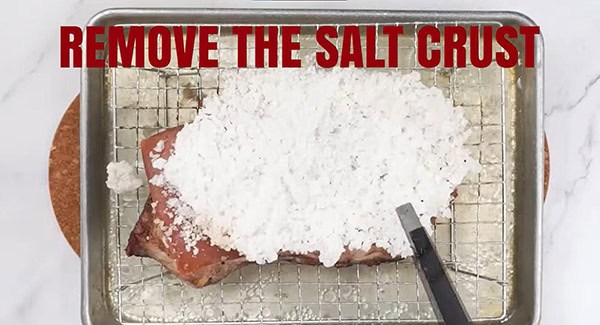
Take the pork out of the oven and carefully pull off that hard salt crust. You can go ahead and throw the salt away.
Crank your oven up to 465°F. Put the pork back in for about 40 minutes. This is where the magic happens and the skin starts to bubble and get super crispy.
Once it is done, let the pork set for 10 minutes. This lets the juices settle so they don’t run out when you cut it.

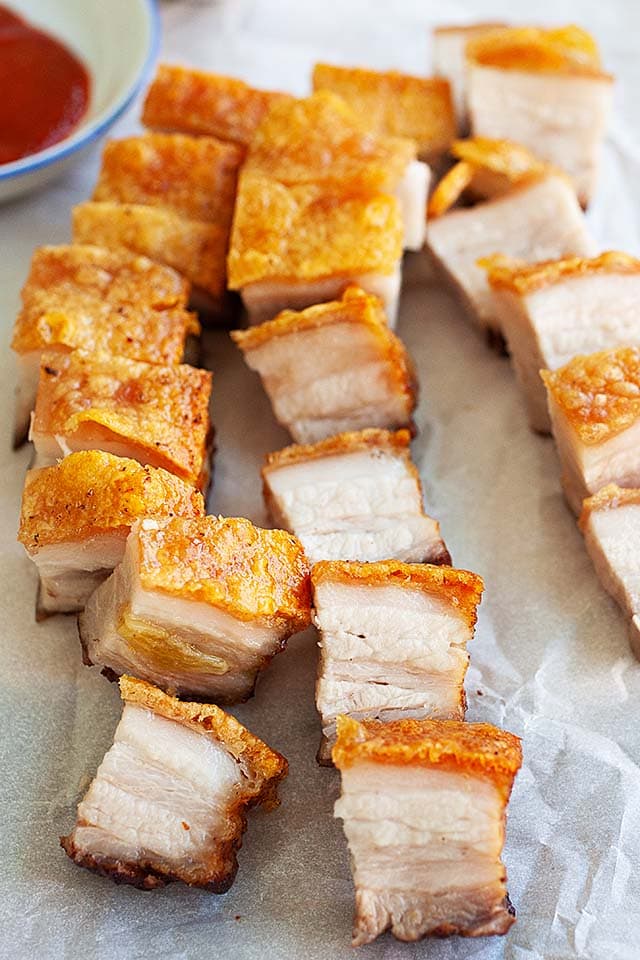
Cut it into pieces and serve it immediately. It is amazing on its own, but even better with some chili sauce and hoisin on the side.
Frequently Asked Questions
You don’t! I found that the salt crust method draws out enough moisture to give you that perfect, glassy crackle without any of the extra poking.
I don’t recommend it. Fine salt melts too quickly and can make your meat way too salty. Stick with coarse kosher salt because it stays on top and peels off easily.
This happens when the meat tightens as it cooks. To prevent this, just make sure you tuck the cloves as deep as possible into those horizontal slits before roasting.
It usually means there was still moisture on the skin or the oven wasn’t hot enough. Make sure to pat the skin bone dry and let the oven fully hit 465°F before the final blast.
Keep them in the fridge for up to 3 days. When you’re ready to eat, use an air fryer or toaster oven to bring back that crunch. Avoid the microwave or the skin will turn rubbery.
This recipe is only 446 calories per serving.
What To Serve With This Recipe
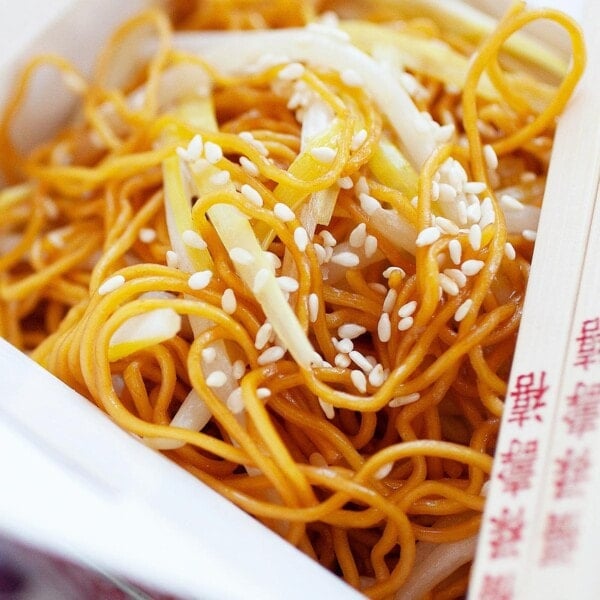
Serve this dish with rice or noodles. For a Chinese meal and easy weeknight dinner, I recommend the following recipes.


I hope you enjoy this post as much as I do. If you try my recipe, please leave a comment and consider giving it a 5-star rating. For more easy and delicious recipes, explore my Recipe Index, and stay updated by subscribing to my newsletter and following me on Facebook, Pinterest, and Instagram for new updates.
Other Recipes You Might Like
- Air Fryer Pork Belly (Siu Yuk)
- Char Siu
- Chinese BBQ Pork
- Braised Pork Belly (Dongpo Rou)
- Braised Pork Belly in Soy Sauce

Chinese Roast Pork Belly
Ingredients
- 2 lbs. pork belly
- 6 cloves garlic
- 1 teaspoon five spice powder
- Kosher salt, for layering
Instructions
- Preheat the oven to 350°F (180°C), arrange a pan on the bottom 1/3 of oven rack and fill with water. The pork belly should be roasted using the rack above it.
- Wash and use paper towels to dry the pork belly.
- Make some horizontal slits on the sides of the belly, then rub the meat side with the five spice powder.
- Insert each garlic and push them deep inside the pork belly.
- Layer the top of the pork belly with the salt evenly.
- Place the pork belly on a wire rack. This is how it should look before going into the oven.
- Place the pork belly at the top 1/3 of the oven and roast for 1 hour. While baking, the oil will drip to the bottom pan with water.
- Bake until the salt crust forms, the salt should be hardened. Check water in the pan below and add if needed. This is how the pork belly and salt crust will look like in the oven. You have to insert the garlic deep inside the horizontal slits or else they will be pushed out during the roasting process.
- Remove the pork belly from the oven, pull off the salt crust and discard.
- Raise the heat of oven to 465°F (240°C), place the pork belly back in the oven and roast for another 40 minutes.
- Remove from oven and let set for 10 minutes.
- Cut and serve immediately with some chili sauce and hoisin sauce, or eat as is.
Video
Notes
- Bake until the salt crust forms, the salt should be hardened.
- Check water in the pan below and add if needed.
- You have to insert the garlic deep inside the horizontal slits or else they will be pushed out during the roasting process.
Nutrition
Nutrition information is automatically calculated, so should only be used as an approximation.


Hi! I love this recipe so much. Have you tried making this with a bigger piece? I am thinking of a 3kg piece for a crowd and wondered whether the salt crust / cooking times still apply. Thanks!
For a larger piece like 3 kg, the salt crust method still works, but you’ll need to increase the roasting time. I’d recommend checking the pork belly for doneness and ensuring the meat is cooked through before moving on to the high-heat roasting stage. Cooking time can vary depending on the thickness of the meat.
Thank you!
Oh wow guess what’s just become my staple lol lol
Loved it , cooked it, ate it , now a staple yummmmmmm
Hi Annette, thanks for trying my recipe! :)