This post may contain affiliate links. Please read my privacy policy.
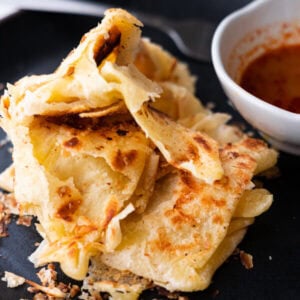
Roti canai, also known as roti paratha, is a crispy, buttery Indian flatbread with the softest, flakiest layers inside. It’s delicious on its own, with some sugar, or served alongside curry! Learn how to make this at home with my step-by-step picture guide.
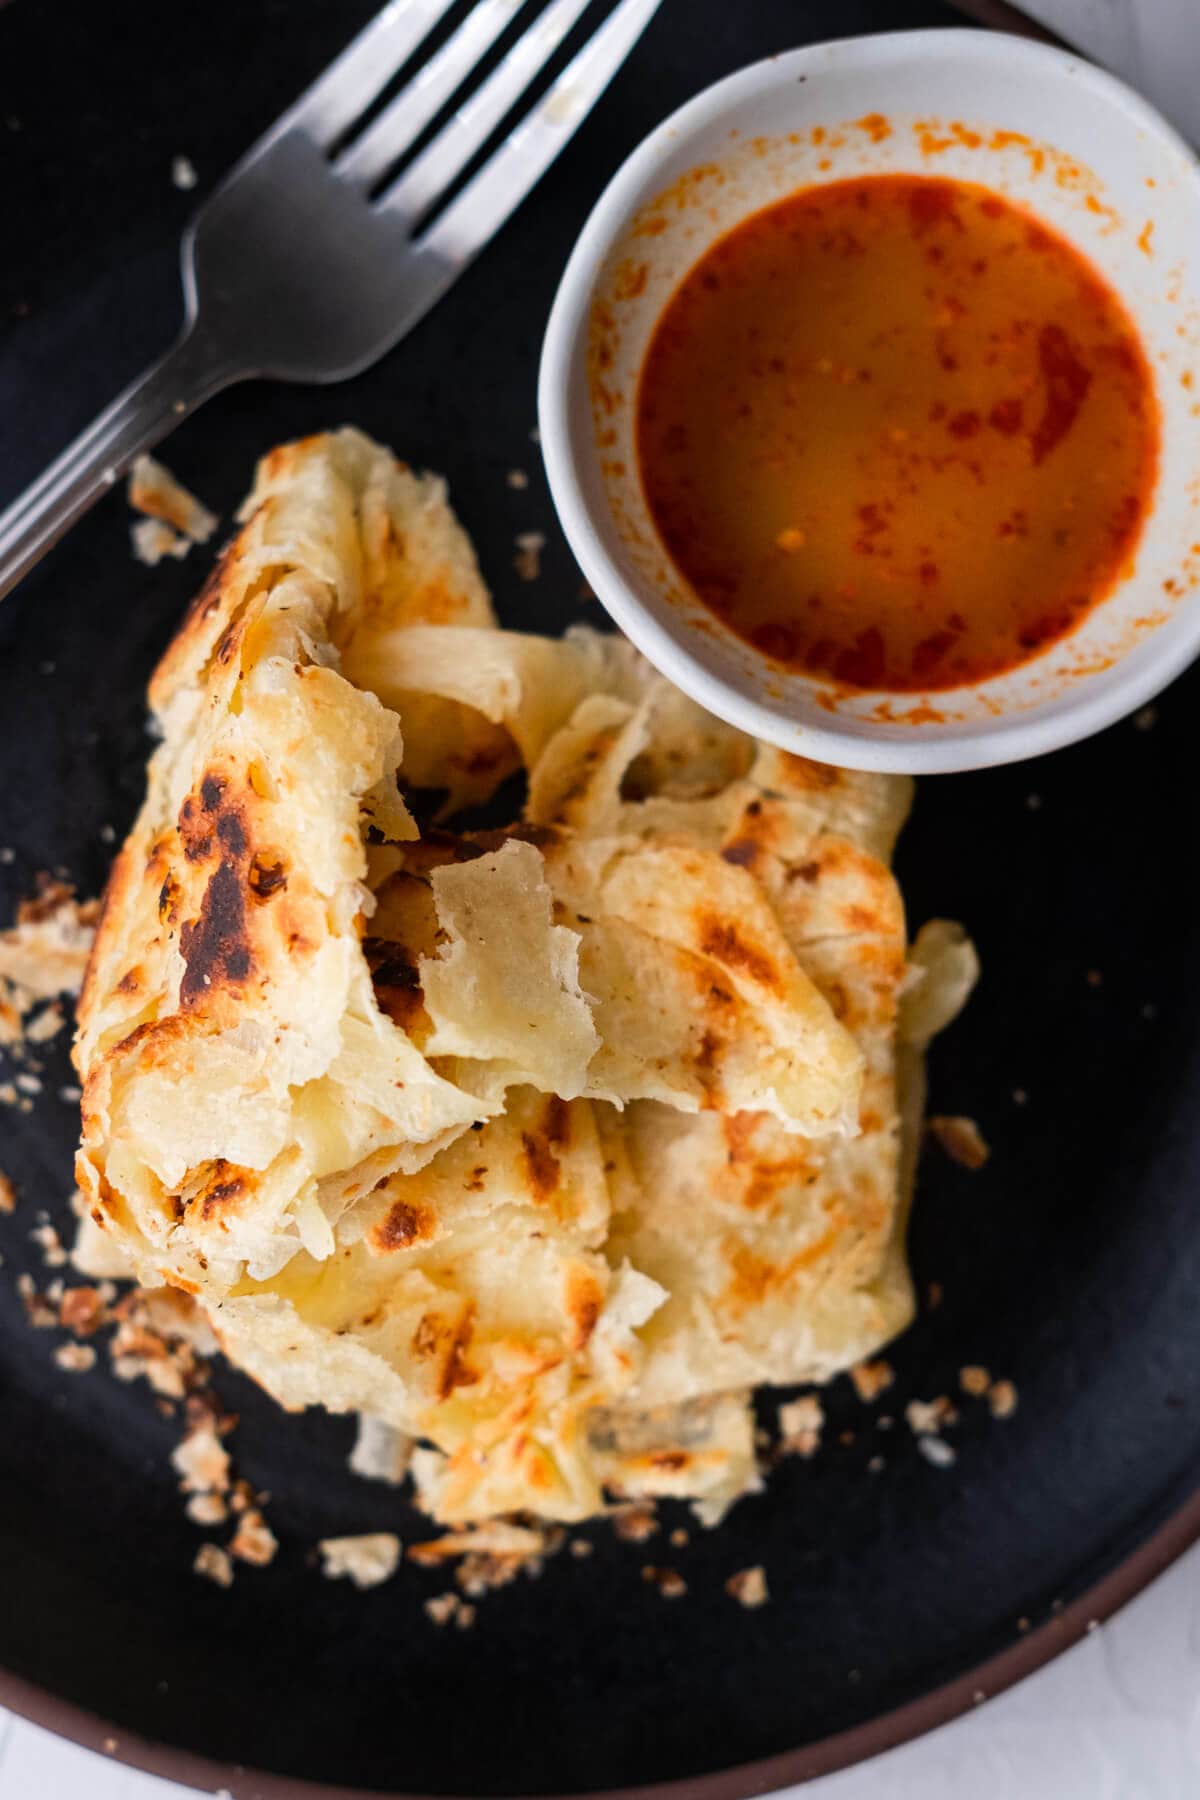
Table of Contents
- Recipe Summary
- Roti Canai Recipe
- What Is Roti
- Is Roti Canai The Same As Roti Paratha
- Ingredients You’ll Need
- Which Flour Is Best For Roti
- How To Make Roti Canai
- Secrets To Perfectly Crispy And Flaky Roti Canai
- Frequently Asked Questions
- What To Serve With Malaysian Roti Paratha
- Roti Canai (Roti Paratha) Recipe
Recipe Summary
- 🔪 Prep Time: 30 minutes (plus 6 hours resting)
- 👨🍳 Cook Time: 20 minutes
- ⏱️ Total Time: 50 minutes
- 🍽️ Servings: 8 pieces
- 🏷️ Calories: ~371 calories
- 🍳 Cook Method: Pan-fried
- ✨ Flavor Profile: Buttery & savory with crispy, flaky, and paper-thin layers
- 🧩 Difficulty: Medium (Requires a bit of practice and patience to stretch the dough thin)
SUMMARIZE AND SAVE THIS CONTENT ON
Roti Canai Recipe
Roti canai holds a special place in my heart. My late father used to bring me a piece or two for breakfast, fresh and hot from the local Mamak stalls near our house.
If you’re craving that crispy, buttery goodness, here’s a recipe you can easily make at home! And don’t worry if you’ve never made flatbread before—my Malaysian roti recipe is virtually foolproof, and it tastes just like the ones from the street vendors!
For your next flatbread making project, make my homemade Chapati, Naan, and Pita Bread!
What Is Roti
Roti canai is one of the most popular flatbreads in Malaysia, just like Naan.
It originated in southern India and is sometimes called roti paratha or roti prata, especially in Singapore. In Malaysia, it became famous thanks to Mamak (Muslim-Indian) hawkers and street vendors who put their own twist on the traditional paratha to suit local tastes.
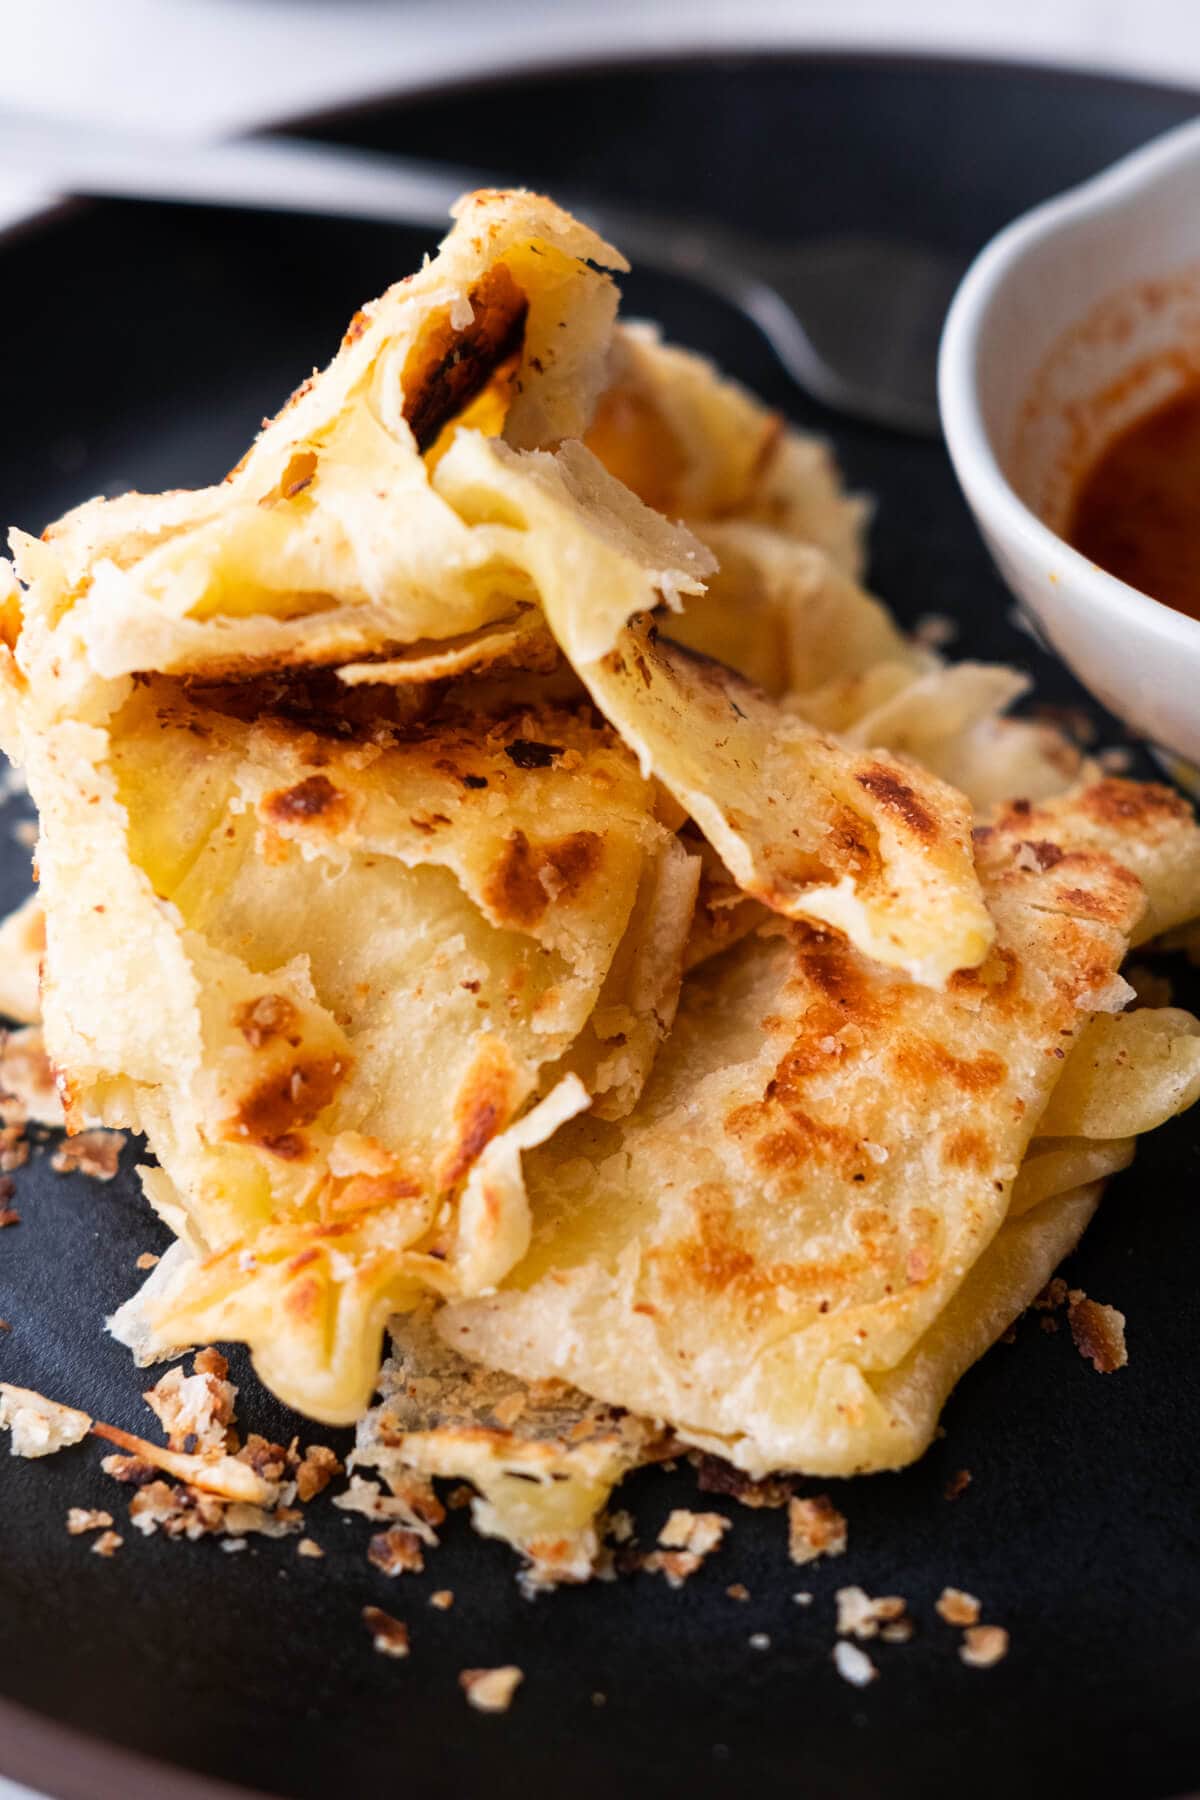
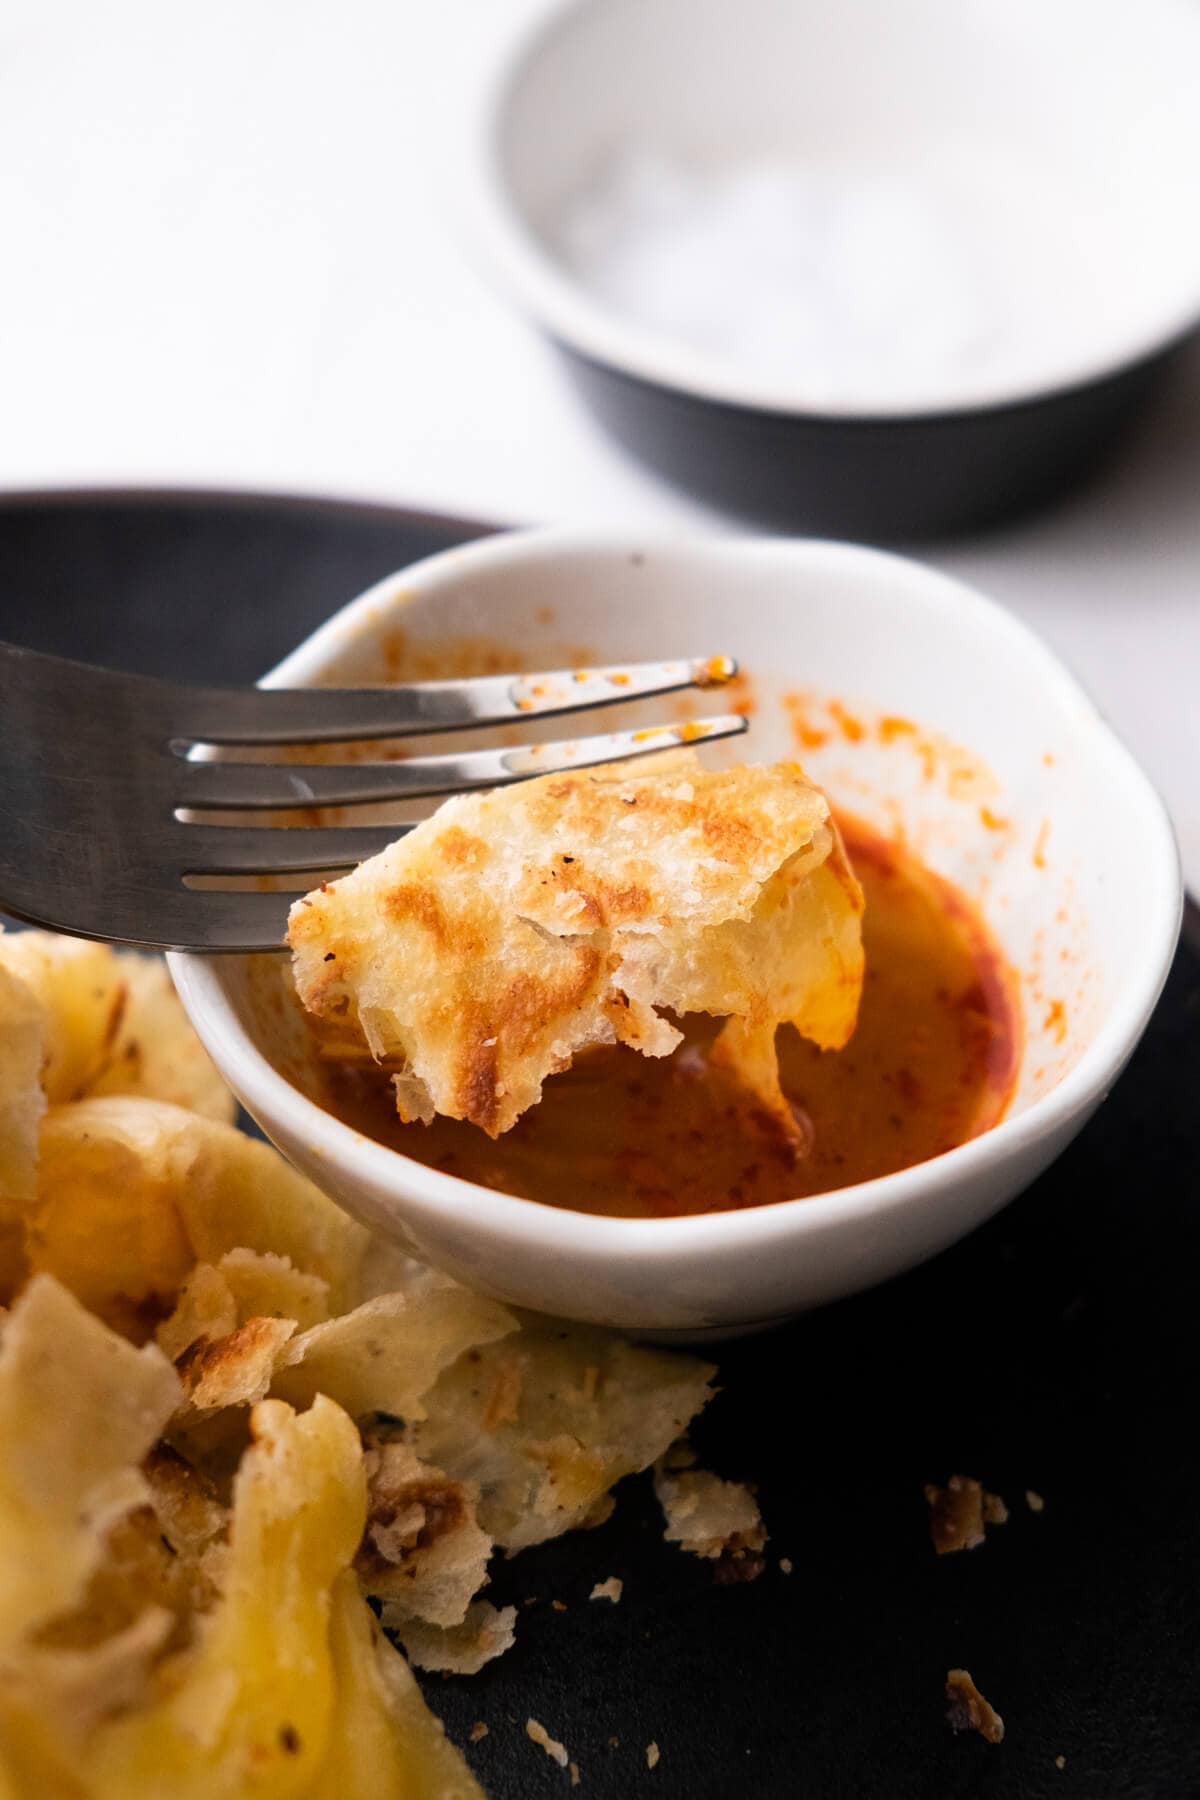
What I love about roti canai is how the outside gets perfectly crispy and flaky, while the inside stays soft and buttery. It’s usually served as a side dish with curry or daal, but many people, including myself, enjoy it just on its own or with a sprinkle of sugar.
Is Roti Canai The Same As Roti Paratha
Both roti canai and roti paratha originated from India, but they have slight differences in terms of ingredients.
The typical roti prata recipe has a simpler dough—usually just flour, salt, water, and ghee—giving it a slightly denser, chewier texture than roti canai.
Roti canai, on the other hand, is the Malaysian version of paratha, which often adds eggs, milk, and sugar for a richer dough. The dough is then folded and wrinkled several times to create air pockets, and it puffs up into the softest, lightest layers once it hits the hot pan!
Ingredients You’ll Need
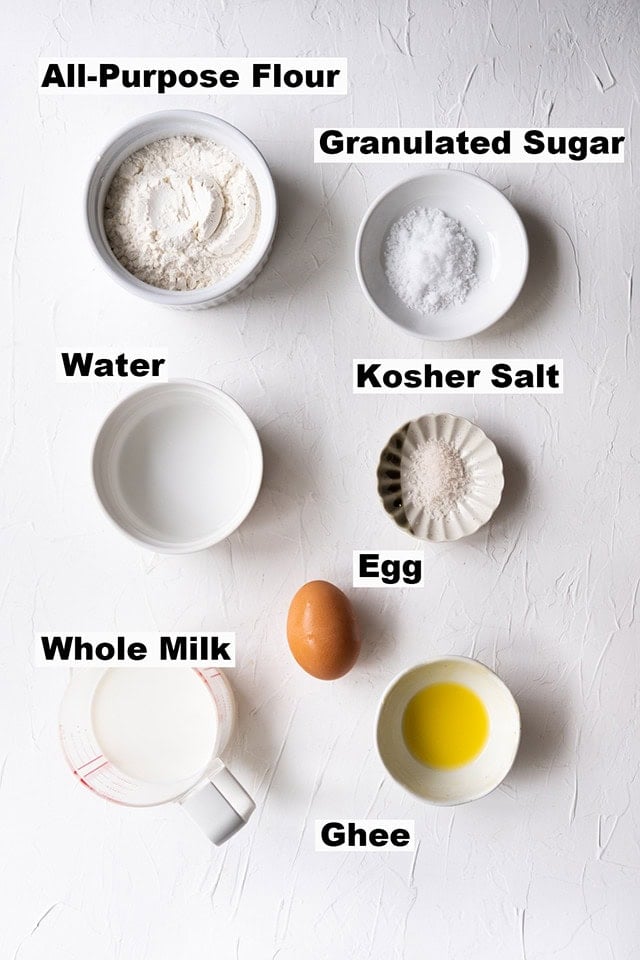
- All-purpose flour – the foundation of our roti dough. It provides the perfect balance of structure and stretch for roti!
- Ghee (clarified butter) – essential to our roti canai recipe! It infuses the bread with buttery flavor while helping create those signature flaky layers as it melts between the folds of dough. Its high smoke point also allows us to crank up the heat, resulting in a crispy exterior without any burnt bits.
- Whole milk – adds moisture and fat for a more tender roti.
- Egg – serves as a binding agent to make the dough easier to work with. It also adds a beautiful golden hue to the cooked roti.
Please refer to the recipe card at the bottom of this post for full details on each ingredient.
Which Flour Is Best For Roti
All-purpose flour is the best choice for a flaky roti recipe. It has a moderate protein content (10-12%) which hits the sweet spot for developing gluten. So you get a roti dough that’s strong enough to stretch without tearing but still cooks up into soft, light layers with a crisp bite when pan-fried.
How To Make Roti Canai
For an authentic roti paratha recipe, I turn to my friend Chef Robert Danhi of Southeast Asian Flavors.
It takes a bit of practice to nail the stretching technique, but you’ll eventually get a feel for it as you make it more often. And your roti will still taste amazing regardless!
Here’s Chef Danhi’s detailed step-by-step instructions to guide you:
Making Roti Dough
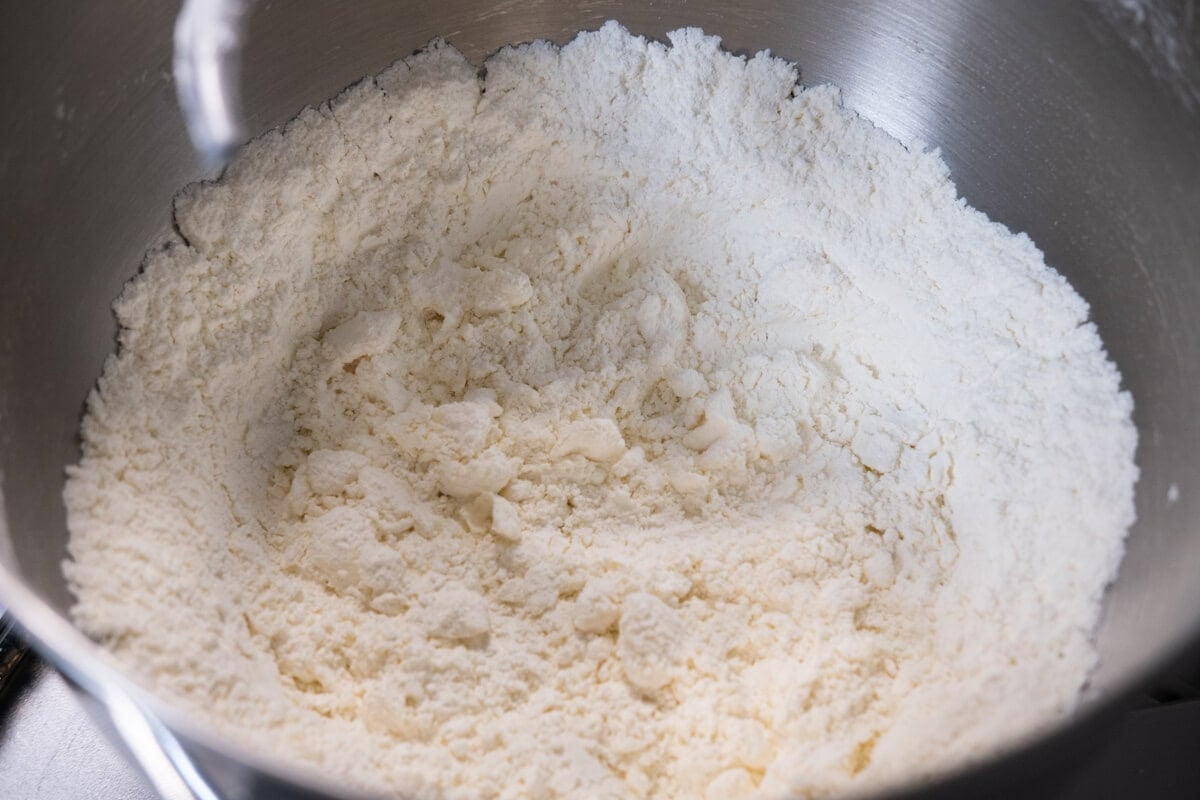
In the bowl of a stand mixer, combine the flour, salt, sugar, and 1/4 cup of ghee. Turn the mixer to low speed and let it run until everything clumps together.
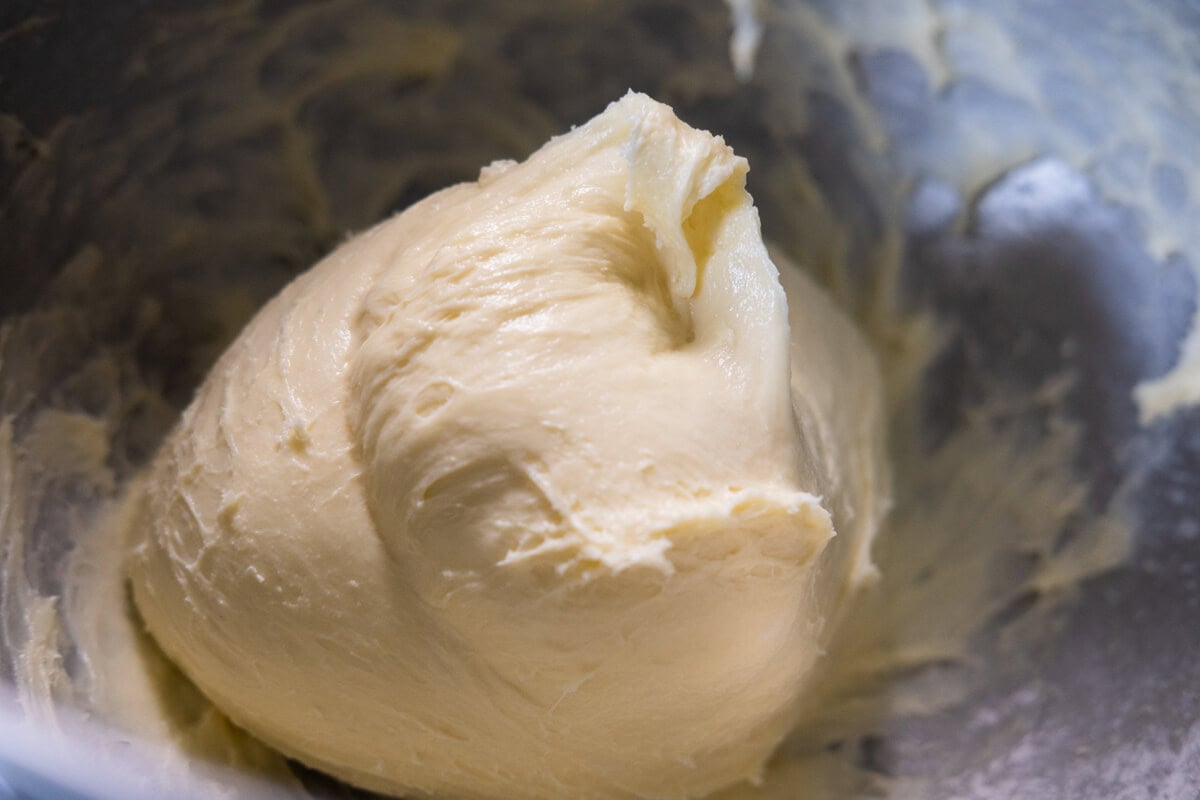
Add the egg, milk, and water to the mixer and keep mixing until the dough comes together and becomes smooth, elastic, and just a little sticky—not too wet. This should take about 8 to 10 minutes of kneading.
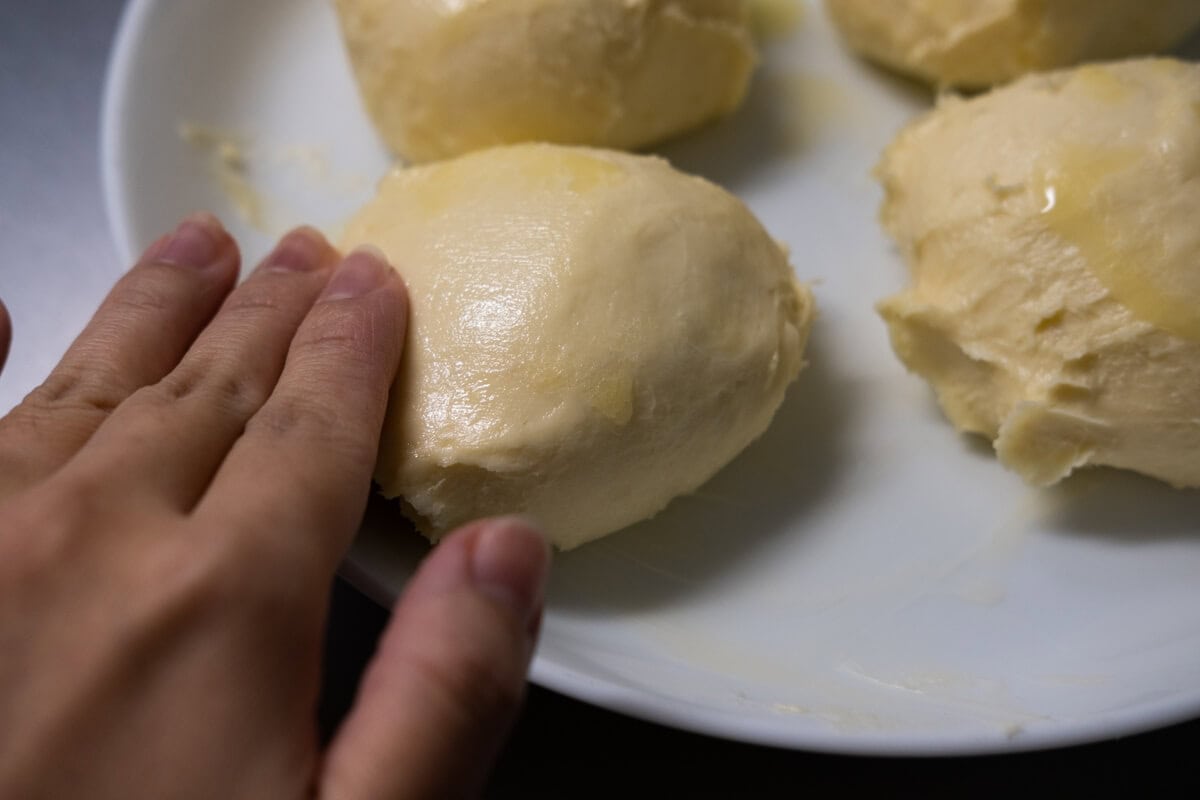
Once the dough is ready, transfer it out and divide it into eight equal pieces—about 4 ounces (113 grams) each. Shape them into smooth, round balls.
Coat each ball with about a teaspoon of ghee, making sure they’re well slathered. Arrange them in a single layer on a plate, cover with a damp cloth, and let them rest at room temperature for at least 6 hours.
Pro tip: You can make the dough a day ahead and keep it in the refrigerator.
Preparing The Work Space
If the dough was made a day ahead, let it come to room temperature. If your kitchen is chilly, place the dough in a warm spot, or you can microwave it for 10-second intervals. Warm dough is more elastic and easier to work with.
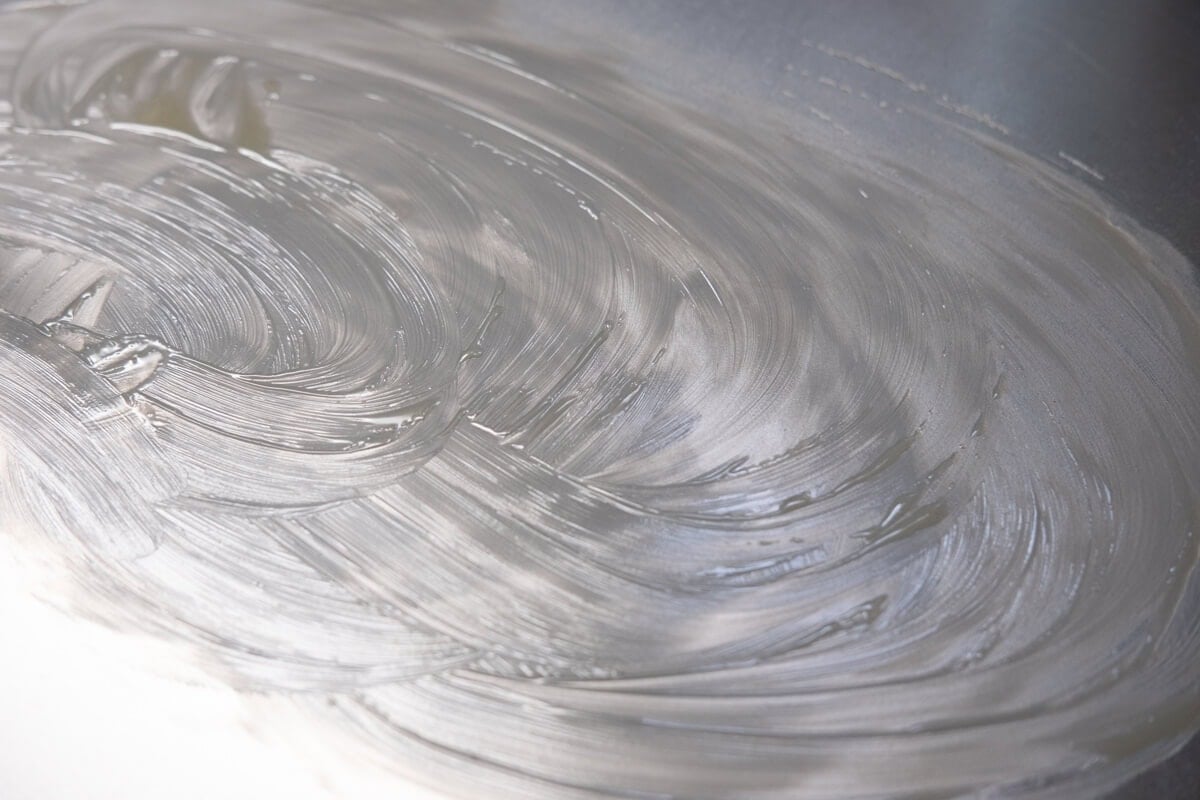
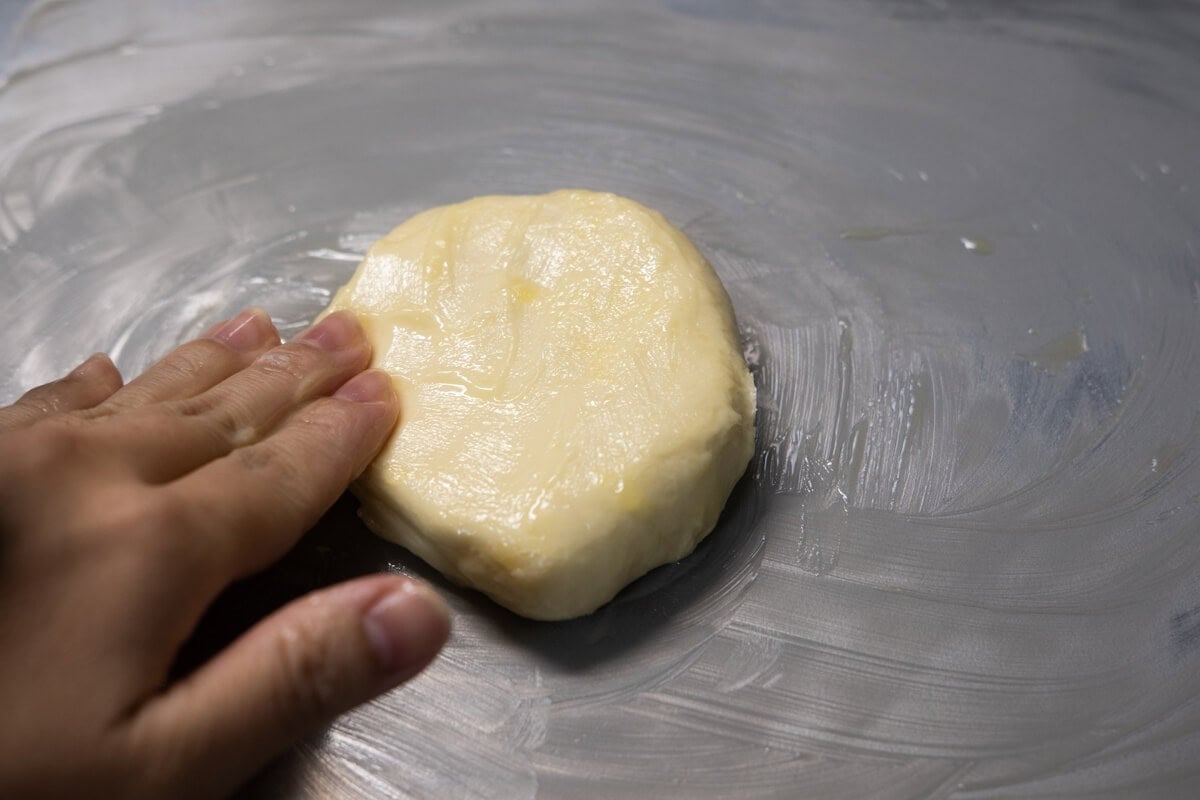
Clean a small surface, about 2 inches by 2 inches (5 cm x 5 cm), and coat it with a 12-inch circle (30 cm) of ghee—about 2 tablespoons. Make sure your hands are well-lubricated with ghee too. This helps keep the dough from sticking as you work with it.
Stretch out the dough into a thin sheet, then drop 1 teaspoon of ghee right in the center of your buttered work area. This will help keep the dough soft and pliable.
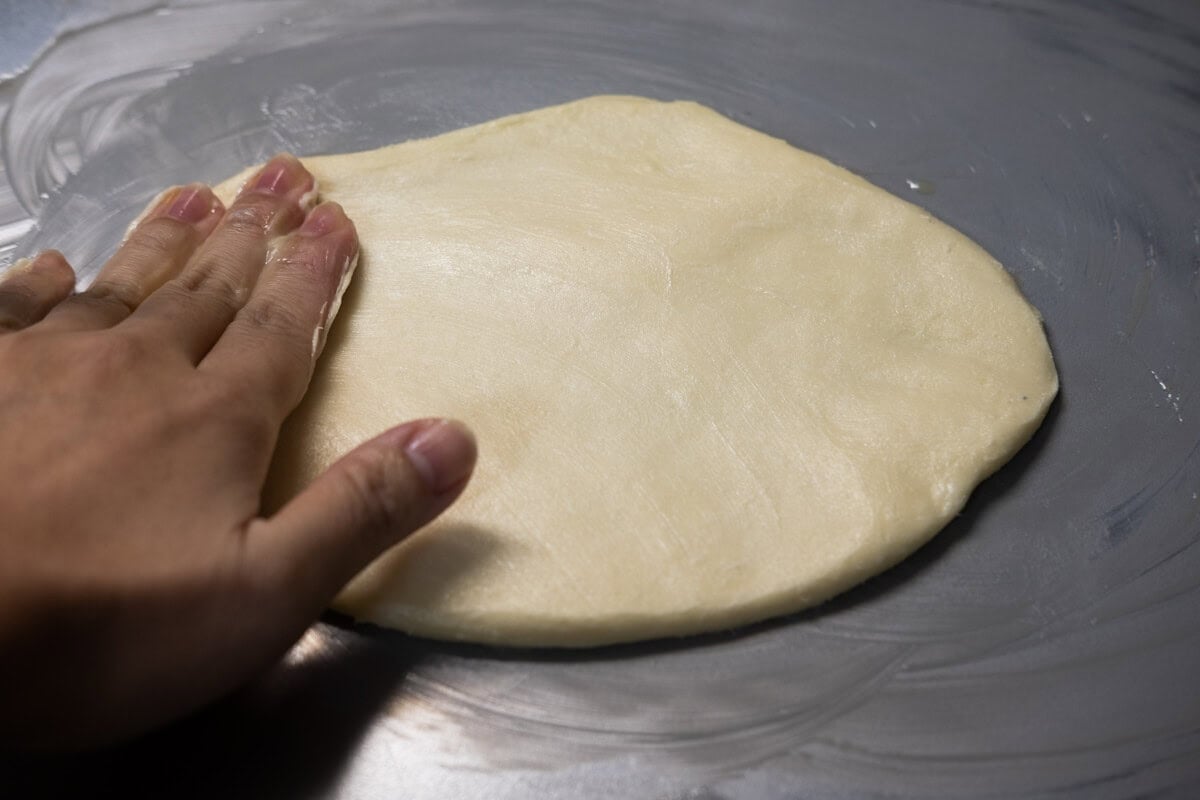
Place one dough ball in the center of your ghee-coated surface, then gently press with your buttered palm to flatten it into a 6-inch (15cm) disc. Make sure it’s less than 1/4 inch (5mm) thick, and especially thinner around the edges.
Gently pull and stretch the dough from the center outwards. Use your fingertips and thumbs to lift the thicker edges, pulling them outwards to thin. Press gently against the table as you go to help the dough stretch and adhere. You want it as paper-thin as possible, especially around the edges.
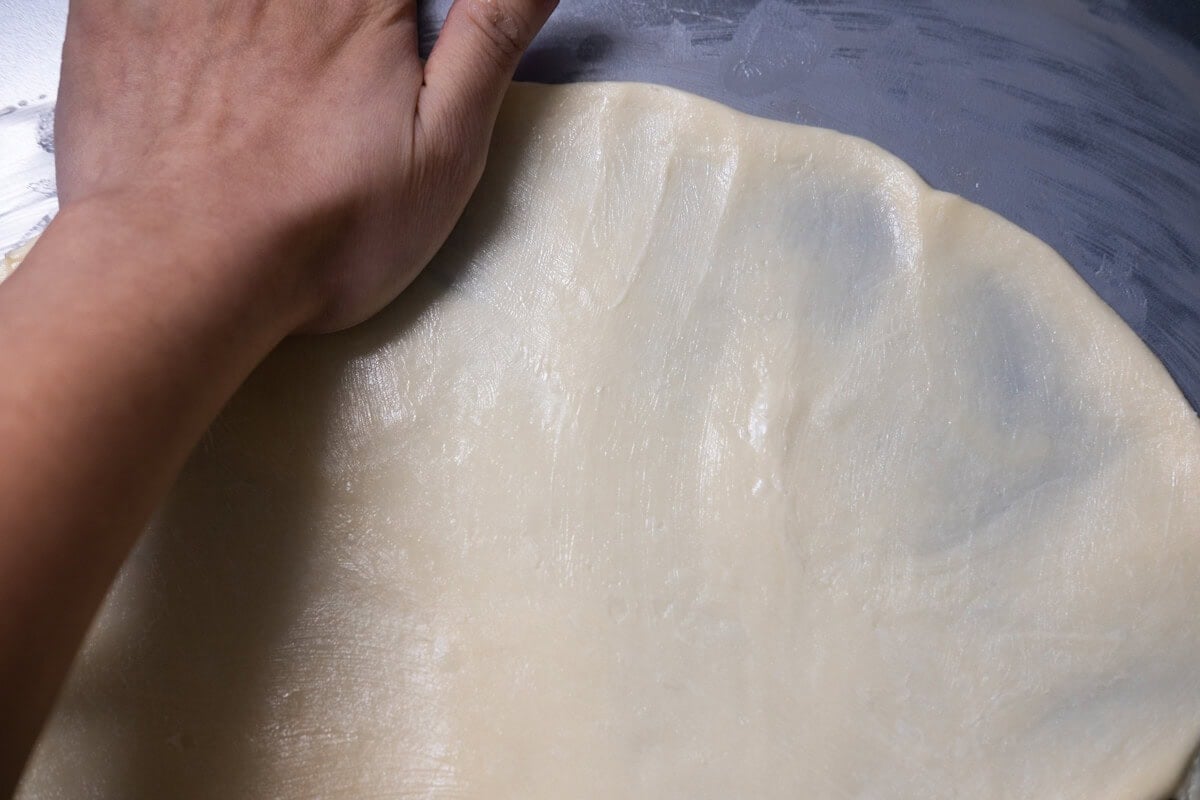
Slowly work your way around the perimeter of the dough circle, gently pulling it outwards to thin. Start by pulling about 3 to 4 inches (8 to 10 cm) at a time. Keep going until the dough becomes thinner and thinner, ensuring it’s as thin as possible, especially around the edges.
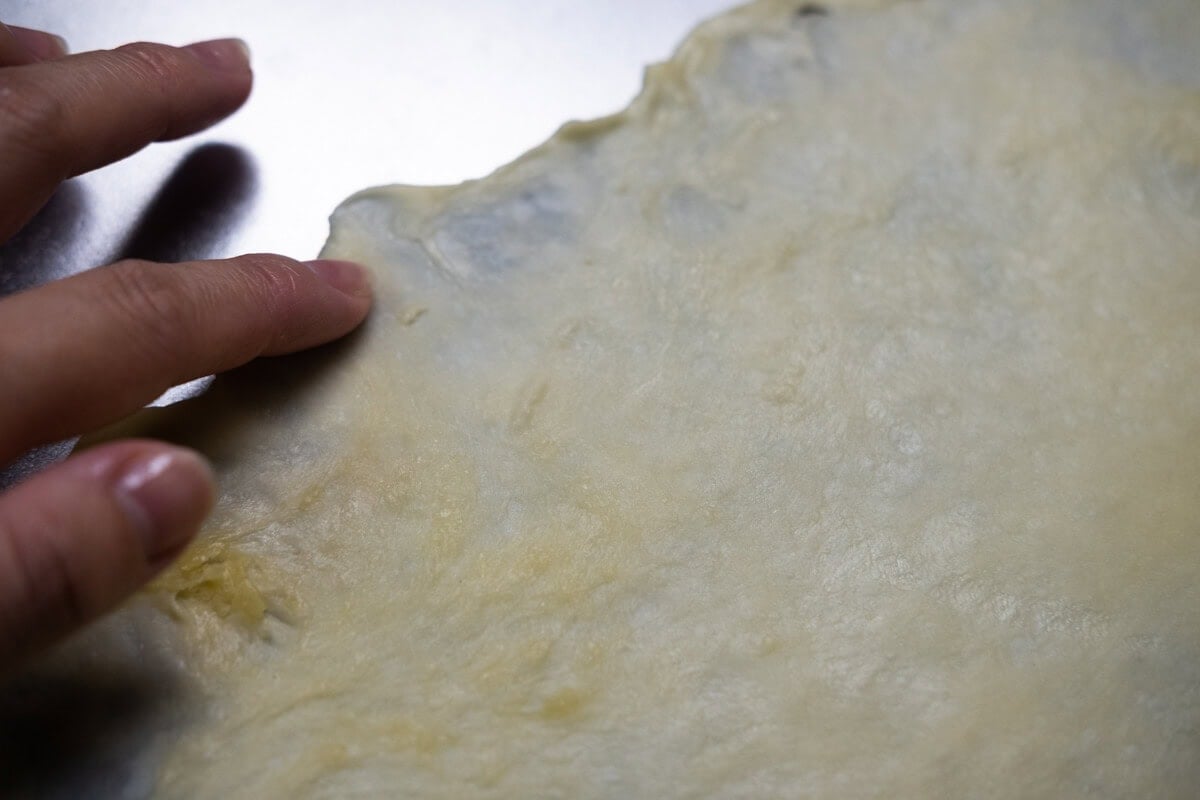
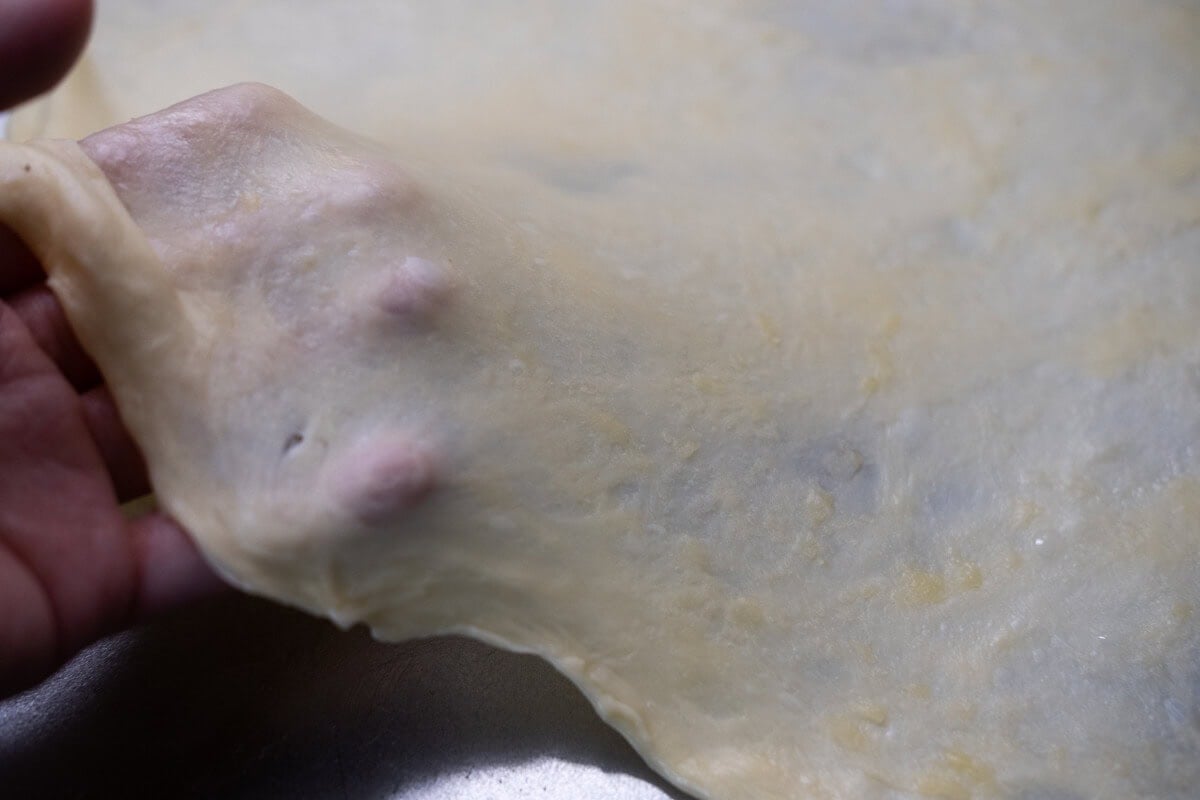
As the dough becomes thinner, pay close attention to the thicker parts. Use your fingertips to gently stretch and thin those areas out. Keep working until you’ve got a paper-thin sheet, about 2 feet in diameter. It might take a bit of practice to get it just right, but that’s what makes it so satisfying when it finally comes together!
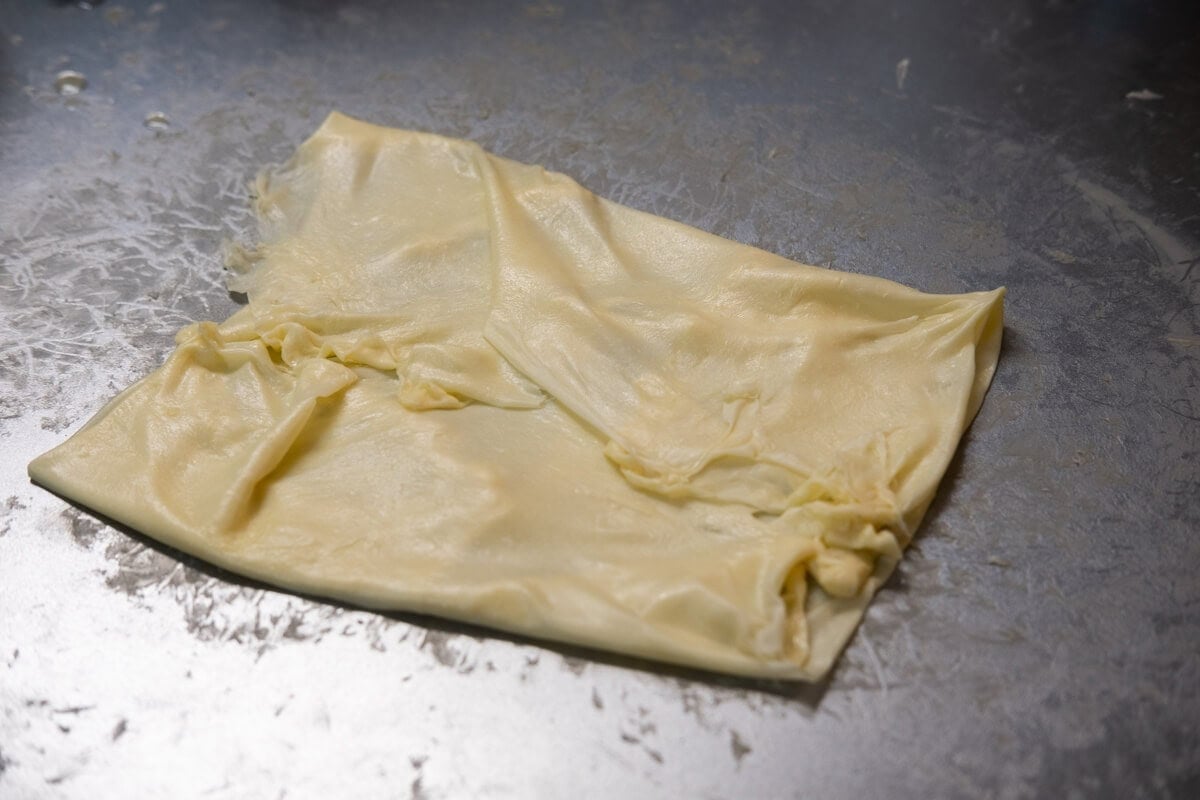
Once the dough is stretched thin, its time to fold. Fold the top quarter of it over itself, almost reaching the center. Then fold it over again, and again, until you have a neat square about 6 to 8 inches in size. Each time you fold, make sure to capture a little air between the layers. It’ll give your dough those beautiful, flaky layers when you cook it!
Cooking The Bread
Heat up a griddle or a big sauté pan over low heat. You want it nice and warm, but not too hot to burn the dough right away.
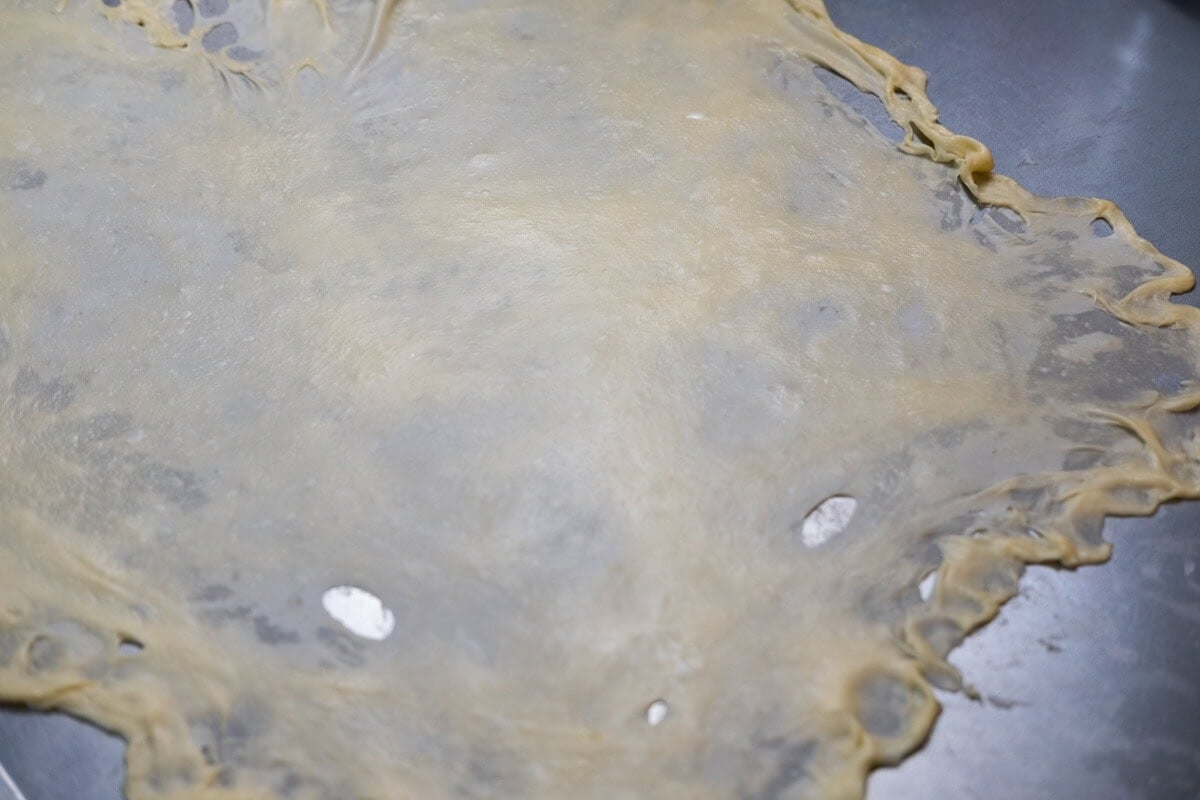
Flatten and spread one disc of dough until it’s about 7 to 8 inches in diameter (18 to 20 cm). The dough might pull back a little, but just keep working it gently until it’s nice and thin.
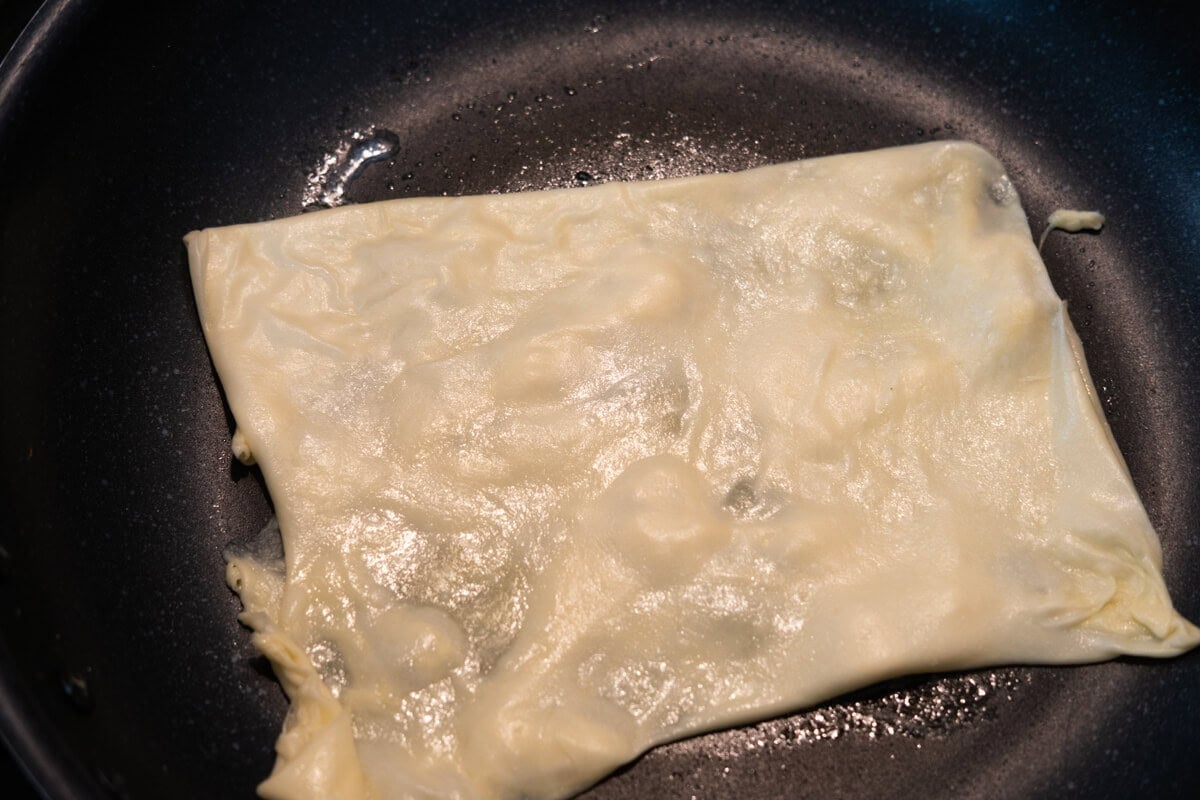
Drizzle a little ghee on the griddle, then place one bread on it. Cook slowly, turning it once, about 3 to 4 minutes per side. Rotate occasionally to get that even golden brown on each side.
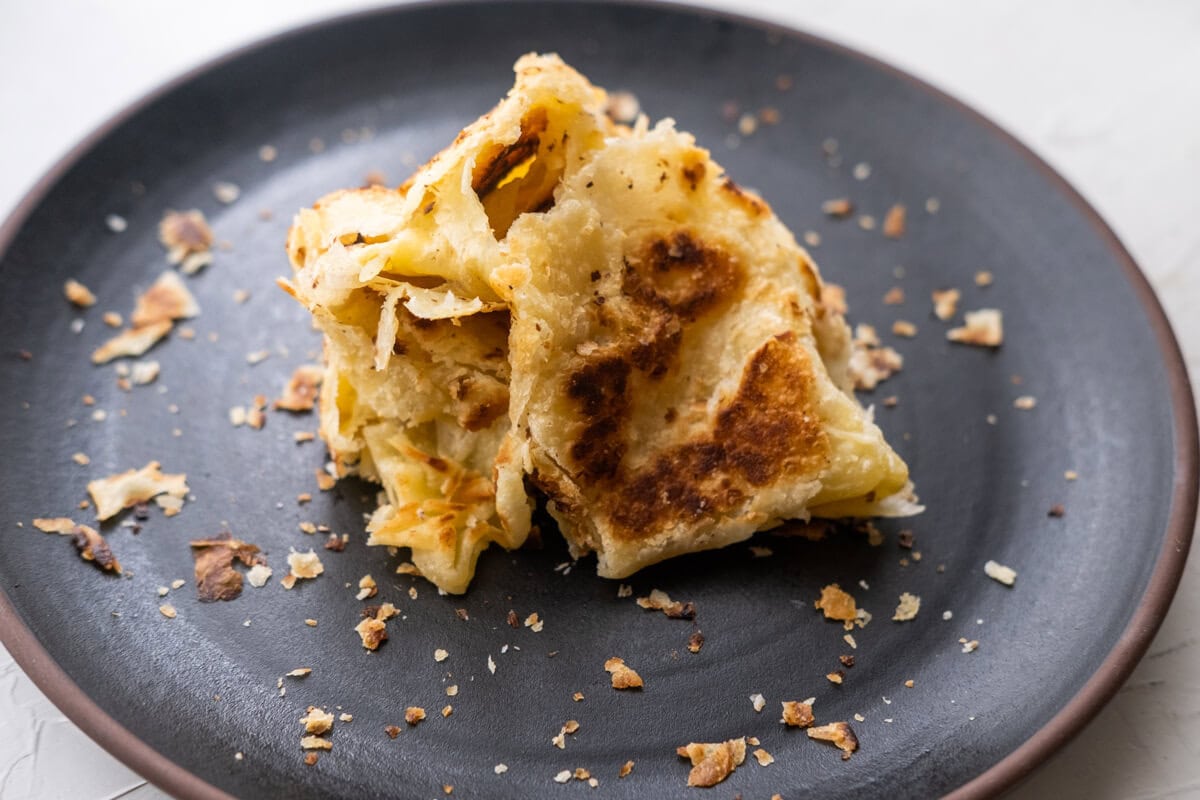
Once the bread is done cooking, transfer it to a work surface. Be careful—it’s going to be hot! Use a clapping motion to slap the bread together between your hands, which will separate those delicious layers.
Keep going with the rest of the roti! Cook them in batches, as many as will fit in the pan at once. Once they’re done, serve them hot with your favorite curry sauce or a sprinkle of sugar. Enjoy!
Secrets To Perfectly Crispy And Flaky Roti Canai
- For a chewier roti canai, I prefer using bread flour, which has more protein than all-purpose flour. It helps with the texture. Just keep in mind, you might need to add a little extra water since bread flour tends to absorb more liquid.
- I always keep the ghee at room temperature—liquid but not too warm, around 75°–80°F (23°–26°C). It mixes much better with the dough this way.
- When I roll out the dough, I aim to make it as thin as I can without tearing it. This step is essential to getting those perfectly crispy, flaky, and soft layers.
- If I’m struggling to stretch the dough thin by hand, I use a rolling pin to flatten it between stretches and folds. It’s a total game-changer!
- When it’s time to fry, I make sure the pan is really hot. If the pan’s not hot enough, the dough ends up soaking up too much oil, making it greasy and undercooked. I know it’s the right temperature when I see wisps of smoke or when a drop of water sizzles and evaporates instantly on the surface.
Frequently Asked Questions
Roti canai is best eaten in moderation because it’s loaded with carbs and calories. But it can still be part of a healthy lifestyle. Serve it with protein and veggies for a complete, nutritious meal.
Yes, an egg is usually included in Malaysian-style roti.
For the best results, I recommend using ghee. It gives that rich, crispy texture and delicious flavor you’re after. While butter or canola/vegetable oil can work in a pinch, they won’t quite replicate the same taste or texture as ghee.
Whole milk gives the roti a richer, creamier texture, but you can definitely use 2% milk if that’s what you have. It will still be tasty, just a little less rich!
Yes, roti canai is pan-fried in a shallow pan or griddle lightly brushed with ghee.
A rubbery roti is usually caused by overworking the dough or not resting it enough.
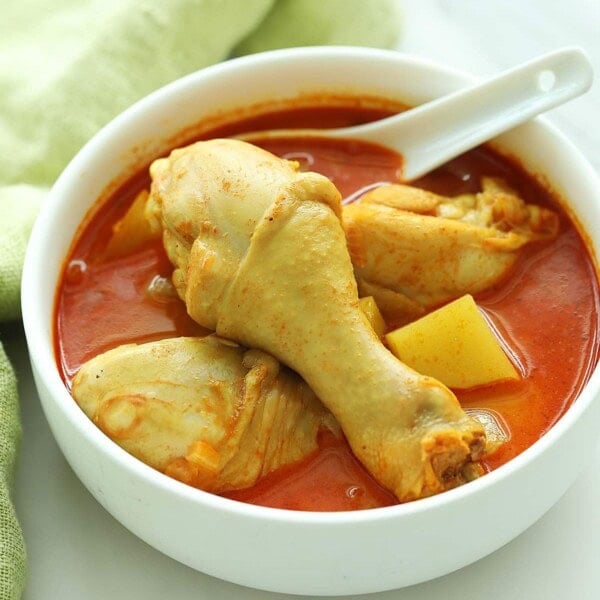
Go traditional by serving it with a light daal, curries like Malaysia Chicken Curry or squid curry or sambal dishes like Prawn Sambal. It’s also amazing in sweet combinations like condensed milk and sugar or paired with bananas and Nutella like a Thai roti recipe. You can get creative with it—use it as a pizza base, in a wrap, or in Curry Puff!
This roti paratha recipe has only 371 calories per serving.
What To Serve With Malaysian Roti Paratha
Serve roti with Malaysian Chicken Curry, plain sugar, Cardamom Chicken (Masala Murgh) or Mango Chutney. For an easy Malaysian weeknight dinner, I recommend the following recipes:
I hope you enjoy this post as much as I do. If you try my recipe, please leave a comment and consider giving it a 5-star rating. For more easy and delicious recipes, explore my Recipe Index, and stay updated by subscribing to my newsletter and following me on Facebook, Pinterest, and Instagram for new updates.
Roti Canai (Roti Paratha)
Ingredients
- 3 1/2 cups all purpose flour , (1 1/4 lb. / 580 g)
- 1 1/2 teaspoon kosher salt
- 1 teaspoon granulated sugar
- 3/4 cup ghee, room temperature
- 1 large egg, beaten
- 3/4 cup whole milk
- 1/2 cup water
Instructions
Roti Canai Dough
- Combine flour, salt, sugar and 1/4 cup of the ghee in the bowl of a stand mixer. Run on low speed with a dough hook until mixture clumps.
- Add egg, milk and water. Continue to mix until a smooth, elastic dough is formed. Knead into a smooth, soft, elastic dough, about 8 to 10 minutes. The dough should be a bit sticky, but not wet.
- Transfer the dough out and cut into eight equal pieces, about 4 oz. each (113 g). Form into smooth balls.
- Coat each ball with one teaspoon of ghee, slathering them well. Arrange in a single layer on a plate, cover with a damp cloth and allow them to rest at room temperature for at least 6 hours. (The dough can be made a day ahead and kept in the refrigerator.)
Prepare the Work Space
- If the dough was prepared the day ahead, let come to a warm room temperature. So if your kitchen is cold, place the dough in a warm area, or you can even microwave it for 10 second intervals. Warm dough is more elastic and easier to work with.
- Clean a 2-inch × 2-inch (5cm x 5cm) surface, and coat it with a 12-inch circle (30 cm) of ghee (about 2 tablespoons). Coat hands liberally with ghee.
- Stretch the dough into a sheet; put 1 teaspoon of ghee in the center of the buttered work area.
- Arrange one dough ball in the center. Press with your buttered palm to flatten dough into a 6-inch (15cm) disc, less than 1/4 inch (5mm) thick, slightly thinner around edges.
- Pull and stretch it from the center outwards. Make sure most of the dough is paper thin by moving around the dough perimeter with your fingertips and thumbs, lifting thicker edges, pulling outwards to thin, and gently pressing against the table to adhere.
- Systematically, slowly, work your way around the perimeter of the dough circle, pulling outwards to thin the dough. For the first few rounds, pull 3 to 4 inches (about8 to 10 cm) each time, making it thinner and thinner.
- As it gets thinner, it will be obvious where the thicker parts of the dough are. Focus on those areas. Keep going until you achieve a paper thin sheet. It should reach about 2 feet in diameter. Use the tips of your fingers to smooth the thicker part paper thin.
- Using two hands, fold the top quarter of dough over itself, almost reaching the middle of the sheet. Fold top edge over again to meet the top edge. Then repeat with other sides to create a square multi-layered square of dough about 6 to 8 inches (about 16 to 20 cm). Each time you fold, try to capture some air in-between layers.
Cook the Bread
- Heat a griddle or large sauté pan over low heat.
- Firmly flatten and spread one disc of dough until it is 7 inches to 8 inches in diameter or (18 to 20 cm). The dough will be elastic, and may pull back a little.
- Drizzle the griddle with a little ghee. Add one bread to the pan, and cook slowly, turning once, 3 to 4 minutes per side, rotating occasionally to ensure even browning. Cook until each side is deep golden brown.
- Transfer the breads to a work surface, and then use a clapping motion (careful, it will be hot), slapping the bread together between your hands to separate the layers.
- Repeat with remaining roti, cooking as many as will fit in the pan at one time. Serve immediately with curry sauce or sugar.
Notes
-
- For a chewier roti canai, I prefer using bread flour, which has more protein than all-purpose flour. It helps with the texture. Just keep in mind, you might need to add a little extra water since bread flour tends to absorb more liquid.
- I always keep the ghee at room temperature—liquid but not too warm, around 75°–80°F (23°–26°C). It mixes much better with the dough this way.
- When I roll out the dough, I aim to make it as thin as I can without tearing it. This step is essential to getting those perfectly crispy, flaky, and soft layers.
- If I’m struggling to stretch the dough thin by hand, I use a rolling pin to flatten it between stretches and folds. It’s a total game-changer!
- When it’s time to fry, I make sure the pan is really hot. If the pan’s not hot enough, the dough ends up soaking up too much oil, making it greasy and undercooked. I know it’s the right temperature when I see wisps of smoke or when a drop of water sizzles and evaporates instantly on the surface.
Nutrition
Nutrition information is automatically calculated, so should only be used as an approximation.


Love your recipes, always have a positive outcome.Thanks for sharing your Malaysian cuisine.
Thanks Adeline. I’m glad you love my recipes and thanks for the 5 stars rating!
The Roti canai is looks crispy and yummy, it’s familiar to what we call buss up shirt in Trinidad,the same method and ingredients except for the eggs, but instead of frying it we make it on a baking stone, also call tawa on the stove top.
That’s awesome Adeline. Do try this recipe!
Thank you very much for the recipe. I enjoyed many many Roti Canai in KL and Penang during my stay in Malaysia.
I just realized at your recipe that the amount of flour in gram is not correct. 455g is the correct amount when you convert 3,5 cups.
I started with the stated 580g which is far too much.
Thanks for all the recipes. Greetings from Germany