This post may contain affiliate links. Please read my privacy policy.
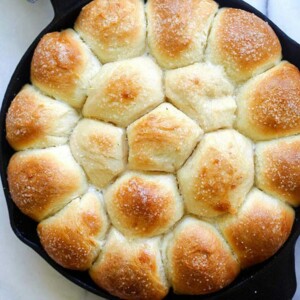
Skillet Dinner Rolls - easiest and best homemade dinner rolls on skillet. Much better than store-bought and takes 60 minutes!
Happy November! Now that Halloween is over, everyone is looking forward to Thanksgiving. When it comes to Thanksgiving, there is one thing I love most: homemade dinner rolls.
In this post, you will learn how to bake the best and easiest dinner rolls, on a skillet. And yes, they are pull-apart bread, too.
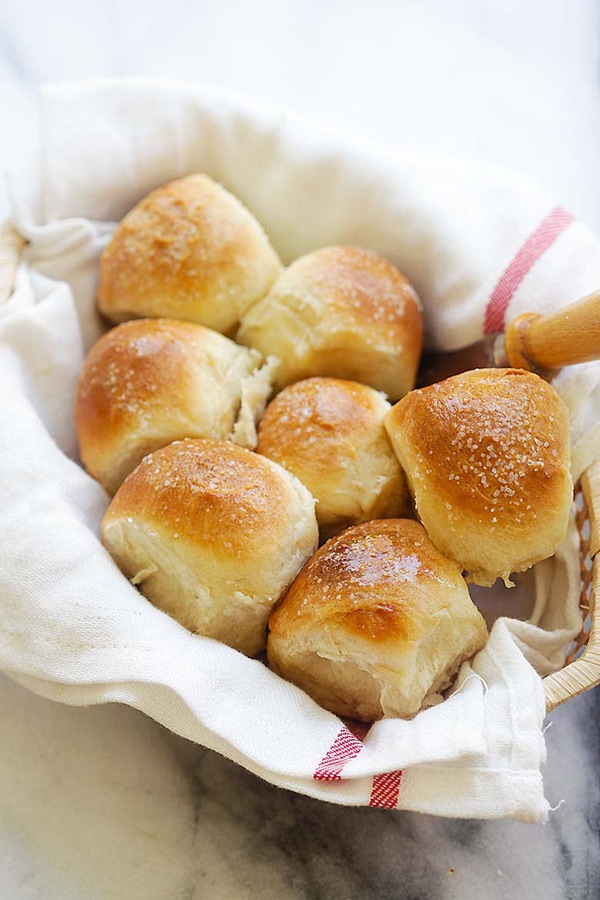
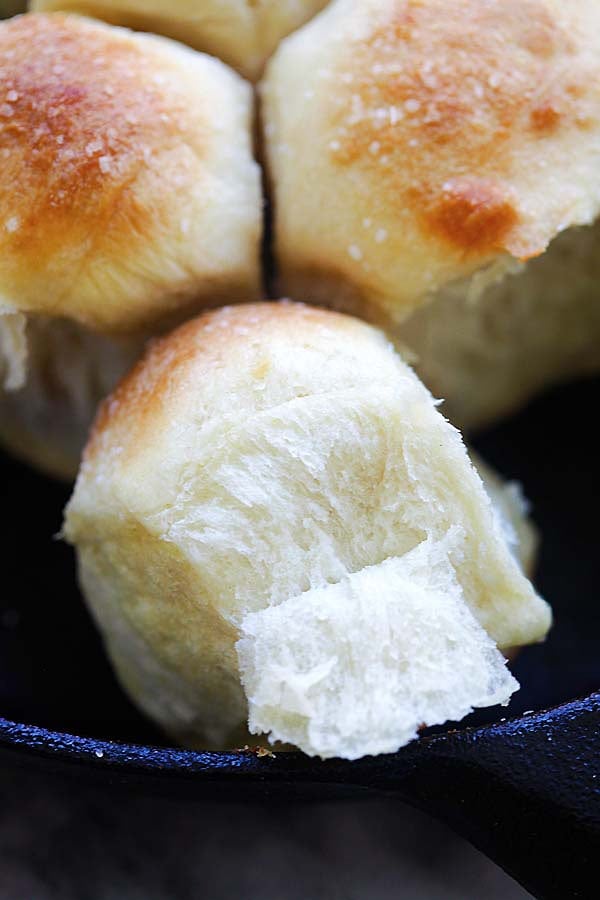
The best thing about this dinner rolls recipe is that it takes only 60 minutes to make and it’s actually A LOT easier than you think. The recipe is fail-proof and yields soft, light, fluffy buns. Fresh off the oven, these buns are great as is, or with just a slather of butter. It’s that simple.
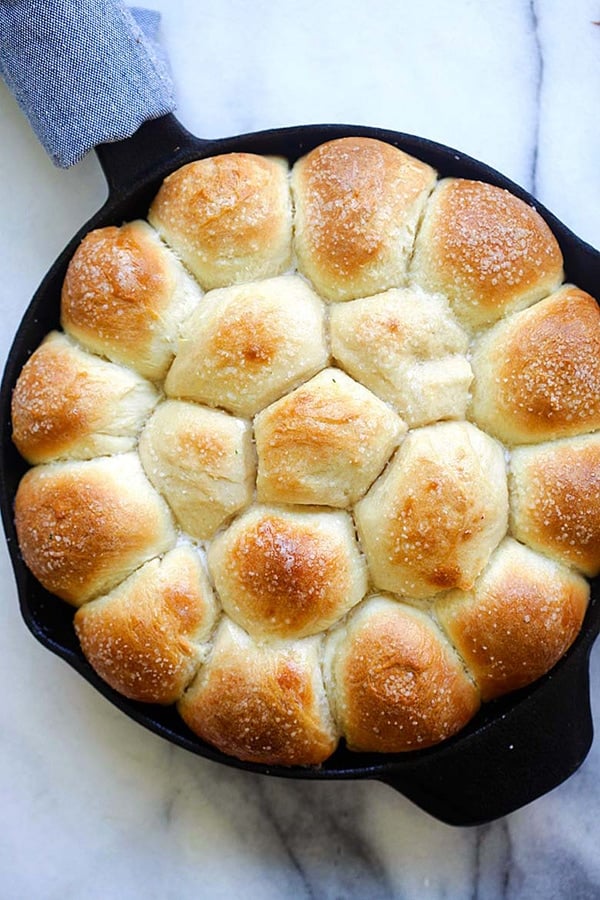
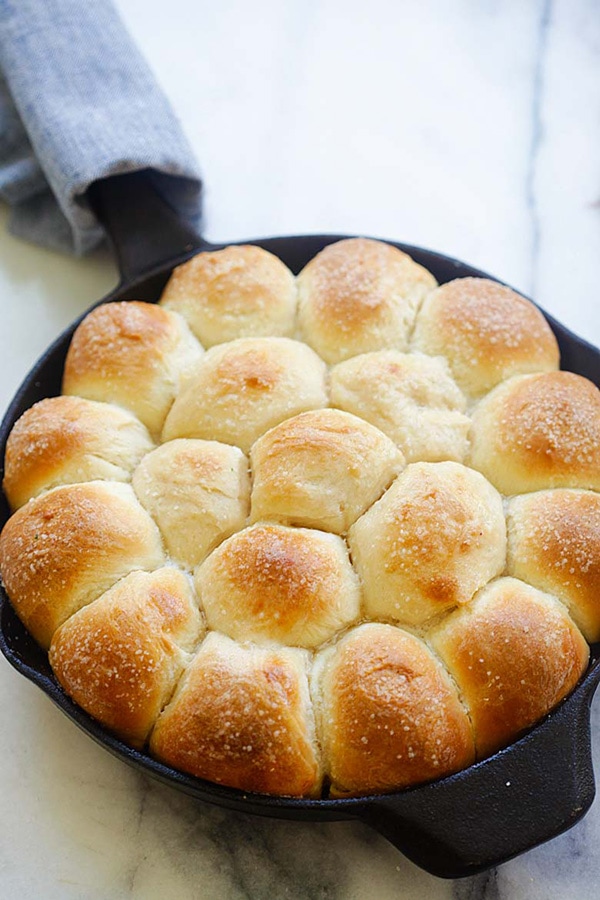
There are many ways to dress up your dinner rolls but the classic buttered rolls will hit all the right notes. Sprinkle some kosher salt on top of the rolls and you and your family will be happily eating away the entire skillet of these soft and amazing dinner rolls!
How To Make Skillet Dinner Rolls
Mix the yeast and a pinch of sugar into warm water and let it sit. Meanwhile, warm up the milk with the rest of the sugar, salt, and butter—just until it’s lukewarm.
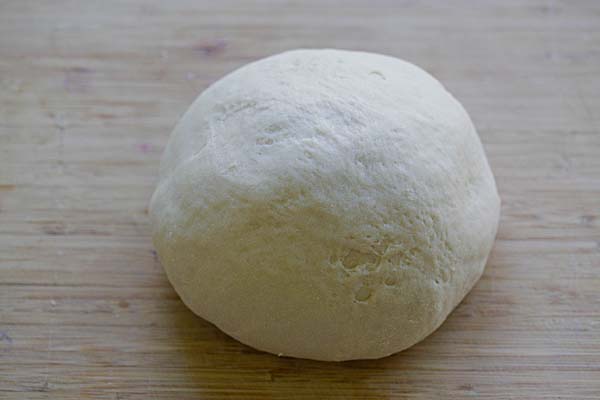
Crack the egg into the yeast mixture and give it a quick stir. Then pour in the warm milk mixture and dump in all the flour. Mix everything together until it comes together into a dough. Cover it up and let it chill for about 15 minutes. After that, pop it into your stand mixer with the dough hook and let it knead for around 5 minutes—it’ll get nice and smooth.
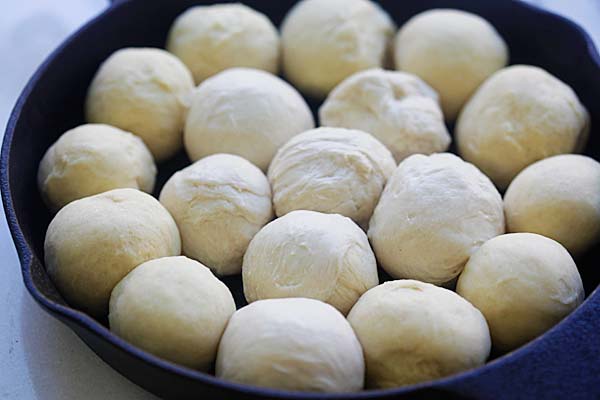
Preheat the oven to 375°F (190°C).On a floured surface, roll out the dough and divide it into 18 balls, each about the size of a small tennis ball. Cover and let rise for 25 minutes. Spray a 10-inch (25 cm) cast-iron skillet with baking spray and arrange the dough balls in the skillet. Sprinkle the kosher salt evenly over the surface. Bake for 10–12 minutes, or until the surface of the dinner rolls turns golden brown. Brush with melted butter and serve warm.
Frequently Asked Questions
This recipe is only 530 calories per serving.
What To Serve With Skillet Dinner Rolls
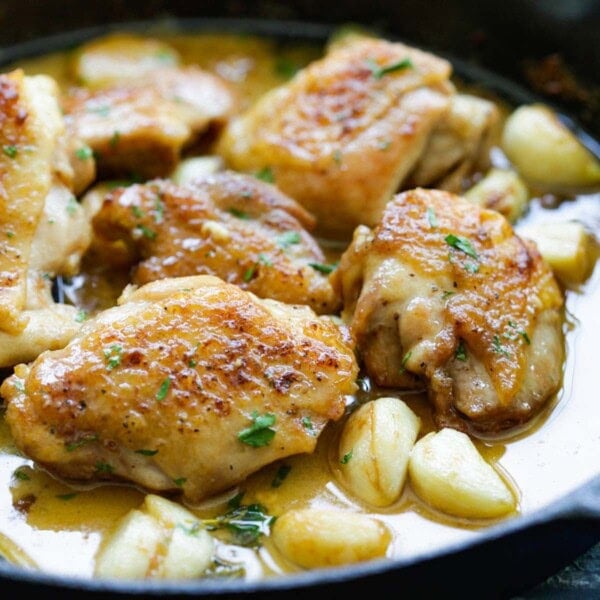
Serve this dinner rolls with Garlic Butter Brazilian Steak. For a wholesome meal and easy weeknight dinner, I recommend the following recipes.
I hope you enjoy this post as much as I do. If you try my recipe, please leave a comment and consider giving it a 5-star rating. For more easy and delicious recipes, explore my Recipe Index, and stay updated by subscribing to my newsletter and following me on Facebook, Pinterest, and Instagram for new updates.
Other Recipes You Might Like
Skillet Dinner Rolls
Ingredients
- 2 packets active dry yeast, total 1/2 oz or 14 g + 1 tablespoon sugar
- ¼ cup warm water
- 1¼ cups milk
- 5 tablespoons sugar
- ¾ teaspoon salt
- ¼ cup unsalted butter
- 4½ cups all-purpose flour, sifted
- 1 large egg
- baking spray
- 1 teaspoon kosher salt
- 3 tablespoons unsalted butter, melted
Instructions
- Dissolve the yeast and sugar in warm water. Heat the milk with the sugar, salt, and butter until lukewarm.
- Add the egg to the yeast mixture. Combine the yeast mixture, milk mixture, and all of the flour. Stir well to combine. Cover the dough and let it rest for 15 minutes. Using a stand mixer with a dough hook, knead the dough for 5 minutes.
- Preheat the oven to 375°F (190°C). On a floured surface, roll out the dough and divide it into 18 balls, each about the size of a small tennis ball. Cover and let rise for 25 minutes. Spray a 10-inch (25 cm) cast-iron skillet with baking spray and arrange the dough balls in the skillet. Sprinkle the kosher salt evenly over the surface. Bake for 10–12 minutes, or until the surface of the dinner rolls turns golden brown. Brush with melted butter and serve warm.
Notes
Nutrition
Nutrition information is automatically calculated, so should only be used as an approximation.


i really like you skillet dinner rolls it looks yummy i will try is.
Hi Emre, thanks for liking my recipe and for the 5 stars! :)
I would love to try this recipe. However I do not have a stand mixer. Is there an alternative way to knead the dough? Example: by hand?
Yes, by hand.
I like to prep as much as possible before the holiday. Can you make these dinner rolls the day before and refrigerate them to cook the next day.
Yes, you can make the dough balls (Step 4 in recipe), and then refrigerate. The next day, let it come to room temperature and rise before baking.
Thanks so much! These are great! And I should add I got your very helpful cook books and online recipes. Not a single one was in any way disappointing. Thanks so much for the amazing skill and clear instructions.
Thanks! :)
Do you think they would turn out okay if I substituted plant based butter and oat milk to make dairy free?
Sorry but I am not sure.
Can you prepare the rolls the day before and refrigerate over night to cook the next day?
Hi Millie. You can refrigerate the dough balls after shaping (Step 4 in recipe), and then let them come to room temperature and rise before baking.
Can you use a Soy plain milk for these rolls.
My g@0-daughter has Dairy allergies. I can use her soy butter. But not cows milk
I don’t have a mixer. How much do I need to knead using hand?
You knead until the dough becomes shiny on the surface.
Made these the other night because of the quick rise. I placed them in my 12 inch cast iron pan and they seem to be doing nicely, but I couldn’t get the middle to not be doughy. I put foil over them to slow the browning and cooked them much longer than the recipe called for and still they were doughy in the middle. Maybe next time I will try less or split it between two pans. Or possibly try on a baking sheet.
Hi Bee,
This is a beautiful recipe! Thanks for sharing, we all love recipes, and when I find ones that I like, I stick with them. I am happy to say it’s a keeper and it’s forever a winner in my home! Thank you, it’s a big commitment to move to online. I made a few tweaks and wanted to share. I don’t use eggs, but use 1/3 cup of Soda Stream carbonated water as a replacement, per 1 large egg and it’s perfect. I oil my pan with quality olive oil, and brush the tops with either butter, olive oil or ghee then salt before baking. The oven time varies for all of our ovens, and mine needs 30-35 minutes on your recommended 375F setting, as the skillet needs time to heat. I make 16 rolls, but could easily do your 18. This recipe is a winner, from one fellow cook to another. Thanks! Carrie from Sydney, Nova Scotia.
Thanks for your trying!