This post may contain affiliate links. Please read my privacy policy.
Soft, puffy, and blistered—this naan recipe is foolproof! It’s quick, easy, and tastes even better than restaurant naan. No tandoor oven required—just a cast iron skillet. Watch my video tutorial with all the tips to make perfectly chewy naan bread every time!
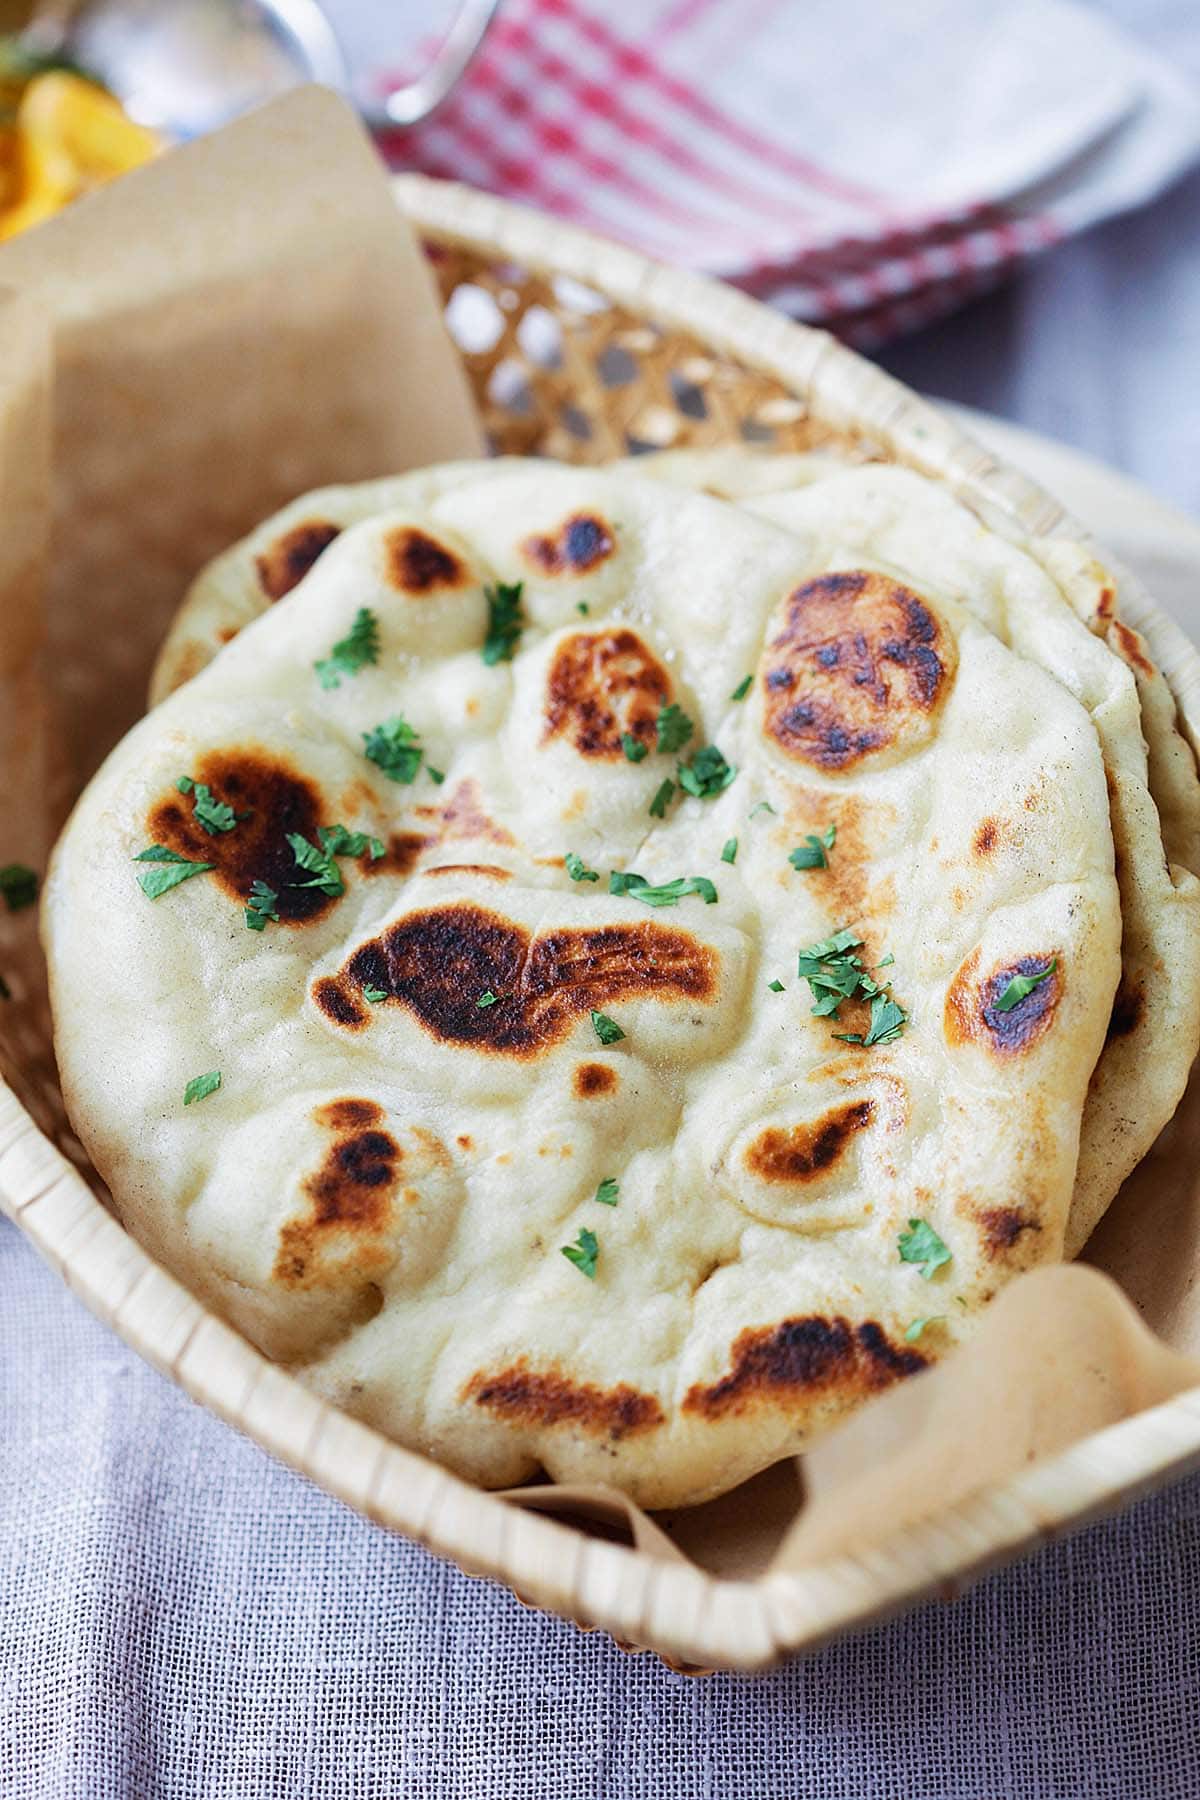
Table of Contents
- Soft & Fluffy Naan – Made At Home!
- All About Naan: The Indian Flatbread
- Ingredients You’ll Need
- Recipe Variations
- The Secret Ingredient For Naan: Yogurt
- How To Make Naan
- What To Eat With Naan Bread
- Easy Tips For Perfect Naan
- Naan Recipe Troubleshooting
- Frequently Asked Questions
- What To Serve With Naan
- Other Recipes You Might Like
- Naan (The Best Recipe!)
Soft & Fluffy Naan – Made At Home!
The traditional way of making naan in a tandoor oven with charcoal or wood fire might sound amazing, but let’s be real—it’s labor-intensive, tricky, and not exactly practical for most home kitchens. That’s why I came up with this easy recipe just for you! It’s fluffy, chewy, buttery, and bubbly—all cooked up in a hot cast-iron skillet. No fancy equipment, no stress—just warm, fresh and delicious naan bread straight from your own kitchen!
Whether you’re dipping it in Malaysian Chicken Curry, Cardamom Chicken (Masala Murgh) or enjoying it plain, this recipe is guaranteed to hit the spot and satisfy all your Indian food cravings.
Tried and tested by home cooks worldwide, with over 1,500 votes and an average rating of 4.6 stars—this is the easiest, best, and most authentic naan recipe you’ll find online! Whether you’re new to making naan or have tried before without success, my recipe is designed to help you succeed. Before you start, be sure to check out the recipe card and video.
A reader favorite for over 5 years, readers rave about this naan recipe. Just read all the reviews and comments at the bottom of the post!!
Real Reviews From Happy Cooks
“I have been using this recipe for a couple of years now. I’ve tried others, but I always come back to this one. It’s hands down the best. Thanks for such a fabulous recipe!”
Amanda
– STEPHANIE
“Just made these and they were fantastic, we used a blowtorch to char the tops a little bit to give them a ‘tandoor’ vibe, they bubbled up beautifully. This is the most authentic naan recipe I have tried and will definitely be making them again. Thank you for sharing it!”
All About Naan: The Indian Flatbread
If you’re new to Indian cuisine, let me tell you what naan is! This delicious flatbread is a staple in many South Asian and Middle Eastern countries. While it’s closely tied to Indian food, it actually originated in Persia (modern-day Iran).
It’s soft, doughy, and light with those golden-brown bubbles that make it perfect for dipping into rich curries like Butter Chicken, Chicken Tikka Masala, or even Squid Curry. I never miss out on it when dining at an Indian restaurant!
Tandoor Oven
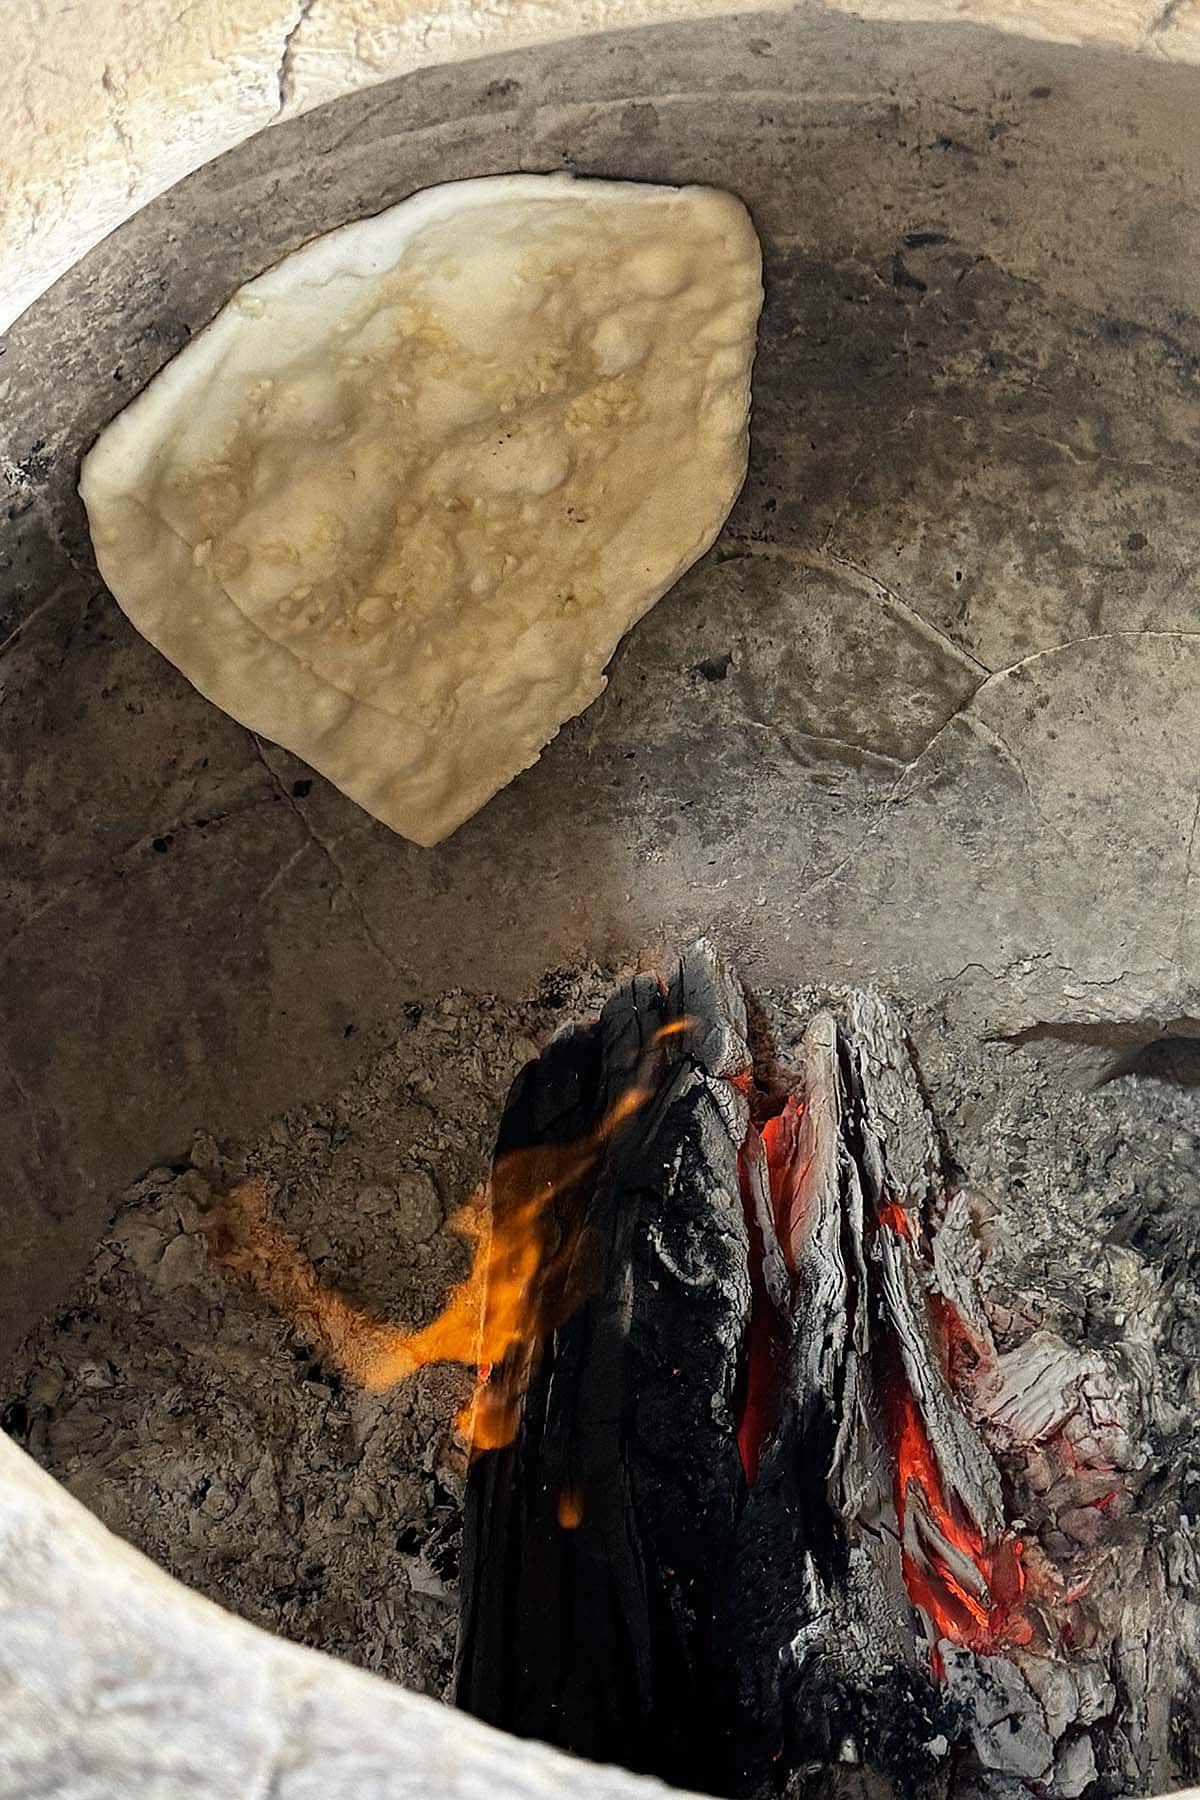
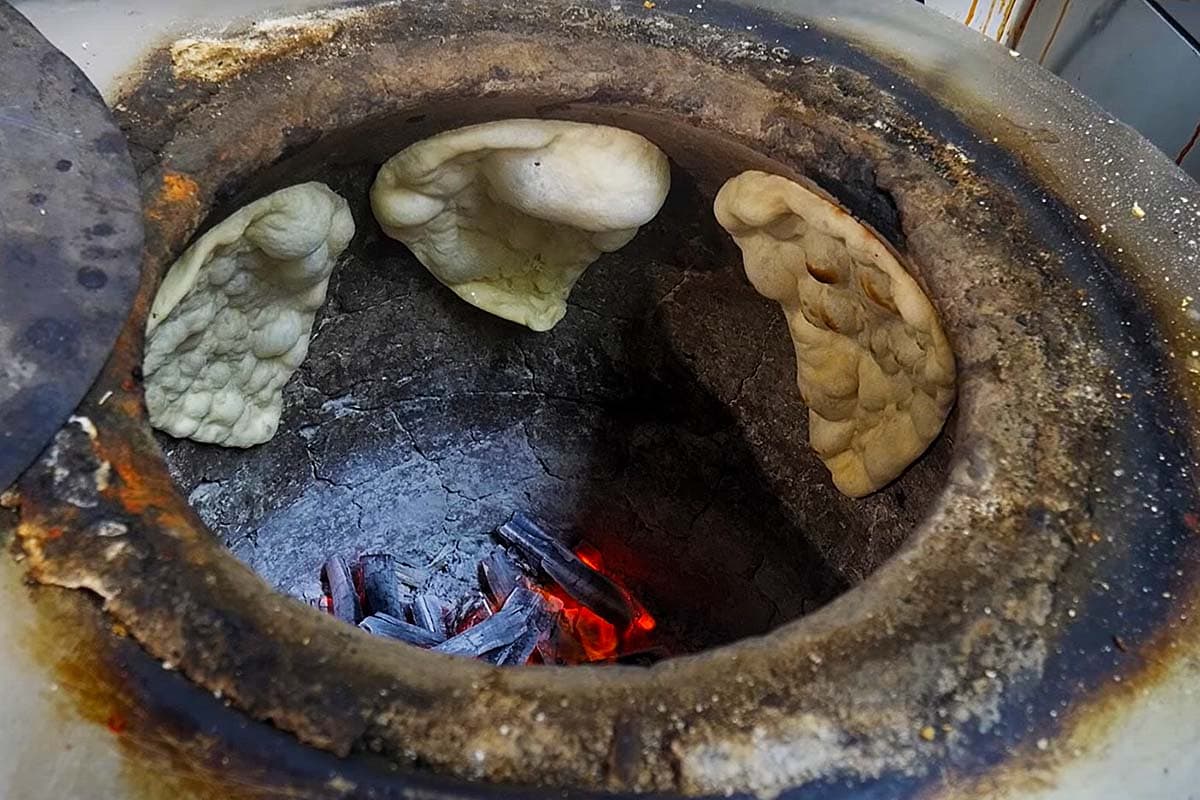
Naan is traditionally cooked in a tandoor, a clay or metal oven used for centuries in places like Central Asia, South Asia, and the Middle East. Heated with charcoal or wood, tandoors reach temperatures up to 900°F (482°C), giving naan bread its signature smoky flavor. The intense heat and quick cooking process make it uniquely delicious.
To get that charred, bubbly appearance and look, the dough is slapped against the hot walls of the tandoor—either with a cushioned pad or by hand. The rapid contact with the high heat creates those beautiful charred spots and gives it its soft, airy, and chewy texture.
Now, you might be wondering how you can get that same effect at home. The answer is simple: a hot cast-iron skillet! It can reach up to 650°F (343°C) with almost any heat source, making it perfect for creating fluffy, flavorful naan in your own kitchen.
Shopping Guide: For this recipe, I used a 12-inch Lodge Cast Iron Skillet. It’s durable, budget-friendly, and pre-seasoned with 100% natural vegetable oil, offering excellent heat retention and even heating. You can also try a Staub Cast Iron Skillet, which is French-made but more expensive. If you have an induction stovetop, make sure your cast iron skillet is compatible with it, or you can use a portable propane stove instead.
Ingredients You’ll Need
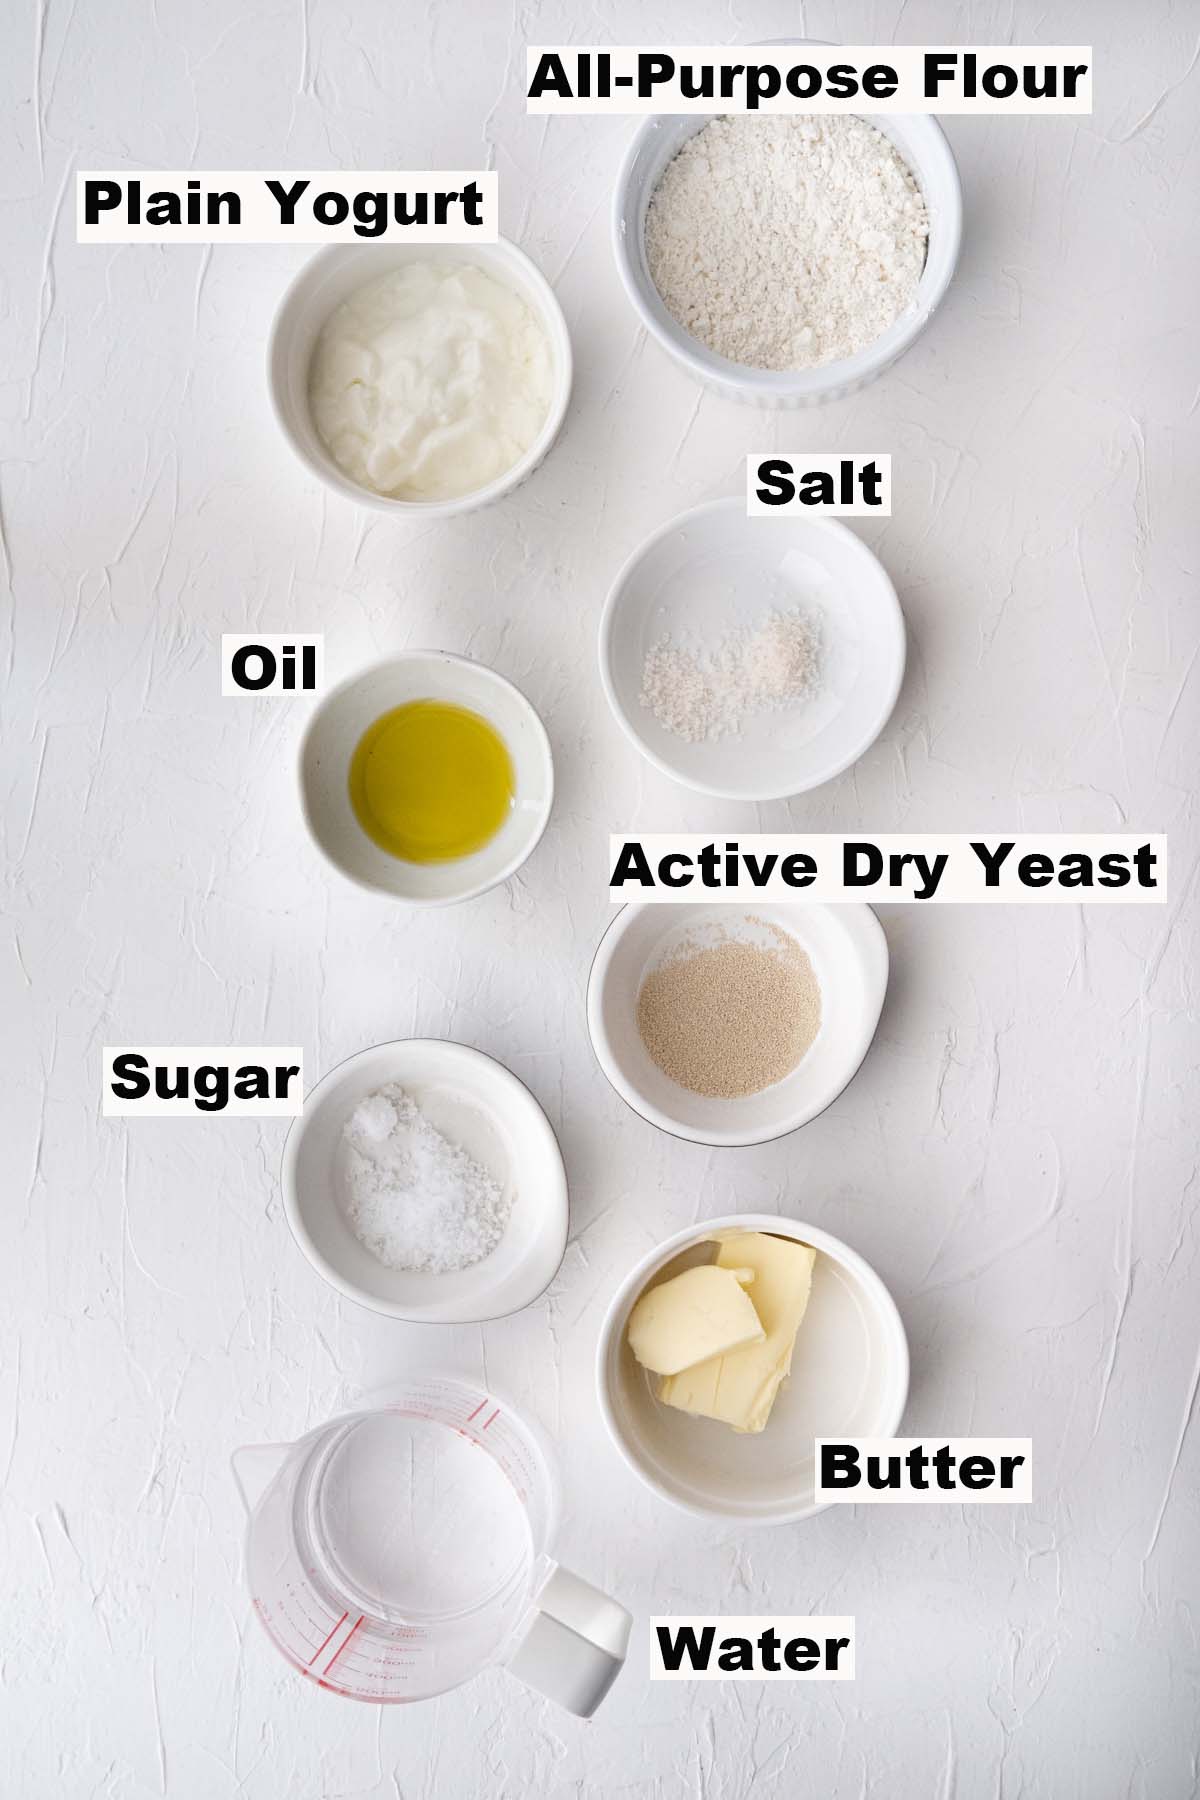
Here’s a breakdown of the ingredients I use in my homemade naan recipe:
- All-purpose flour – Depending on the humidity in your kitchen, you might need a little more or less flour to get a smooth and elastic dough.
- Yeast – I use active dry yeast in this recipe, but instant yeast works just as well!
- Warm water and sugar – These two are essential for activating the yeast and getting it to work its magic.
- Plain yogurt – This is the secret to making the dough soft and moist while adding a slight tanginess to the bread.
Some people add optional ingredients like ghee and egg to their naan, but let me tell you—no authentic naan is made with ghee and egg. See the recipe card for full information on ingredients.
Recipe Variations
Naan is one of those versatile breads, and I absolutely love these two variations.
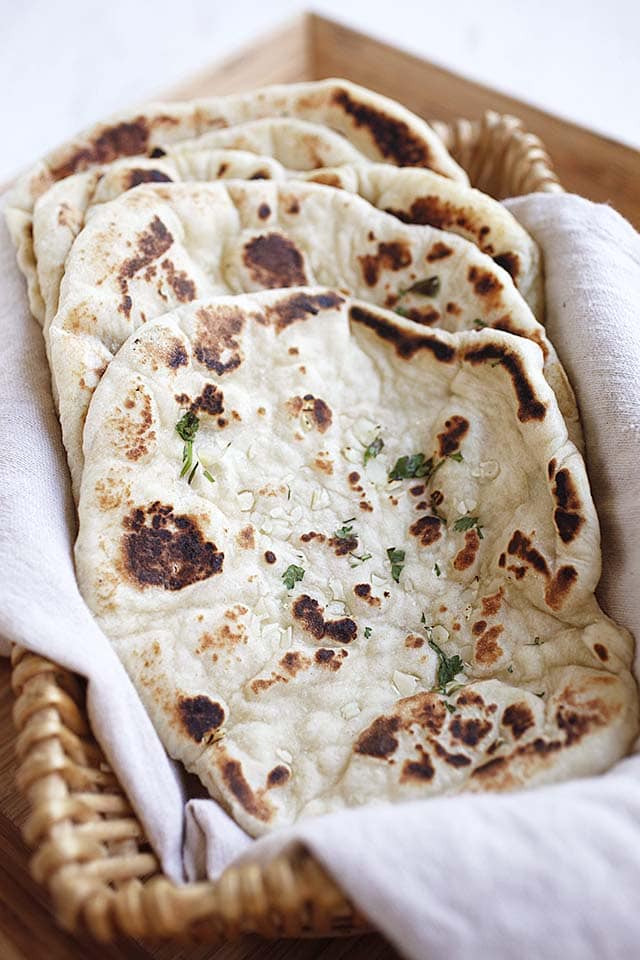
My Garlic Naan recipe includes minced garlic and chopped cilantro mixed right into the dough, giving the flatbread a deliciously garlicky flavor.

Cheese Naan is topped with melted cheese, like cheddar or mozzarella, for a irresistibly cheesy treat.
Both versions offer a tasty twist on the classic recipe. I love enjoying them with my favorite Indian dishes, or sometimes just on their own as a snack or appetizer.
The Secret Ingredient For Naan: Yogurt
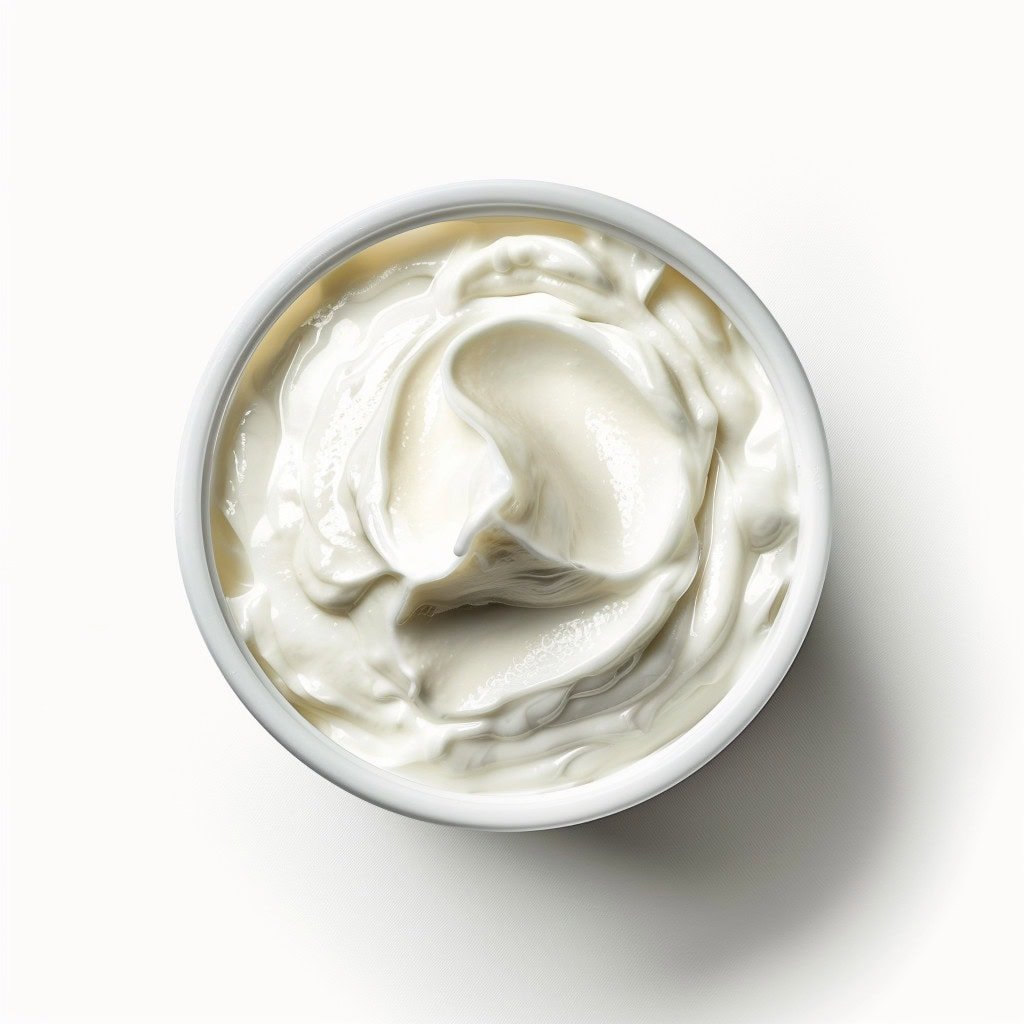
Yogurt is the secret ingredient in my recipe, and I honestly don’t think you can be successful without it! While some recipes skip yogurt, let me tell you why I swear by it.
- First off, yogurt helps with the leavening process, adding moisture and tenderness to the dough. This ensures the naan turns out soft and fluffy—just the way we love it!
- Secondly, it gives the dough a creamy, slightly tangy flavor that adds a mild kick to the bread. Plus, yogurt brings a touch of sweetness, making the end result even tastier. Trust me, it’s a game-changer!
Plain Yogurt Versus Greek Yogurt
Both plain yogurt and Greek yogurt work great for making naan at home. Whenever I use Greek yogurt, I notice the bread has a slightly denser texture because it has more protein and less moisture.
Plain yogurt, on the other hand, tends to make it softer and fluffier. In the end, I use what I have on hand.
Pro Tip: If you prefer a chewier, denser naan, go for Greek yogurt. But if you’re after a pillow-soft texture, plain yogurt is the way to go.
How To Make Naan
Let’s get started. When I make naan, I keep it simple—just a hot cast-iron skillet, no oven or fancy tandoor. Trust me, you don’t need all that to make incredible naan at home.
It turns out soft, puffy, and full of flavor, with those beautiful golden spots and little blisters on top. Honestly, it’s just as authentic as the ones you’d get at your favorite Indian restaurant—and maybe even better since you made it yourself!
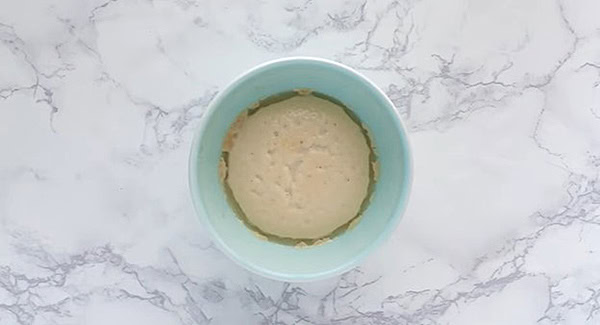
Alright, here’s how you start making naan: First, we’re going to activate the yeast. Grab a small bowl and mix together some sugar, warm water, and yeast. Give it a quick stir, then let it sit for about 10 minutes until it gets all foamy—that’s how you know the yeast is alive and kicking!
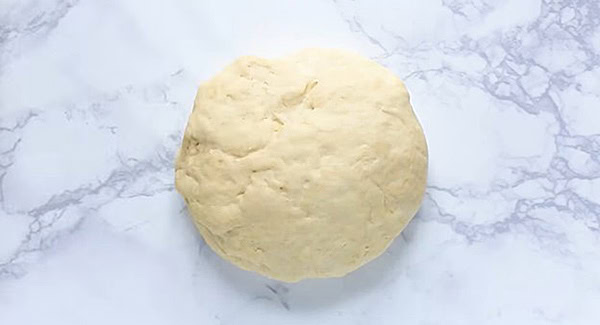
Meanwhile, place your flour on a flat surface and make a little well in the center—kind of like a crater. Now, pour in the yeast mixture, yogurt, salt, and oil. Start mixing and kneading the dough until it’s smooth and shiny—should take about 10 minutes. Once that’s done, cover it with a damp cloth and let it hang out in a warm spot, like near the stove or oven. In about an hour, it’ll puff up and double in size!
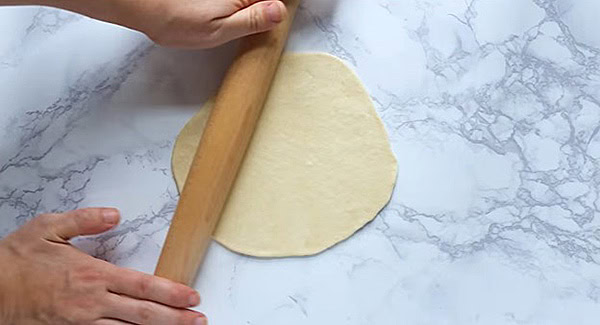
Now it’s time to roll out the naan! Divide the dough into 8 pieces, then grab a rolling pin and roll each one into a circle about 8 inches (20-cm) wide. It doesn’t have to be perfect—just try to keep it even.
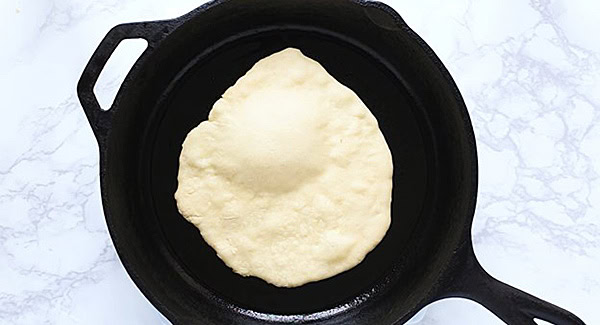
For cooking naan, heat up a skillet (cast iron works great) on high and brush a little oil so the dough doesn’t stick. Place the dough in the skillet, and once it starts puffing up, bubbling, and getting some charred spots, flip it over to cook the other side. Keep doing that until all the dough is cooked!

Ready to eat these soft and fluffy naans? Brush the tops with melted butter or ghee, sprinkle on some fresh cilantro, and serve them warm. Enjoy!
Freezing Instructions: To freeze naan dough, divide it into portions, wrap each in plastic wrap, and store them in a freezer-safe bag or container. When ready to use, thaw the dough in the fridge overnight or at room temperature for a few hours before rolling and cooking.
Kneading Techniques
Proper kneading is key to making great dough—it’s what develops the gluten and gives the dough its elasticity. When I knead, I use a folding and pressing motion, working the dough until it’s smooth, elastic and bouncy. By hand, this usually takes about 8–10 minutes, but if you’re using a stand mixer with a dough hook, it’s quicker—just 5–7 minutes.
You really can’t skip this step if you want good bread. Kneading isn’t just a step in the process; it’s a tradition that’s been passed down through generations. It’s what makes the difference between average bread and truly amazing bread. So take your time with it—you’ll feel the change in the dough as it comes together, and that’s when you know you’re on the right track!
Sidenote: You don’t need ghee to make great naan dough, so don’t worry if you don’t have it on hand! Traditional recipes skip the ghee, and honestly, adding it isn’t necessary to get that soft, fluffy texture and delicious flavor. While some recipes call for it, sticking to the basics is all you need.
What To Eat With Naan Bread
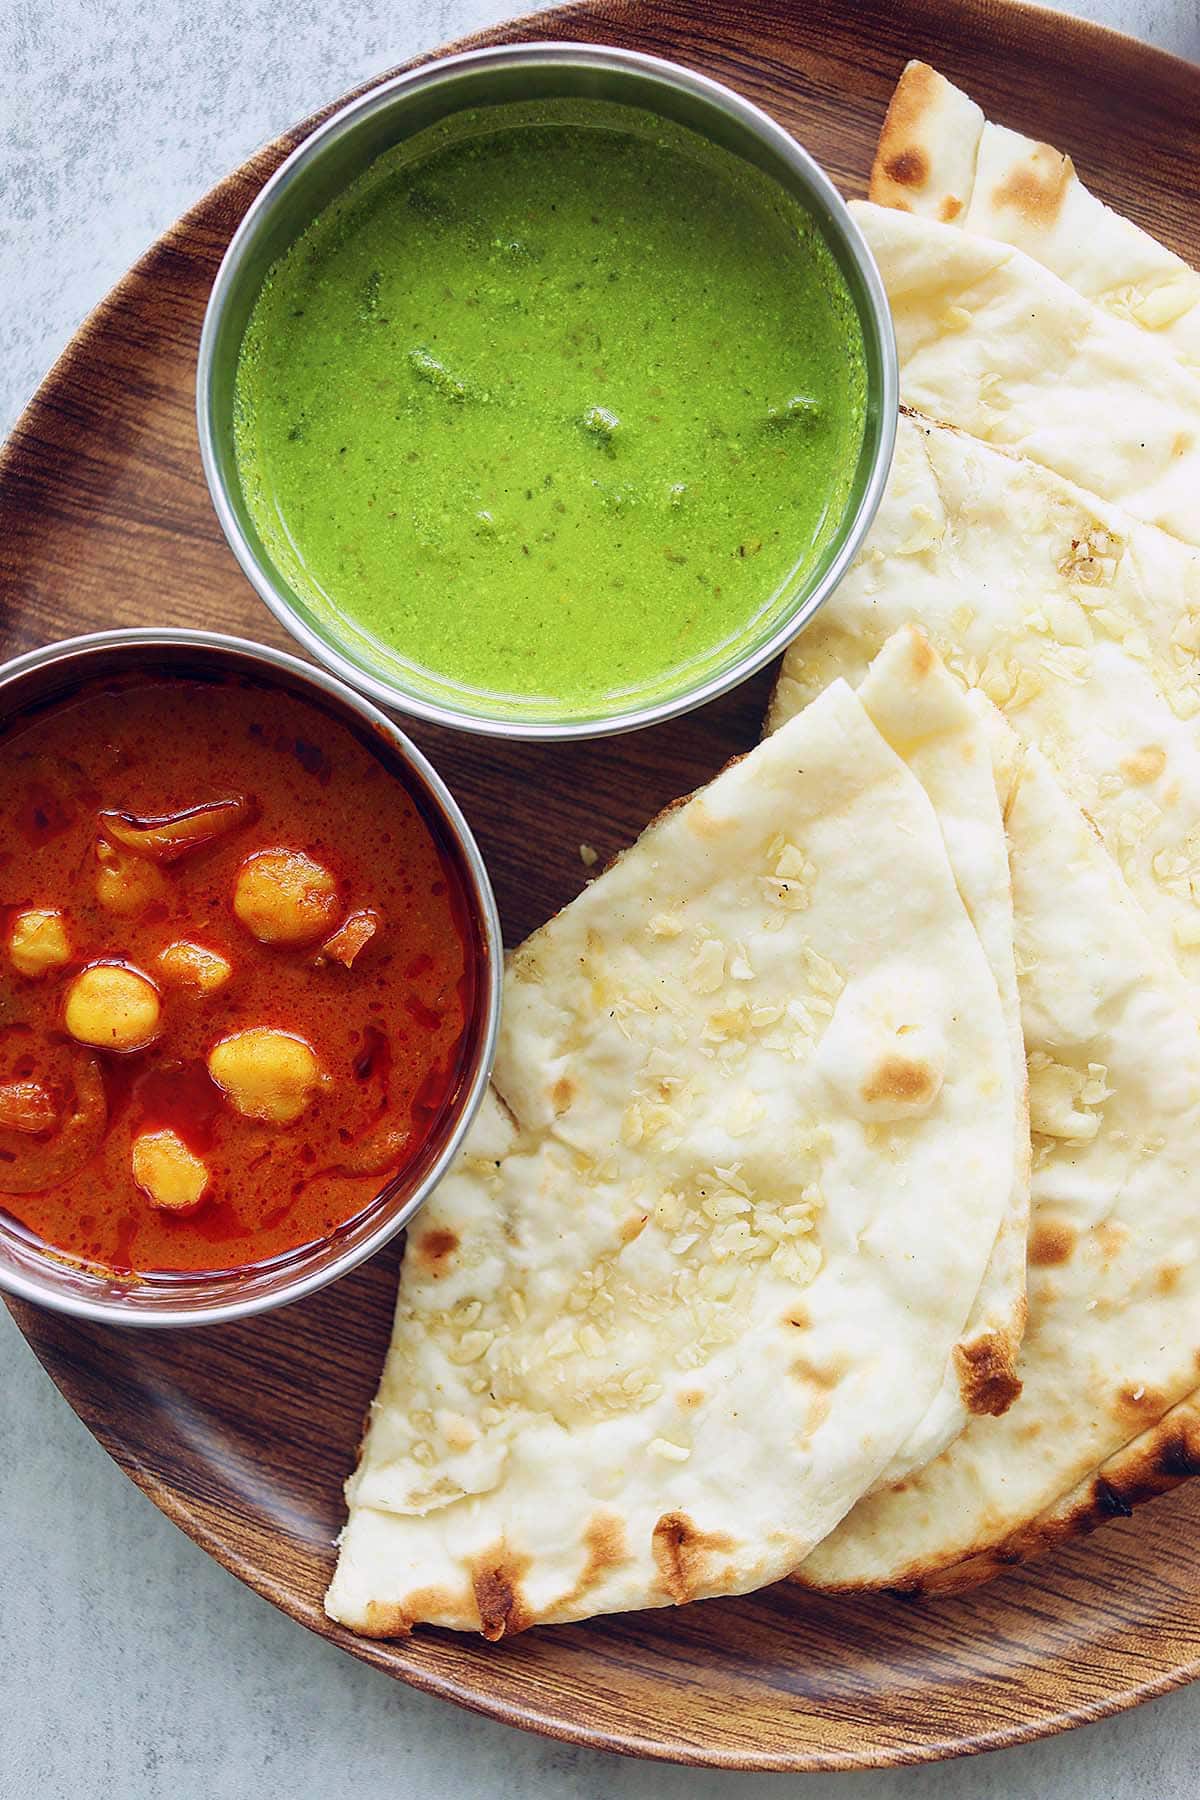
If you’re wondering what to pair with naan, you can’t go wrong with chana masala and mint chutney. It’s a classic combo in Indian cuisine. The soft, fluffy bread is perfect for scooping up the rich, spiced chickpea curry, and the mint chutney adds a fresh, tangy bite that balances everything out. My personal favorite is serving it with Mango Chutney!
This trio creates a well-rounded, flavorful meal that’s not only traditional but also deeply satisfying. Whether you’re having a casual family dinner or serving it up for a fancier gathering, this combo always hits the spot. It’s affordable, packed with flavor, and loaded with nutrition—making it one of the best ways to enjoy naan bread!
Easy Tips For Perfect Naan

Here are the helpful tips for making my simple naan bread recipe, every time!
- Climate and temperature. The dough can be sensitive to the climate, so keep that in mind. If the dough feels too sticky, just add a couple of tablespoons of flour to help bind it together. On the flip side, if you’re in a dry climate, you might need to add a bit more water to prevent the dough from drying out too quickly.
- Proper kneading. I like kneading my dough by hand for a smooth, elastic texture, or use a stand mixer to save time. Let it rest until it doubles in size. In warmer climates, it may rise faster, while in cooler ones, it might take longer.
- Control the heat on your skillet. Make sure it’s hot before cooking—high heat creates the puff and airy texture of naan bread. It’s ready when you see dark brown “blisters” on the surface. In warmer kitchen, keep an eye on the heat to prevent over-browning.
Naan Recipe Troubleshooting
If your naan isn’t bubbling up, here are a few key things to check:
- Dough is too dry or not rested enough: Make sure your dough is soft, slightly sticky, and well-kneaded. Let it rest for at least 1-2 hours (or longer) to relax the gluten. Lightly dampen the surface of the naan before cooking to help create steam for bubbling.
- Skillet isn’t hot enough. A very hot cast-iron skillet or cooking surface is essential for generating the steam that forms bubbles.
- Inactive leavening agents. Check the expiration date to ensure that your yeast is fresh. In colder months, let the dough rise in a warm spot for best results.
- Thin or uneven rolling: Roll the dough evenly to about ¼ inch (0.6 cm) thickness. If it’s too thin, it won’t trap enough steam, and uneven rolling can cause some areas to bubble up while others stay flat, tough and dense.
Troubleshoot with the tips above, and your naan will turn out bubbly and puffed up beautifully every time!
Frequently Asked Questions
No, you don’t need ghee. Traditional naan is meant to be light and dry, not soaked in oil or fat like Indian Roti Paratha. That said, you can always brush melted ghee over warm naan just before serving to add that delicious, rich flavor.
Many people get confused about naan and roti, but they’re actually quite different. First off, they’re made differently, which gives them distinct textures. Naan is soft and pillowy because it’s made with all-purpose flour, yeast, and yogurt. Roti, like Chapati, is made with just whole wheat flour and water, making it more tender and flaky, kind of like a flour tortilla. Naan is traditionally cooked in a tandoor oven, while roti is made on a flat pan or griddle called a tawa, which you’ll find in most Indian households.
Naan shouldn’t have eggs because authentic naan is traditionally made without them. Its soft and pillowy texture comes from ingredients like yogurt and yeast.
Yes, you can! My recipe calls for active dry yeast, but you can swap it with instant yeast.
Yes, you can absolutely use bread flour! It has a higher gluten content, which makes the flatbread a bit chewier. You can also mix all-purpose flour with bread flour if you prefer.
You can use self-rising flour for naan by skipping the yeast and salt, but the texture may be a bit different, more like soft flatbread, instead of airy and chewy.
Yes, you can! Greek yogurt works perfectly. If it’s too thick, just thin it out with a little water or milk until it’s the same consistency as plain yogurt.
Yes, you can use milk instead of yogurt. To get that tangy effect, just mix 1/2 cup of milk with a teaspoon of lemon juice or vinegar and let it sit for 5 minutes before using it in the recipe.
Yes, you can make gluten-free bread using alternative flours such as rice flour, almond flour, or a gluten-free flour blend. However, the texture and flavor will be different.
Yes, you can double all the ingredients to make more. Just be sure you’ve got enough room for mixing and kneading. The rising time and cooking steps will be exactly the same.
Yes, you can! Once the dough has risen, cover it tightly and pop it in the fridge for up to 24 hours. When you’re ready to use it, let it come to room temperature before rolling and cooking.
Yes, you can freeze the dough! After the first rise, divide the dough into individual portions. Wrap each portion tightly in plastic wrap and place them in a freezer-safe bag or container. When you’re ready to make naan, just pull out a portion, let it thaw, and cook as usual. It’s a great time-saver!
Yes, you can! While a cast iron pan gives the best results with even heat and those perfect charred spots, any skillet will work. A non-stick or stainless steel pan is just fine. Just make sure it’s nice and hot before cooking, and you might need to adjust the cooking time a little.
To freeze, I just wrap the naan tightly in plastic wrap or aluminum foil, or place it in a freezer-safe plastic bag or container. When I’m ready to eat, I thaw it in the refrigerator overnight or at room temperature, then reheat it in the oven or microwave for 10-20 seconds before serving.
No, it’s thicker and fluffier than a tortilla. Tortillas, on the other hand, are thinner and more pliable.
Yes! I usually divide the dough into four portions, roll each one into a thicker bread and turn it into a chicken tikka masala pizza. It’s so delicious—you’ve got to try it!
There are three simple ways I reheat naan: 1) in the oven at 350°F (175°C) for 5 minutes, 2) on the stovetop over medium heat, or 3) in the microwave for 15-30 seconds with a damp cloth or paper towels.
Each piece of naan bread is only 195 calories.
What To Serve With Naan

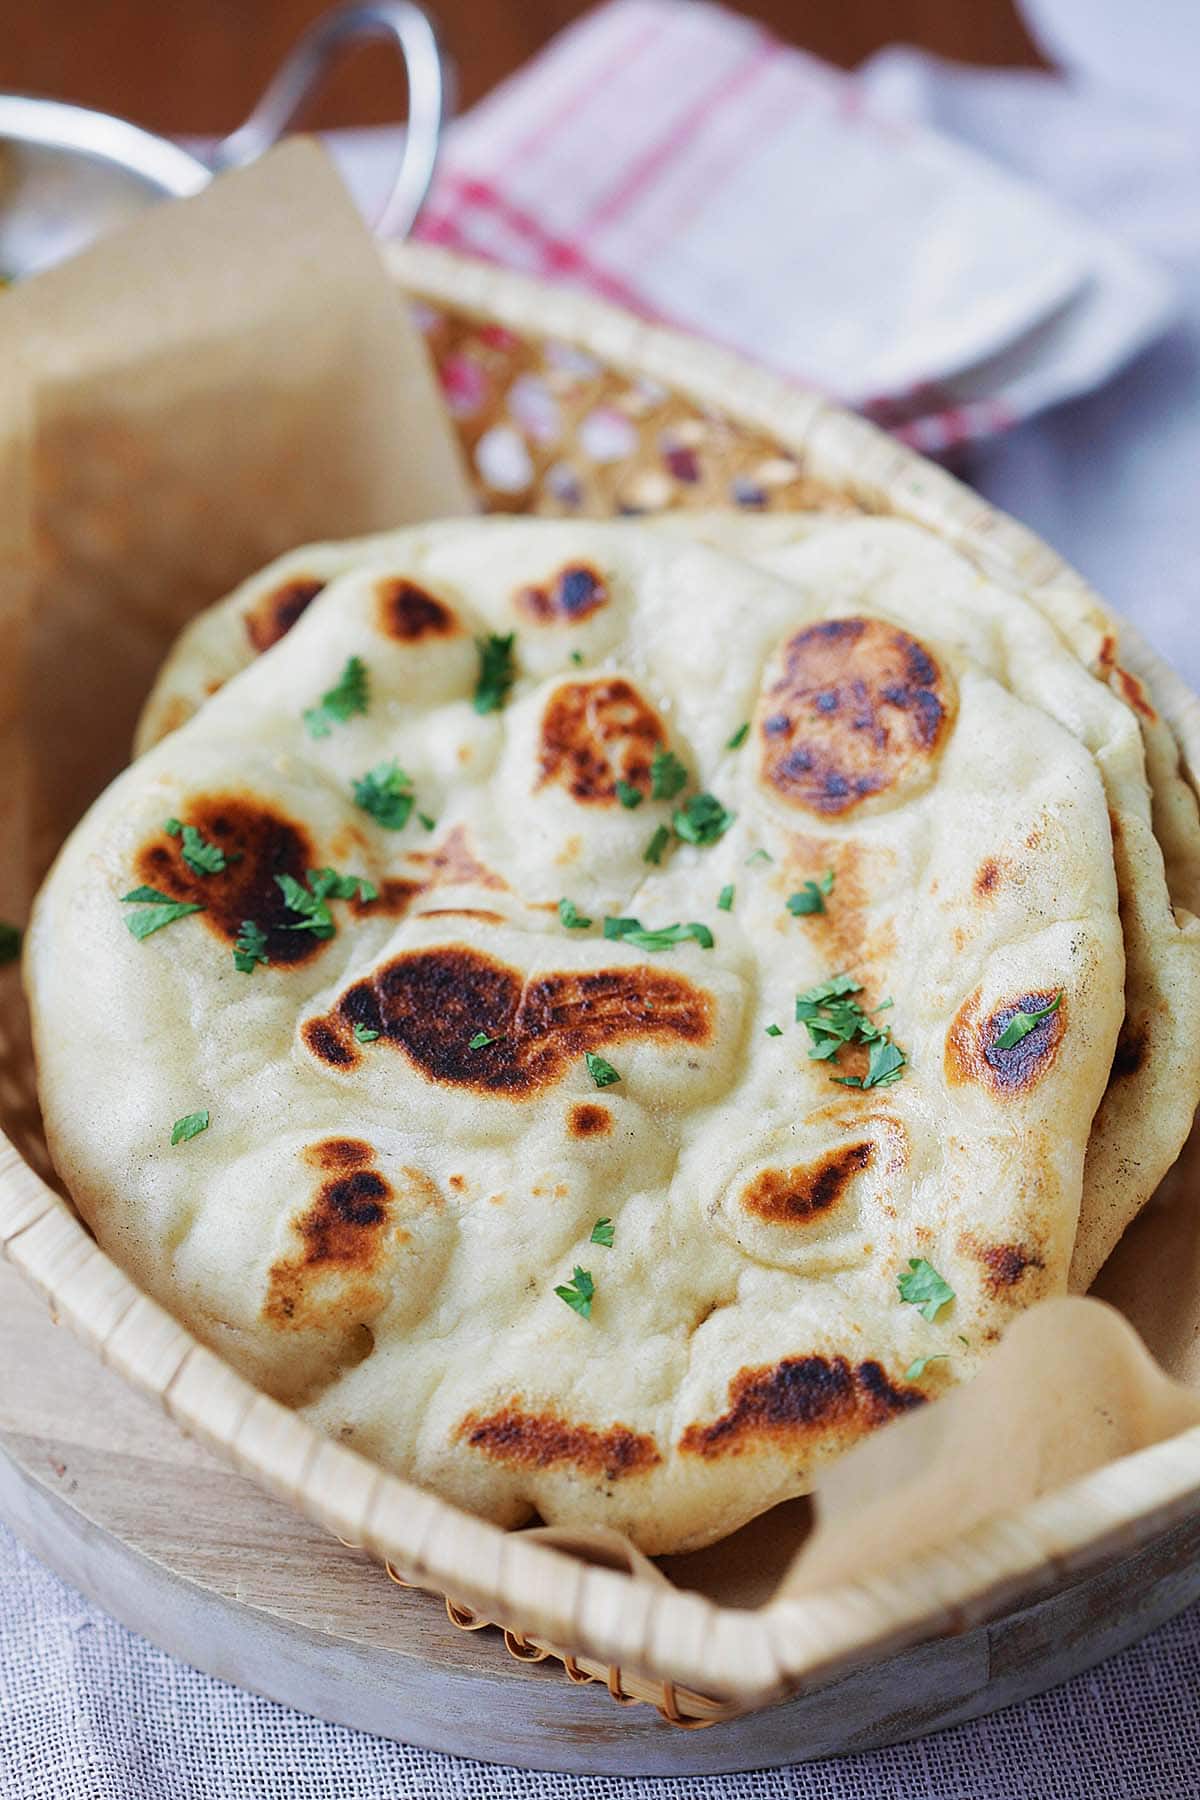
Naan bread is great with vibrant green-color mint chutney dip or chana masala, as pictured above. For a wholesome Indian dinner at home, I recommend the following recipes:
I hope you enjoy this post as much as I do. If you try my recipe, please leave a comment and consider giving it a 5-star rating. For more easy and delicious recipes, explore my Recipe Index, and stay updated by subscribing to my newsletter and following me on Facebook, Pinterest, and Instagram for new updates.
Other Recipes You Might Like
- Challah Bread
- Easy Pita Bread
- Italian Puff Bread
- Roti Canai – Roti Paratha
- Chapati (Indian Flat Bread)
- Sweet Potato Tortillas


Naan (The Best Recipe!)
Ingredients
- 1 teaspoon sugar
- 1/2 cup warm water
- ¼ oz active dry yeast , 2 1/4 teaspoons (Refer to the notes for scaled teaspoon measurements)
- 10.5–12.5 oz all-purpose flour, 2 1/4-2 1/3 cups (Refer to the notes for scaled cup measurements)
- 1/2 cup plain yogurt
- 1 teaspoon salt
- 1 tablespoon oil
- some oil , for greasing the skillet
- 3 tablespoons melted butter , or ghee
Instructions
- Activate Yeast. In a small bowl, add the sugar, warm water, and yeast together. Stir to combine well. The yeast should be activated when it becomes foamy, about 10 minutes. Transfer the flour to a flat surface and make a well in the middle.
- Making Naan Dough. Add the yeast mixture, yogurt, salt, and oil, and knead the dough until the surface becomes smooth and shiny, about 10 minutes. Cover the dough with a damp cloth and let it rise in a warm place (for example: beside the stove top or warm oven). The dough should double in size in about 1 hour.
- Rolling Naan. Divide the dough into 8 equal portions. Roll the dough to an 6” (15 cm) circle using a rolling pin.
- Cooking Naan. Heat up a skillet (cast-iron preferred) over high heat and lightly grease the surface with some oil to avoid the dough from sticking to the skillet. Place the dough on the skillet. When it puffs up and bubbles, and burnt spots appear, flip it over and cook the other side. Repeat the same until all the dough is done. Brush with melted butter, and serve warm.
- Serving Naan. Brush the naan with melted butter or ghee, then sprinkle with fresh cilantro. Serve warm and enjoy!
Video
Notes
x2: 4½ teaspoons active dry yeast, 4½–4⅔ cups all-purpose flour
x3: 6¾ teaspoons active dry yeast, 6¾–7 cups all-purpose flour
- The dough is sensitive to climate and temperature variations. Start with 300 g (about 10.5 oz or 2 1/4 cups) of flour. If the dough still feels sticky, gradually add up to 350 g (around 12 oz or 2 1/3 cups) until it reaches the right consistency.
- Knead the dough with your hands until it becomes smooth and elastic, or use a stand mixer to speed up the process. Then, let it rest until it doubles in size. Please take note that in warmer climates, naan dough may rise faster due to more active yeast, while in cooler climates, it may take longer to rise.
- Make sure to use a very hot skillet to cook the flatbread. The high heat puffs up the bread for that iconic airy appearance. It’s done when burnt brown “blisters” or spots appear (see photo above). In hotter climates or kitchens, it may cook faster due to higher temperature, leading to quicker browning and potential charring.
- Brush the fresh-off-the-skillet bread with some melted salted butter or ghee, and top them with fresh cilantro.
Nutrition
Nutrition information is automatically calculated, so should only be used as an approximation.






Thank you for posting this recipe. I’ve made this naan in a cast iron skillet as recommended a couple of times, but recently tried it in a heated (500 degrees F) dutch oven in the oven. About 1-2 minutes on each side (the oven was hot of course), and it came out great.
Nice!
Thee blanket Naan I’ve ever made. More salt is needed!!!
:)
Great idea John! Did you need to grease the Dutch oven before heating it?
This is a delicious easy recipe. I made the garlic naan and I’d say it was restaurant worthy.
I made the dough ahead of time and refrigerated after an hour of proofing. Took it out and formed the balls about 1-2 hr before cooking and they filled up and got all nice and airy and soft.
Awesome! :)
I want to make this!! Do you have any suggestions on how to make this gluten free?
Sorry I am not sure about GF.
This recipe is perfect! Did not have plan yogurt, but had Trader Joe’s Greek yogurt with honey and came out perfectly. Used a large cast iron pan and puffed the bread up great.
Awesome! :)
My third time making naan from this recipe. I also tried this recipe with some sour dough starter. Perfectly buttery flavor, a hint of tang and moist. I froze some, they reheated beautifully for a quick meal.
Awesome!
Very good and easy to follow!!! Naan turned out fabulous, tender and light…
:)
Great recipe! Thank you for sharing this.
:)
How much is a “cup” of something? Gosh…
There is a thing called measuring cup, and the cup is the US measuring cup.
Some people…sheesh!
…or “gosh”! lol.
You’re kidding, right?
1 cup flour = 120g
It’s about a gram worth
My second attempt at this recipe was much better. I reduced the flour to 2 cups keeping in mind that I would need flour to roll them out. Both times I have allowed the dough to sit overnight instead of just waiting an hour. The dough does double in size if left overnight. I probably should not have rolled them out quite so thin. Mine are pleasantly crispy and less chewy and thick than restaurant naan but they are GOOD. Easy if you know what you’re doing but the recipe should state to reserve a 1/4 cup of flour for rolling.
Awesome thanks for letting me know.
These turned out fantastic! It was my first time making naan and this recipe was easy to follow. I substituted sour cream in place of the yogurt and it turned out great! I also added a bit of garlic and onion powders into the dough, which added a great flavor. I will definitely be making these again. Thanks for sharing such a great recipe!
:)