This post may contain affiliate links. Please read my privacy policy.
This easy homemade Pull Apart Garlic Bread is seriously the softest, fluffiest, most foolproof garlic bread ever. Loaded with buttery garlic flavor in every bite and no slicing needed. Just tear and eat. Once you try it, you’ll never go back to store-bought.
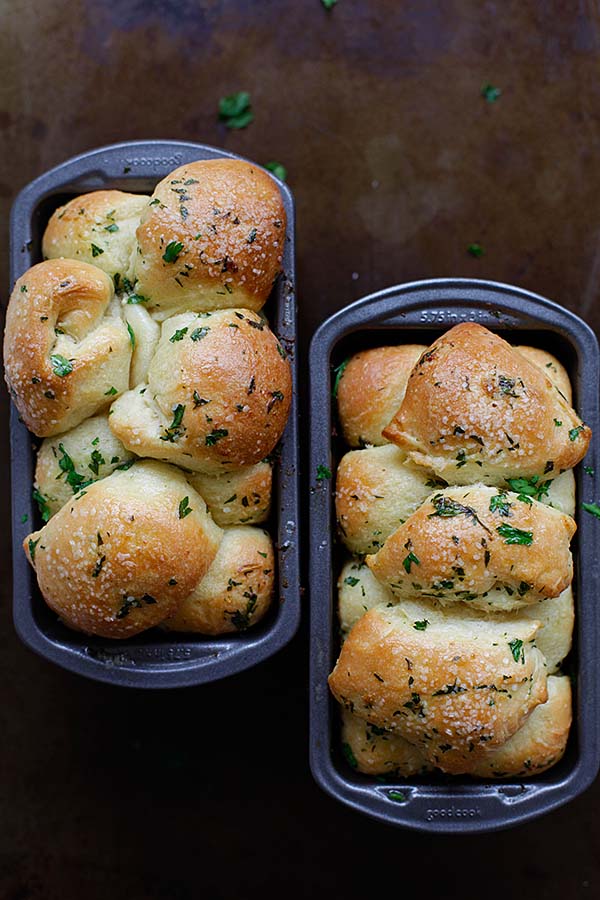
Table of Contents
- Recipe Summary
- Homemade Pull-Apart Garlic Bread Recipe
- This Garlic Bread Always Gets Asked For
- Tips For The Perfect Dough
- Ingredients You’ll Need
- Ingredients For Topping
- Recipe Variations
- How To Make Pull Apart Garlic Bread
- Frequently Asked Questions
- What To Serve With Garlic Bread
- Other Recipes You Might Like
- Pull Apart Garlic Bread Recipe
Recipe Summary
- 🔪 Prep Time: 1 hour 20 minutes (including rising time)
- 👨🍳 Cook Time: 30 minutes
- ⏱️ Total Time: 1 hour 50 minutes
- 🍽️ Servings: 2 loaves
- 🏷️ Calories: ~897 calories
- 🍳 Cook Method: Oven baked
- ✨ Flavor Profile: Soft and fluffy bread and loaded with buttery garlic and herb flavor
- 🧩 Difficulty: Easy (Beginner friendly & foolproof)
SUMMARIZE AND SAVE THIS CONTENT ON
Homemade Pull-Apart Garlic Bread Recipe
I’m not a seasoned baker, but once in a while, when I stumble on a really good baking recipe, I’ll bookmark it and give it a try at home. That’s exactly what happened when I spotted this pull-apart garlic bread on Pinterest a few weeks ago—I saved it right away. I’ve always loved garlic bread, especially when it’s fresh out of the oven, soft and fluffy inside, with that buttery, garlicky aroma. Regular garlic bread is great, but I find slicing a whole loaf a bit of a hassle. This pull apart version is perfect—you just tear and eat, no knife needed.
I ended up halving the original recipe (from Gather for Bread) to avoid wasting ingredients in case it didn’t work out. But honestly, the recipe turned out to be super easy, straightforward, and totally foolproof. Just a few hours in the kitchen and I had the softest, most delicious garlic bread ready to go. If you’re new to baking or just want a no-fail recipe, this one’s for you.
Be sure to check out my tips below and video guide to help you get the best results. And if you love homemade bread, don’t miss my Brioche and Milk Bun recipes too.
This Garlic Bread Always Gets Asked For
I’ve made this so many times and it’s always the first thing to go—here’s what makes it so good:
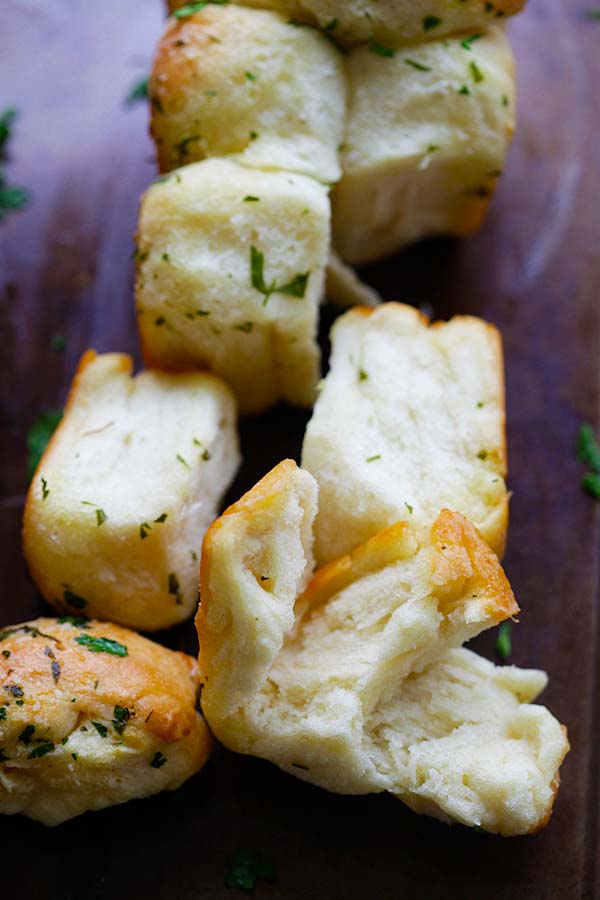
- Soft and fluffy inside, golden on the outside. This bread bakes up pillowy and light with buttery, golden tops—every bite is warm, garlicky comfort.
- Easy, homemade dough. Foolproof and simple, the dough comes together with pantry basics. No fancy mixers or baking skills needed.
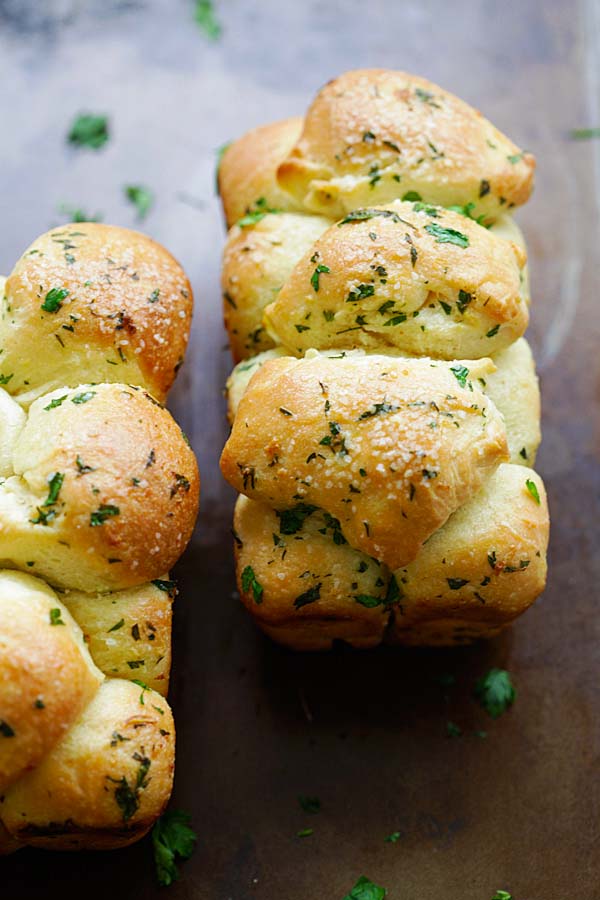
- Loaded with real garlic butter. Each piece is dipped in a fragrant mix of melted butter, fresh garlic, and parsley—so you get flavor in every bite.
Tips For The Perfect Dough
Before you start, here are some things you need to keep in mind. Having baked in both Malaysia and the US, I’ve noticed the results can be totally different. A recipe can give you measurements, but it can’t see what is happening in your kitchen or feel the air around you.
- The humidity adjustment: If you are baking on a high humidity or rainy day, add 2 extra tablespoons of flour to your dough. Extra moisture in the air makes the dough much stickier regardless of your location. Standard recipes don’t account for the weather, but you want the dough to be tacky without clinging to your fingers.
- The scent timer: Don’t trust the timer on your oven blindly. Instead, trust your nose. Once the scent of toasted garlic fills the entire room, you are in the home stretch.
- The final countdown: When that garlic aroma hits its peak, you usually have about 2 minutes left before it starts to burn. Stay close to the oven and watch for that deep golden color.
Pro Tip: The Windowpane Test
To see if you have kneaded your dough enough, stretch a small piece between your fingers. If it stretches thin enough to see light through it without tearing, the gluten is ready. If it snaps, keep kneading for another few minutes.
Ingredients You’ll Need
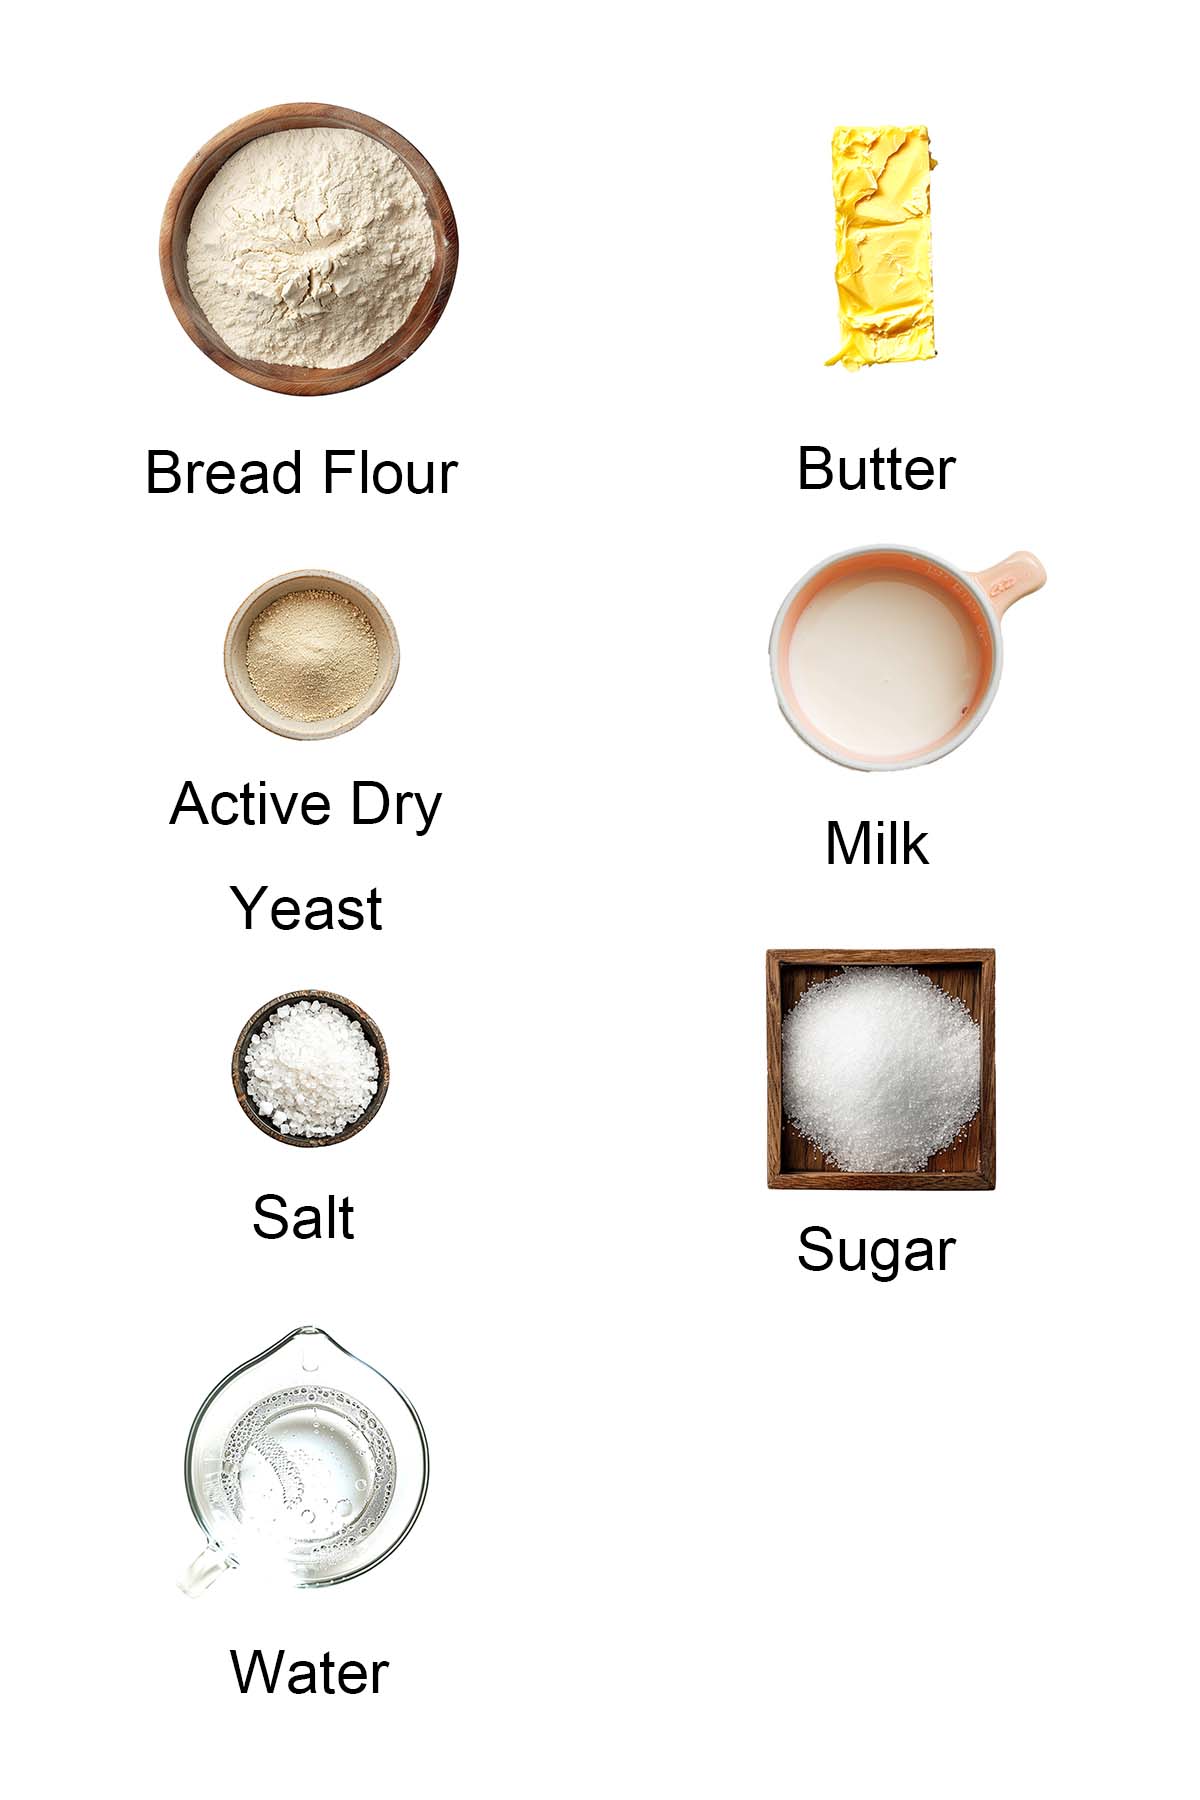
- Bread flour
- Butter
- Active dry yeast
- Milk
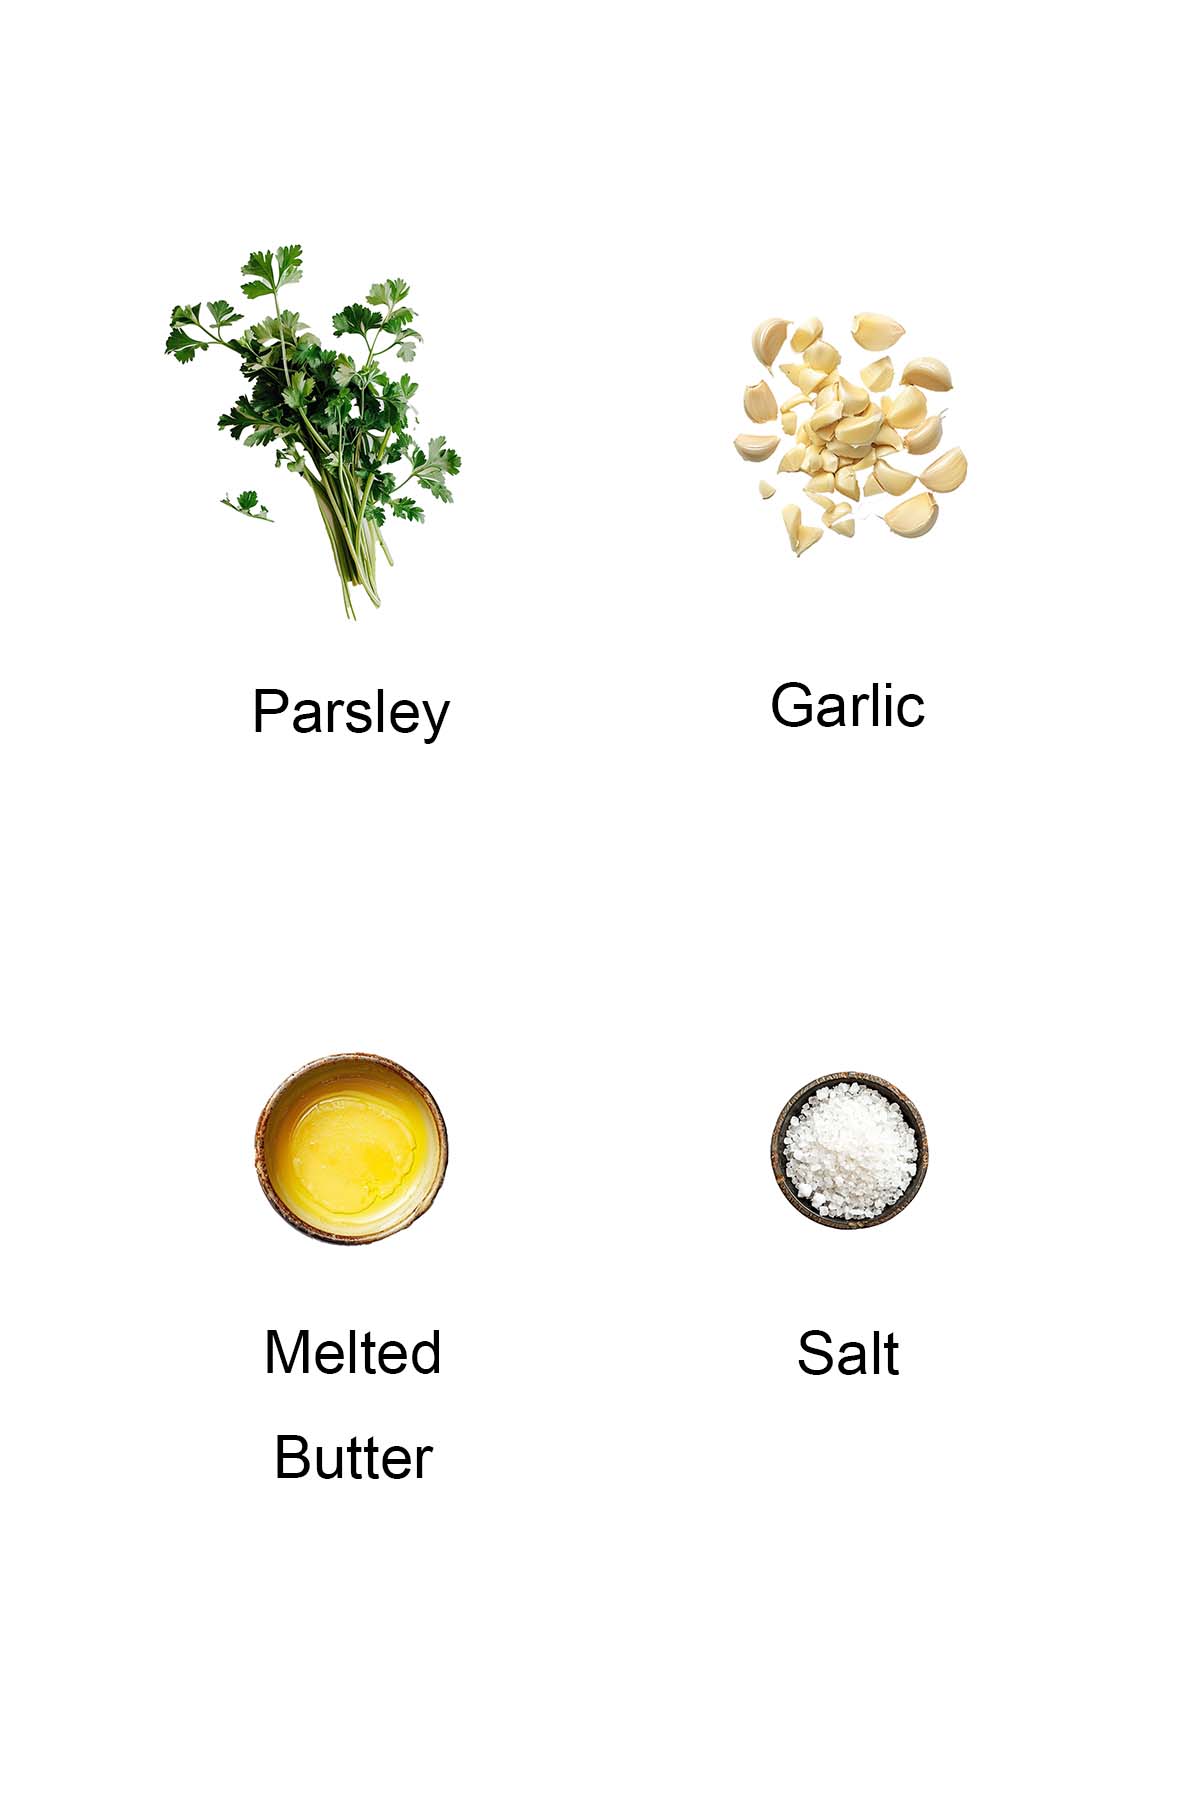
Ingredients For Topping
- Parsley
- Garlic
Please refer to the recipe card at the bottom of this post for full details on each ingredient.
Pro Tip #1: Why I Use Bread Flour
Bread flour gives you that soft, chewy texture with a little more structure than all-purpose. It makes the bread fluffier and helps it hold its shape—especially important for pull apart bread that’s meant to be torn and shared.
Pro Tip #2: Warm Water Helps Activate the Yeast
I always start with warm (not hot!) water because it wakes up the yeast and gets it going. You’ll know it’s working when it turns foamy—that’s the sign your bread is on the right track.
Pro Tip #3: Milk Makes It Soft and Rich
Milk adds richness and moisture to the dough, giving it a softer crumb. It’s what makes the bread taste homemade and slightly buttery, even before you brush on the garlic butter.
Recipe Variations
Once you’ve mastered this garlic pull apart bread, try one of these easy twists for something new and just as irresistible:
- Garlic Herb and Cheese Pull Apart Bread: Love cheese? This version adds melty mozzarella and sharp Parmesan with a fragrant mix of Italian herbs. Extra cheesy, extra garlicky—what’s not to love?
- Pull-Apart Pepperoni Garlic Knots: Think garlic bread meets pizza. These soft, buttery knots are loaded with pepperoni and garlic—perfect for snacking, game day, or whenever those pizza cravings hit.
- Chocolate-Cinnamon Pull-Apart Bread: Swap savory for sweet with this soft, fluffy bread filled with melted chocolate and warm cinnamon. It’s like dessert and breakfast rolled into one.
- Blueberry-Cream Cheese Pull-Apart Bread: A creamy, fruity twist made with swirls of sweet blueberries and rich cream cheese. Perfect for brunch or a cozy afternoon treat.
- Cheesy Pull-Apart Rolls: These soft, golden rolls are packed with gooey cheese in every bite—simple, comforting, and always a crowd-pleaser.
How To Make Pull Apart Garlic Bread
Start by pouring the warm water into your stand mixer bowl—make sure you’ve got the dough hook attached. Sprinkle in the sugar and yeast, and just let it sit for about 5 to 10 minutes until it gets nice and foamy. That’s how you know the yeast is alive and ready to go!
Next, add in the butter, milk, and salt. Then gradually stir in the flour—it’ll start coming together into a dough. Let the mixer knead it for about 7 to 10 minutes. You’ll know it’s right when the dough sticks a bit to the bottom of the bowl but pulls away from the sides.
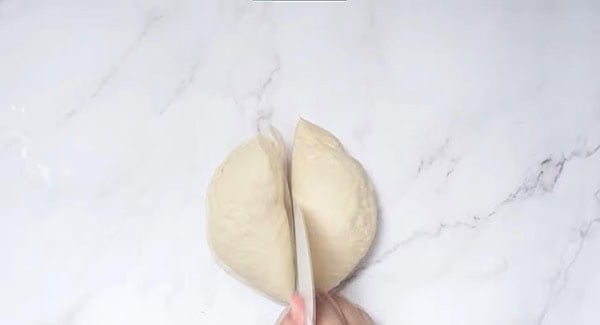
Once that’s done, go ahead and divide the dough into two equal portions.
Now in a small bowl, mix together the butter, a pinch of salt, chopped parsley, and garlic. It smells so good already, right?
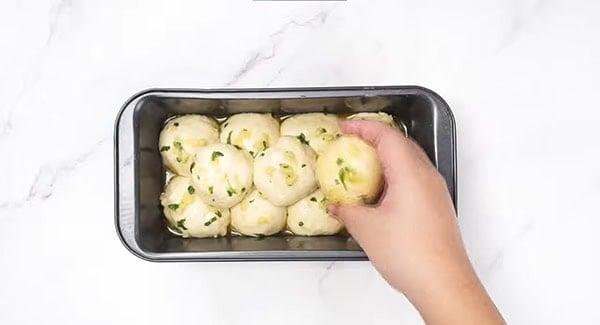
Take your dough and cut it into small little pieces—kind of like mini dough balls. Dip each one into that buttery garlic mixture (make sure they’re coated well!), and then start arranging them in either two mini loaf pans or just one regular loaf pan, whatever you’ve got.
Pro Tip: Cutting the dough into small pieces and coating each one in garlic butter means every bite gets that buttery, garlicky flavor—plus, it gives you that classic pull-apart look without needing to slice anything after baking. Just tear and eat!
Once that’s done, cover the pan with a clean kitchen towel and let the dough rise for about an hour, or until it’s doubled in size and looking puffy. Oh—and don’t toss the leftover butter mixture! We’ll use that later.

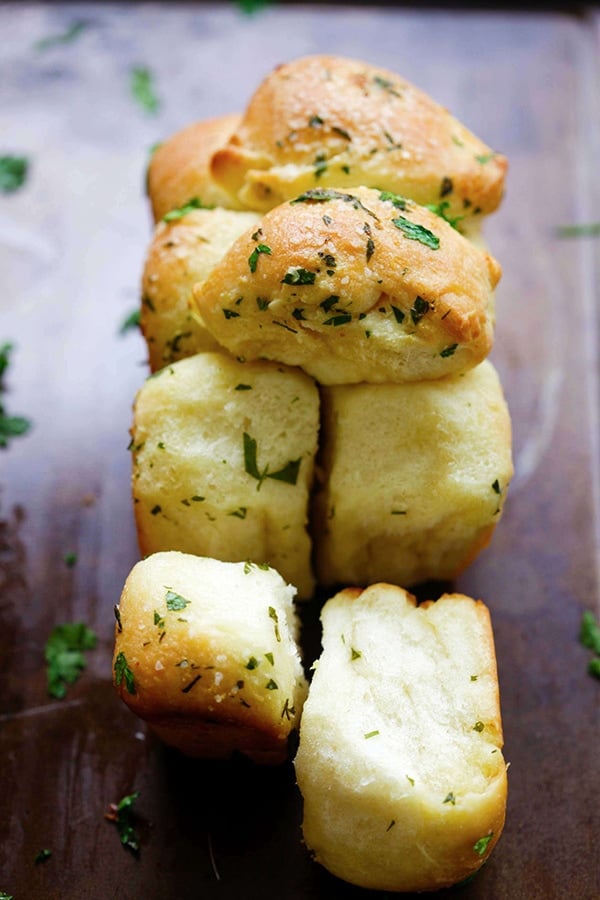
Pop the pan into the oven at 350°F (or 176°C) and bake for about 30 minutes, or until the top is golden brown and smells amazing.
As soon as you take it out of the oven—while it’s still hot—brush the top with that leftover garlic butter we saved earlier. It’ll melt right in and make everything extra flavorful and buttery. Trust me, this part takes it over the top!
Frequently Asked Questions
Yes! You can prep everything—cut and coat the dough pieces, arrange them in the pan—and store in the fridge overnight. Let it rest at room temp for about 30 minutes before baking.
Add a handful of shredded mozzarella or cheddar between the dough balls before baking. It melts into the buttery garlic mixture for a gooey, cheesy upgrade.
Once cooled, keep the bread in an airtight container at room temperature for up to 2 days, or refrigerate for up to 5. Reheat before serving to bring back that fresh-from-the-oven softness.
I recommend using the oven or air fryer at 300°F (150°C) for 5–8 minutes to warm it through while keeping the edges slightly crisp. You can also microwave it for about 20 seconds if you’re short on time.
Definitely. Wrap the baked and cooled bread tightly and freeze for up to 1 month. Thaw at room temp, then reheat to enjoy. You can also freeze the unbaked, shaped dough and bake straight from frozen with a few extra minutes added.
This recipe is 897 calories per loaf.
What To Serve With Garlic Bread
For a wholesome meal and easy weeknight dinner, pair the bread with the following recipes.

I hope you enjoy this post as much as I do. If you try my recipe, please leave a comment and consider giving it a 5-star rating. For more easy and delicious recipes, explore my Recipe Index, and stay updated by subscribing to my newsletter and following me on Facebook, Pinterest, and Instagram for new updates.
Other Recipes You Might Like
- Garlic Bread Homemade
- Skillet Garlic Bread
- Homemade Garlic Bread
- Parmesan Garlic Bread
- Hasselback Cheesy Garlic Bread
- Cheesy Garlic Bread

Pull Apart Garlic Bread
Ingredients
- 1/2 cup warm water
- 1 tablespoon white sugar
- 1 teaspoon active dry yeast
- 1 tablespoon unsalted butter, softened
- 1/2 cup milk
- 1 teaspoon salt
- 2 1/2 cups bread flour
Topping:
- 4 tablespoons unsalted butter, melted
- 1 pinch salt
- some fresh parsley leaves, finely chopped
- 3 cloves garlic, finely minced
- 1 teaspoon grated Parmesan cheese, optional
Instructions
- Add warm water to the bowl of a stand mixer fitted with a dough hook. Sprinkle sugar and yeast into the water and let it stand for 5-10 minutes until foamy. Mix in the butter, milk, and salt, and then stir in the flour gradually. Knead for 7-10 minutes. The dough should stick to the bottom of the bowl but clear the sides. Add 1 to 2 tablespoons or more water if the dough is too dense. Divide the dough into 2 equal portions.
- In a small bowl, combine the unsalted butter, salt, parsley leaves, garlic, and grated Parmesan cheese (if using). Cut the dough into small round pieces and dip them into the butter mixture. Arrange the dough balls in two mini loaf pans or one regular loaf pan. Cover and let rise until doubled, about 1 hour. Reserve the leftover butter mixture.
- Bake at 350°F (176°C) for 30 minutes or until golden brown. Baste the butter mixture onto the pull-apart garlic bread after it comes out of the oven.
Video
Notes
- Add 1 to 2 tablespoon or more water if the dough is too tough.
- Dough should stick to the bottom of the bowl but clears sides.
- You can divide the dough balls into however many pieces you would like to place into the loaf pan.
Nutrition
Nutrition information is automatically calculated, so should only be used as an approximation.


Is this a dough you could make a head of time and freeze?
I have never tried freezing the dough.
I made these last night and they turned out like little puffs of perfection! I went one step further and added some garlic/butter mixture into the dough to make it more garlic-eeee :D Thank you for this recipe! Its a keeper!
Awesome sounds so yummy!
I am making these for a Thanksgiving dinner and I was wondering if I go with a larger batch and put in a larger pan do I need more baking time causing them to be a lower temp? And I love the Christmas tree idea, any suggestions how to go about that? The are going to be perfect! Thanks for sharing your recipe
Hi Laura, I think the same temperature would work. Once they turn golden brown the inside should be cooked through. The Xmas tree idea is great, I have yet to try out. Happy Thanksgiving.
I made these for dinner tonight and we absolutely LOVED them. This will now be my “go to” recipe for garlic rolls! The only thing that I did differently was I made the dough in my bread machine and then made the balls and dunked in the butter mixture and let set for about 30 minutes before baking. So incredibly easy to make and absolutely delicious!
Granted, I am not particularly comfortable working with yeast, though I bake all the time. These looked so easy however that I thought I could do this. I have made them three times and each time they did not rise much. I checked my water temp, used fresh quick rise yeast, etc. They taste great, but they are not tender. I also did not let them knead as long, as it seemed to make them tougher. Also did not bake 30 minutes, as that would be too long. They’re were pretty brown at 25 minutes.
Hi Joan, I know what you mean. The first time I made it I failed. But somehow the second time it worked…for the baking, different oven is different mine took 30 minutes but if yours were brown in 25 minutes, you can take it out sooner.
I love your recipes however your page is so overloaded with advertising makes it difficult to go through with ease… Very happy for your success but please make a recipe page without advertising!!! Thanks~
Hi there, unfortunately I agree. The page is jumpy and erratic when I try to scroll down. It’s frustrating and does get in the way of what is otherwise an awesome blog. Maybe cut back a little more on the ads? I understand their purpose but a balance would be much appreciated for this fan of your recipes. :)
Hi Lane, thanks for your honest feedback, we are working on a new and more streamlined design, thanks for your suggestion! :)
Looks delicious, but I bake so rarely that I don’t own a stand mixer.
Warm the water to 27C, add yeast and sugar into large mixing bowl. Stir and rest about 10 mins until foamy. Then add the rest of the ingredients. Using a spatula mix it up until roughly incorporated. Then use your hand to knead it a couple of minutes in the bowl (at this stage you can still add more flour if too wet, or more water if too dry). Then transfer onto floured surface and continue kneading until dough feels soft and elastic (when you poke your finger on the dough ball the indent caused will fill back). Then transfer back onto an oiled bowl and cover with cling wrap to rise.
do you think there would be enough of these to make a christmas tree to have at a christmas family dinner
Yes I think so…good idea. Perhaps you can double the recipe to make a big Christmas tree. :)
Greetings from Norway. I made these yesterday and they taste so delicious!! I think I can easily get addicted:) Thanks for sharing!
Thank you for trying the pull-apart garlic bread recipe! :)
Making it now. Something’s not right. Dough was super hard. It almost broke my mixer! I had to need it by hand. The balls were hard to make. It’s rising now not sure now it will turn out :-( what am I doing wrong?
Once the dough becomes one, you should stop the mixer straight away to avoid it breaking, as you were speaking of. With the kneading, when a recipe asks you to knead, it always means by hand. Electric mixers can’t do it, because they don’t aerate it like doing by hand can. Aerating the dough also helps to make the dough rise.